ChevyParts
My Garage
My Account
Cart
OEM Chevrolet Metro Rod Bearing
Engine Connecting Rod Bearing- Select Vehicle by Model
- Select Vehicle by VIN
Select Vehicle by Model
orMake
Model
Year
Select Vehicle by VIN
For the most accurate results, select vehicle by your VIN (Vehicle Identification Number).
1 Rod Bearing found

Chevrolet Metro Bearings Part Number: 96051616
Chevrolet Metro Rod Bearing
Want to cut long-term maintenance and repair costs? Choose OEM Rod Bearing. Those parts deliver top durability you can trust. On our site, you'll find a huge catalog of genuine Chevrolet Metro parts. Prices are unbeatable, so you can keep more in your pocket. Every OEM Chevrolet Metro Rod Bearing includes a manufacturer's warranty. You can also get an easy return policy that keeps buying risk free. Fast delivery, get your car on the road quickly. It's simple to search, compare, and order. Stop guessing about quality or fit. Order today and save with parts that last.
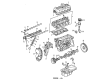
The Rod Bearing in Chevrolet Metro cars mainly helps them in bearing crankshaft and connecting rods, helps in rotation without much friction. These bearings are almost always plain bearings, they can be made as bi-metal bearing or tri-metal bearing. Bi-metal bearings are built with a layer of aluminum alloy while tri-metal bearings have a layer of copper in between and top layer containing lead-tin-copper alloy, which increases strength and fatigue strength. There are so many types of Rod Bearings that Chevrolet Metro has used over the years, and while the performance models of the car use the tri-metal types of Rod Bearings because they are rugged and come with very good lubrication characteristics. Furthermore, such performance Rod Bearings can also feature additional surface treatments as well as designed pre-camber to improve oil control clearance mechanism and minimize drag under enhanced power demands of the engine. It is very important for the Chevrolet Metro engine that the Rod Bearing be properly installed during the manufacturing process and well maintained during service.
Chevrolet Metro Rod Bearing Parts Questions & Experts Answers
- Q: How to replace the piston, rod bearing in an engine on Chevrolet Metro?A:You need to start by reducing fuel pressure and removing the negative Battery Cable before proceeding with piston replacing and connecting rod installation together with bearing insertion. Support the vehicle then drain coolant from the engine while you set a drain pan under the Oil Pan to collect leaking oil. First remove the engine oil Drain Plug with its gasket and then disconnect all fourteen bolts and two nuts that secure the engine Oil Pan. The installation of a new oil pump strainer starts by removing its bracket bolt along with the strainer bolt and the strainer itself from the cylinder block while retrieving the strainer seal also. Lower the vehicle while you remove both the Timing Belt together with the belt tensioner. The next step involves removing the Intake Manifold while taking out the throttle body fuel injection (TBI) unit alongside the Exhaust Manifold from the Cylinder Head and Distributor from the Cylinder Head. All four nuts and seal washers and Cylinder Head cover should be removed while marking the cylinder number on each piston, connecting rod and connecting rod bearing cap to preserve their original order. First disconnect the eight Cylinder Head bolts and the gasket along with the Cylinder Head and then remove the rod bearing caps. A hose should be used to protect rod bolt threads from damaging during connecting rod installation then remove the hose once the rod is properly positioned. Decarbonize the cylinder bore head before extracting the piston and connecting rod assembly through the top hole of the cylinder bore. Engine oil application should occur on the pistons and rings before applying it to cylinder walls and connecting rod bearings and Crankshaft. Implement the hose over driver bolt threads before rod bolt installation while ensuring the arrow on the piston head shows the Crankshaft Pulley side position. Start by mounting the upper connecting rod bearing to its rod before inserting the piston assembly into the cylinder bore so that the connecting rod finds its proper position on the Crankshaft. The Piston Ring compressor (J 8037) assists Piston Ring installation into the cylinder bore and gentle hammer taps over the piston head complete this step. Secure the lower connecting rod bearing into the connecting rod cap. Then install two connecting rod cap nuts and clamp them to 35 nm (26 ft. Lbs.). The Cylinder Head goes onto the cylinder block and then the Cylinder Head cover gets secured using four new seal washers and nuts that should be tightened to 5 nm (44 inch lbs.). Put back all components including the Timing Belt with its tensioner device alongside the Distributor and Intake Manifold along with Exhaust Manifold. Nothing remains but installing both the engine Oil Pan and the oil pump strainer then refilling engine oil to its target specifications and reattaching the negative Battery Cable.

Related Chevrolet Metro Parts
 Chevrolet Metro Crankshaft Pulley
 Chevrolet Metro Cylinder Head
 Chevrolet Metro Intake Valve
 Chevrolet Metro Lash Adjuster
 Chevrolet Metro Oil Pump Rotor Set
 Chevrolet Metro Timing Belt
 Chevrolet Metro Timing Belt Tensioner
 Chevrolet Metro Timing Chain Tensioner
 Chevrolet Metro Valve Cover Gasket
 Chevrolet Metro Valve Cover Grommet
 Chevrolet Metro Valve Stem Oil Seal
 Chevrolet Metro Variable Timing Sprocket