Make sure this part fits

GM 12646386
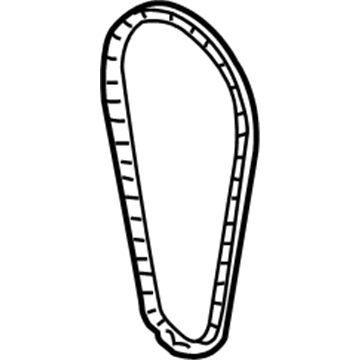
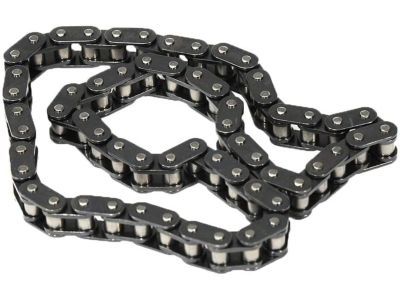
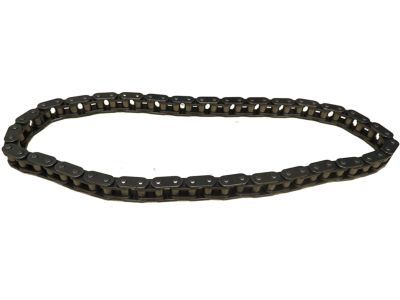
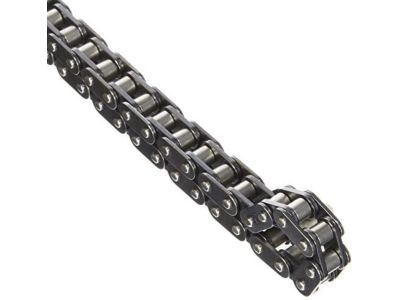
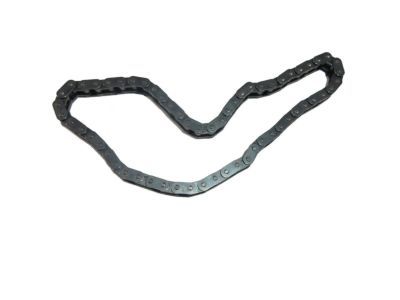
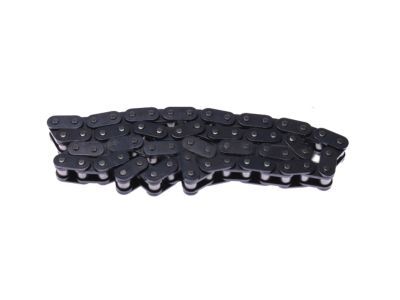
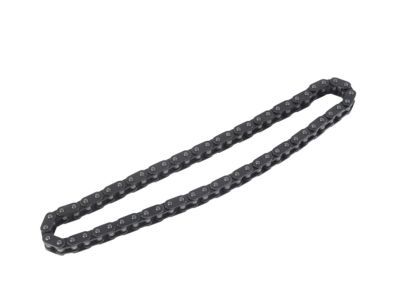
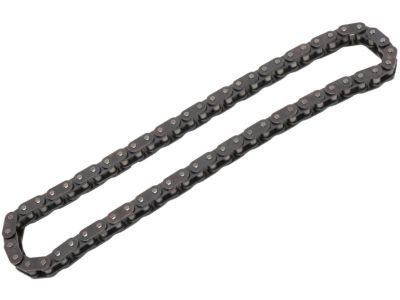
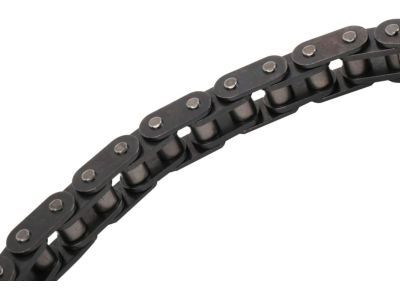
Timing Chain

1997-2023 GM

Customer Questions & Expert Answers (65)
GM 12646386 Timing Chain
  • Part Description
    Chain, Engine Timing
  • Replaced By
    12646387
  • Replaces
    12586482, 88958608, 12552954
  • Manufacturer
    General Motors
Make sure this part fits
$59.35 MSRP: $101.00
You Save: $41.65 (42%)
1
ADD TO CART
  • Related Parts
  • Product Specifications
  • Vehicle Fitment
  • Customer Questions & Expert Answers
  • Product Specifications

    BrandGenuine GM
    Manufacturer Part Number12646386
    Part DescriptionChain, Engine Timing
    Item Dimensions5.7 x 3.0 x 0.7 inches
    Item Weight0.80 Pounds
    ConditionNew
    Fitment TypeDirect Replacement
    Replaces12586482, 88958608, 12552954
    ManufacturerGeneral Motors
    SKU12646386
    WarrantyThis genuine GM part is guaranteed by GM's factory warranty.
    Shipping & ReturnShipping Policy Return Policy
    Warning: California's Proposition 65
  • Vehicle Fitment

    Year Make Model Trim Engine
    2008-2009 Buick LaCrosseSuper8 Cyl 5.3 L GAS
    2004-2007 Buick RainierCXL, CXL Plus8 Cyl 5.3 L GAS
    2009-2019, 2004-2007 Cadillac CTSV8 Cyl 5.7 L GAS, 8 Cyl 6.0 L GAS, 8 Cyl 6.2 L GAS
    2021-2023, 2002-2014 Cadillac EscaladeBase, Hybrid, Hybrid Platinum, Luxury, Platinum, Premium, Premium Luxury, Premium Luxury Platinum, Sport, Sport Platinum, V8 Cyl 5.3 L GAS, 8 Cyl 6.0 L FULL HYBRID EV-FLEX (FHEV), 8 Cyl 6.0 L FULL HYBRID EV-GAS (FHEV), 8 Cyl 6.0 L GAS, 8 Cyl 6.2 L FLEX, 8 Cyl 6.2 L GAS
    2021-2023, 2003-2014 Cadillac Escalade ESVBase, Luxury, Platinum, Premium, Premium Luxury, Premium Luxury Platinum, Sport, Sport Platinum, V8 Cyl 6.0 L GAS, 8 Cyl 6.2 L FLEX, 8 Cyl 6.2 L GAS
    2002-2013 Cadillac Escalade EXTBase, Luxury, Premium8 Cyl 6.0 L GAS, 8 Cyl 6.2 L FLEX, 8 Cyl 6.2 L GAS
    2007-2013 Chevrolet AvalancheBlack Diamond LS, Black Diamond LT, Black Diamond LTZ, LS, LT, LTZ8 Cyl 5.3 L FLEX, 8 Cyl 5.3 L GAS, 8 Cyl 6.0 L GAS
    2010-2022, 1998-2002 Chevrolet CamaroLT1, SS, Z/28, Z28, Z28 SS, ZL18 Cyl 5.7 L GAS, 8 Cyl 6.2 L GAS, 8 Cyl 7.0 L GAS
    2011-2017 Chevrolet CapricePPV8 Cyl 6.0 L FLEX
    2009-2012 Chevrolet ColoradoLT8 Cyl 5.3 L GAS
    View More
  • Customer Questions & Expert Answers

    Q:
    Is this 12646386 designed for my car? Posted by ChevyPartsGiant Specialist
    A:
    Please Select Your Vehicle model to see if part number 12646386 is suitable before ordering.
    Posted by ChevyPartsGiant Specialist
    Q:
    How to replace the timing chain and sprockets on Cadillac Escalade? Posted by Customer
    A:
    To replace the Timing Chain and sprockets, start by replacing the Oil Pump and rotate the Crankshaft until the timing marks are aligned on Crankshaft and sprockets are camshaft to not turn the Crankshaft assembly when the Timing Chain is removed to avoid damage to piston assemblies or valves. Next, take off the camshaft sprocket bolts, camshaft sprocket and Timing Chain. Make use of the j8433 (Two Jaw Puller), j41816-2 (Crankshaft End Protector), and j41558 (Crankshaft Sprocket Remover) to remove the Crankshaft sprocket, and then remove the Crankshaft sprocket. In case you require it, take out the Crankshaft sprocket key and clean and check the Timing Chain and sprockets. For installation, you take the key into the Crankshaft keyway and tap it into the place until its two ends are situated. Place the Crankshaft sprocket at the front of the Crankshaft and make sure the Crankshaft key and the sprocket keyway are in line, and install them fully to the Crankshaft flange with the j41665 (Crankshaft Balancer and Sprocket Installer). Rotate the Crankshaft sprocket until the alignment mark corresponds to 12:00 position, ensuring that the locating pin around the camshaft sprocket would align with the alignment hole of the latter, as well as the teeth of the sprocket teeth and Timing Chain are correctly engaged. Find the camshaft sprocket alignment mark at the 6 o'clock position and install the camshaft sprocket & Timing Chain with the required adjustment to the camshaft sprocket or crank sprocketbringing into the timing alignment marks. Finally, install camshaft sprocket bolts by tightening it to 35nm (26ft. Lbs.), and install the Oil Pump.
    Posted by ChevyPartsGiant Specialist
    Q:
    How to install the timing chain and sprockets on Cadillac Escalade? Posted by Customer
    A:
    In order to install Timing Chain and sprockets, first, fit the key in the Crankshaft if removed earlier and tap it into the keyway until it can be seated in the Crankshaft on both the keyway ends. Then, mount the Crankshaft sprocket onto the front of the Crankshaft, making sure the Crankshaft key goes into the Crankshaft sprocket keyway. Make use of the Crankshaft balancer and sprocket installer (J 41665) to seat the Crankshaft sprocket fully against the cranks tail flange. Rotate the Crankshaft sprocket so that the alignment mark is on 12 o'clock facing ensuring that the camshaft sprocket locating pin is seated with the alignment sprocket hole on the camshaft sprocket, and the teeth of the sprocket are mesh with the Timing Chain. The camshaft and Crankshaft sprocket alignment marks should be aligned with camshaft sprocket alignment being spotted at position 6 o'clock. Assemble the camshaft sprocket and Timing Chain, and if required, turn the camshaft sprocket or Crankshaft sprocket to bring the timing marks in line. Lastly, the bolts of the camshaft sprocket are installed then fastened at 35 nm (26 ft. Lbs.).
    Posted by ChevyPartsGiant Specialist
    Q:
    How to replace the timing chain and sprockets on Cadillac Escalade EXT? Posted by Customer
    A:
    Before starting the Timing Chain and sprockets replacement process begin by removing the Oil Pump while rotating the Crankshaft until camshaft and Crankshaft sprocket timing marks line up. The Crankshaft assembly must not be rotated after Timing Chain removal to safeguard piston assemblies and valves from damage. Then you should detach the camshaft sprocket bolts until both sprocket and Timing Chain are free. You should use the j 8433 two jaw puller (J 8433) and j 41816-2 Crankshaft end protector (J 41816-2) and j 41558 Crankshaft sprocket remover (J 41558) to take off the Crankshaft sprocket. After that you can remove the Crankshaft sprocket key when needed. When necessary, clean and inspect all Timing Chain components and sprockets for any damage. After placing the key into the Crankshaft keyway continue tapping it until both ends fit snugly. Use the j 41665 Crankshaft balancer and sprocket installer (J 41665) to fully seat the sprocket against the Crankshaft flange after correctly placing the Crankshaft sprocket onto the front of the Crankshaft. Align the Crankshaft key with the sprocket keyway. To maintain proper alignment, turn the Crankshaft sprocket so its alignment mark points to the 12 o'clock position while making sure the camshaft sprocket locating pin fits correctly into its alignment hole and the sprocket teeth and Timing Chain will mesh properly. Before installing the camshaft sprocket and Timing Chain, position the camshaft sprocket alignment mark at 6 o'clock while the camshaft and Crankshaft sprocket marks are correctly aligned. Start by rotating either the camshaft or Crankshaft sprockets to align timing marks then reinstall the camshaft sprocket bolts while tightening them to 35 nm (26 ft. Lbs.) before putting back the Oil Pump.
    Posted by ChevyPartsGiant Specialist
    Q:
    What tools are required to replace the timing chain and sprockets on the LY6/L76/L92 engines on Cadillac Escalade ESV? Posted by Customer
    A:
    For the Timing Chain and sprockets replacement on the ly6/l76/l92 engines, the following tools are needed: en 46330 Timing Chain Tensioner retaining pin, j 8433 puller bar, j 41478 crankshaft front oil seal installer, j 41558 crankshaft sprocket remover, j 41665 crankshaft balancer and sprocket installer, j 41816-2 crankshaft end protector, j 42386 b Flywheel holding tool, and j 45059 angle meter. First, you need to pull off the Oil Pump and the Starter motor, while making sure the teeths of the j 42386-a mesh with the engine Flywheel. Mount the j 42386-a with one m10-1.5 x 120 mm and one m10-1.5 x 45 mm bolt, and torque to 50 n.m (37 lb ft). Turn the crankshaft sprocket to realign the cmp actuator and crankshaft sprocket alignment marks, and remove the cmp actuator solenoid valve (234) and cmp actuator (235)/ Timing Chain (208)/. Unhook and remove the cmp actuator and Timing Chain from the camshaft using a tie strap and place one through the middle of the actuator and over the reluctor wheel. Take away the Timing Chain tension bolts (231) and tensioner (232), and then use the j 41816-2, j 41558, bolts and j 8433 to remove the crankshaft sprocket (207). Put the key into the crankshaft keyway and tap it in place, and fit the crankshaft sprocket and align the key into the sprocket keyway. Use the j 41478 and j 41665 to fully seat crankshaft sprocket, proceed to compress Timing Chain Tensioner guide and install the en 46330, then Timing Chain Tensioner and bolts at 25 n.m (18 lb ft). Leverage the cmp actuator correctly into the locating pin on camshaft. Make sure that the sprocket and Timing Chain teeth fit and the marks are good. Mount the cmp actuator and Timing Chain, establishing that the actuator fits completely onto the camshaft. Inspect proper installation, replace the actuator valve (234) cmp with a new one, and then install the cmp actuator solenoid valve as 65 n.m (48 lb ft) followed by an additional 90 degrees using the j 45059. Finally, take off the j 42386-a and bolts, and replace the Starter motor and Oil Pump.
    Posted by ChevyPartsGiant Specialist
    Q:
    How to replace the timing chain, crankshaft sprocket, camshaft position actuator, and solenoid valve on Cadillac Escalade ESV? Posted by Customer
    A:
    In order to replace the Timing Chain, crankshaft sprocket camshaft position actuator and solenoid valve, an ignition pump must be removed first. Make sure that the teeth of the j 42386-a are in the right position. Rotate the crankshaft sprocket until the camshaft position (CMP) actuator alignment mark and the crankshaft sprocket alignment mark are aligned and install and tighten the j 42386-a remove and discard cmp actuator solenoid valve (234) loosen and separate from the cmp actuator & Timing Chain the camshaft, be careful not to pull on the reluctor wheel. Dismount the cmp actuator (235) and Timing Chain (208), and put a tie strap through the center of the actuator and over the reluctor wheel, then unbolt the Timing Chain tension bolts (231) and tensioner (232). Now use the j 41816-2, j 41558, bolts, and j 8433 to undo the crankshaft sprocket, (207), and also the crankshaft sprocket key if any. For installation, insert the key in crankshaft key way tap it and fit the crankshaft sprocket on the crankshaft and align the key with the sprocket keyway. Install the crankshaft sprocket using the j4178 and j41665 until seated. Compress the Timing Chain Tensioner guide and install the en 46330 and install the Timing Chain Tensioner (232) and bolts (231) with a torque of 25 nm (18 lb ft). Correctly attach the cmp actuator to the location pin of the camshaft to make sure the teeth on the sprocket interfacing with the teeth of the Timing Chain align well, as well as the marking alignment marks. Mount the cmp actuator (235) and Timing Chain (208), and guard the hole in the cmp actuator against the locating pin in the camshaft. Do not attempt to push or pull the reluctor wheel when placing into the hole. Make sure the actuator is fully seated, check at the proper installation, and install a new cmp actuator valve (234), tight it by hand until it is snug. Check the alignment of sprockets, remove the en 46330, and tighten cmp actuator bolt initially to 65 nm (48 lb ft) and then further 90 degrees with j 45059. Finally, remove the j 42386-a and replace install Oil Pump.
    Posted by ChevyPartsGiant Specialist
    Q:
    How to install the timing chain and sprockets on Chevrolet Camaro? Posted by Customer
    A:
    Begin the Timing Chain and sprocket installation by inserting the Crankshaft balancer key into the Crankshaft keyway where it needs to maintain parallel alignment or a slight incline. You should begin by installing the Timing Chain onto the sprockets while maintaining proper alignment of the timing marks so you can install the chain together with both sprockets. Before final tightening, use a torque angle meter (J 36660-A) to tighten the camshaft sprocket bolt to 100 nm (74 ft. Lbs.) then further advance the bolt an additional 90 degrees. Finish your work by placing the Timing Chain dampener on the engine then secure the Timing Chain dampener bolt at 22 nm (16 ft. Lbs.).
    Posted by ChevyPartsGiant Specialist
    Q:
    How to replace the timing chain and sprocket on Chevrolet Express 2500? Posted by Customer
    A:
    In order to replace the Timing Chain and sprocket, remove the Oil Pump first. Turn the Crankshaft so that timing marks on the Crankshaft and the camshaft sprockets line up, do not turn the Crankshaft assembly once the Timing Chain is pulled off to avoid damaging the pistons assemblies or the valves. Now, take the bolt of the camshaft sprocket and remove the camshaft sprocket and Timing Chain. Take out the Crankshaft sprocket by using the j 8433 , j 41816-2 , j 41478 , and j 41558 . When required, take the Crankshaft sprocket key out. The Timing Chain and sprockets need to be checked and cleaned. If the key was removed, replace it into the Crankshaft keyway tapping it until flush with both ends into Crankshaft. Mount the Crankshaft sprocket to the front of the Crankshaft, lining up the Crankshaft key and sprocket keyways, allowing use of the j 41665 and j 41478 to fully seat sprocket to the Crankshaft flange. Turn the Crankshaft sprocket until the alignment mark will be on the 12 o clock region and the locating pin of the camshaft sprocket will be aligned with the alignment hole of the camshaft sprocket will align itself to the teeth of the Timing Chain and the alignment marks of the camshaft and Crankshaft sprockets will be matched and camshaft sprocket alignment mark will be at the 6 oclock region. Mount the camshaft sprocket and Timing Chain and have the camshaft or Crankshaft sprockets adjusted in order to line up the timing marks. Torque sprocket camshaft bolts to 35 n.m (26 lb ft). Finally, reinstall the Oil Pump.
    Posted by ChevyPartsGiant Specialist
    Q:
    How to replace the timing chain and sprockets on Chevrolet Corvette? Posted by Customer
    A:
    To replace the Timing Chain and sprockets, the following tools are necessary: pulley puller (J8433), crankshaft sprocket remover (J41558), crankshaft end protector (J41816-2), and Crankshaft balancer and sprocket installer (J41665). Start by taking out the Oil Pump after removing the camshaft sprocket bolts, let out the camshaft sprocket and the Timing Chain. Use the pulley puller (J8433), crankshaft end protector (J41816-2), and Crankshaft sprocket remover (J41558) to extract the Crankshaft sprocket and, if necessary, the removal of the Crankshaft sprocket's key. Clean and check the Timing Chain as well as the sprockets before installing. If the key was removed, do not put it without assurance in the rear (crankshaft keyway), tap it until the ends are seated. Next install the Crankshaft sprocket onto the front of the Crankshaft making sure the Crankshaft key is placed into sprocket keyway using the Crankshaft balancer and sprocket installer (J41665) to fully seat the sprocket onto the Crankshaft flange. For the Crankshaft sprocket, rotate it until the alignment mark will be at 12 while the camshaft sprocket locating pin is in parallel to camshaft sprocket alignment hole and the sprocket teeth is aligned with the Timing Chain. Leave the sprockets and timing marks lined up properly, then install the cam sprocket and Timing Chain and adjust as needed in order to get the timing marks to line up. Finally, fit the camshaft sprocket bolts and tighten them to 35 nm (26 ft. Lbs.), and fit the Oil Pump as well.
    Posted by ChevyPartsGiant Specialist
    Q:
    How to replace the timing chain and sprockets on Chevrolet Express 3500? Posted by Customer
    A:
    To replace the Timing Chain and the sprockets, first, the Oil Pump has to be removed, and then the Crankshaft should be rotated to be aligned with the timing marks on the crank and the camshaft sprockets, but the Crankshaft assembly should not be rotated once the Timing Chain was removed because damage to the piston assemblies or the valves can arise. Next, take off the bolts of the camshaft sprocket, as well as the camshaft sprocket and Timing Chain. Use the j 8433 pulley puller (J 8433), j 41816-2 Crankshaft end protector (J 41816-2) and j 41558 Crankshaft sprocket remover (J 41558) to displace the Crankshaft sprocket, after which you can remove the Crankshaft sprocket key if necessary. You should clean and inspect the Timing Chain and sprockets before putting them in place. If the key is removed, insert it to the crank shaft keyway, tapping in both ends until seated. The Crankshaft sprocket should be installed on the front of the Crankshaft such that the Crankshaft key is in the sprocket keyway, and the j 41665 Crankshaft balancer and sprocket installer (J 41665) should be used to fully install the sprocket against the Crankshaft flange. Turn the Crankshaft sprocket to get the alignment mark at the 12 o'clock position, have the camshaft sprocket locating pin aligned with the camshaft sprocket alignment hole and the sprocket teeth engaged in the Timing Chain simultaneously. The marks on the camshaft and Crankshaft sprocket should be aligned properly with the camshaft sprocket mark at 6 o.clock position when installing the camshaft sprocket and Timing Chain. If needed, turn the camshaft or Crankshaft sprockets to line up the timing marks and install the camshaft sprocket bolts and tighten them to 35 nm (26 ft. Lbs.). Finally, reinstall the Oil Pump.
    Posted by ChevyPartsGiant Specialist
    Q:
    How to replace the timing chain and sprockets on Chevrolet Impala? Posted by Customer
    A:
    Before replacing the Timing Chain and sprockets start by removing the engine front cover. Start by aligning the crankshaft timing mark with the timing mark on the bottom of the Timing Chain Tensioner before transferring alignment of the timing mark on the Camshaft gear with the timing mark on top of the Timing Chain Tensioner . After removing the Camshaft sprocket bolts, proceed to take out the Timing Chain, camshaft, and crankshaft sprockets before removing the Timing Chain Tensioner bolts. When installing the crankshaft sprocket first apply prelube to its thrust surface before assembly. Install the Timing Chain Tensioner with secure bolt torque set to 21 n.m (15 lb ft). As part of the en-47719 tensioner compressor (EN-47719) process completely fold the mechanism then place the retaining pin into the designated hole. Place the crankshaft timing mark against the timing mark on the bottom of the Timing Chain Tensioner before hanging down the Timing Chain with the Camshaft sprocket and fitting the chain to the crankgear. Direct the Camshaft gear timing mark to match with the marking found on top of the Timing Chain Tensioner and make sure the dowel in the Camshaft sprocket aligns with the corresponding hole in the shaft. Fit the sprocket onto the Camshaft through its mounting bolts then tighten it to 16 n.m (12 lb ft). Spray clean engine oil onto both the crankshaft and Camshaft sprockets before installing the engine front cover into place.
    Posted by ChevyPartsGiant Specialist
    Q:
    What tools are required to replace the timing chain and sprocket on engines LH6, LMG, LY2, and LY5 on Chevrolet Silverado 1500? Posted by Customer
    A:
    To replace the timing chain and sprocket on engines LH6, LMG, LY2, and LY5, you will need the following tools: EN 46330 Timing Chain Tensioner retaining pin, J 8433 puller bar, J 41478 crankshaft front oil seal installer, J 41558 crankshaft sprocket remover, crankshaft balancer and sprocket installer, J 41816-2 crankshaft end protector, flywheel holding tool (J 42386-A), and J 45059 angle meter. Begin by removing the oil pump and starter motor, ensuring that the teeth of the J 42386-A engage the engine flywheel. Secure the J 42386-A with one M10-1.5 x 120 mm bolt and one M10-1.5 x 45 mm bolt, tightening them to 50 N.m (37 lb ft). Rotate the crankshaft to align the timing marks on the crankshaft and camshaft sprocket. Loosen the camshaft sprocket bolt (206) and the timing chain tension bolts (231) to release the crank assembly. Use the J 41816-2, J 41558, bolts, and J 8433 to remove the crankshaft sprocket (207) and its key if necessary. To install, insert the key into the crankshaft keyway, tap it in, and position the crankshaft sprocket with the key (207). Use the J 41478 and J 41665 to seat the crankshaft sprocket. Compress and fit the timing chain tensioner guide, EN 46330, and the timing chain tensioner (232), tightening the bolt (231) to 25 N.m (18 lb ft). Ensure the sprocket teeth mesh correctly and the alignment marks on both the camshaft and crankshaft sprockets are properly positioned, with the camshaft sprocket (205) at the 6 o'clock position. Install the camshaft sprocket (205), timing chain (208), and bolt (206), checking the sprocket alignment. Remove the EN 46330 and tighten the camshaft sprocket bolt to 75 N.m (55 lb ft), then an additional 50 degrees using the J 45059. Finally, remove the J 42386-A and bolts, and reinstall the starter motor and oil pump.
    Posted by ChevyPartsGiant Specialist
    Q:
    How to replace the timing chain and sprockets on Chevrolet SSR? Posted by Customer
    A:
    To replace the Timing Chain as well as the sprockets, they must first be healed of the Oil Pump and have the Crankshaft rotated until the timing marks found at the Crankshaft and the camshaft sprockets are aligned whereas they must not rotate the Crankshaft assembly after the Timing Chain has been removed to prevent further damage to the piston assemblies or valves. Then, take away the camshaft sprocket bolts, camshaft sprocket and Timing Chain. Remove the Crankshaft puller using the timberland j 8433 two jaw puller (J 8433), j 41816-2 Crankshaft end protector (J 41816-2), and j 41558 Crankshaft sprocket remover (J 41558), and if necessary remove the Crankshaft sprocket key. Check the Timing Chain and the sprockets. You need to unhook them, clean, and install them again properly. For installation, insert the key into the Crankshaft keyway and drive into place until the ends are seated. Mount the Crankshaft sprocket on the front of the Crankshaft, with crayksaft key matched to the keyway in the sprocket, and using the j 41665 Crankshaft balancer and sprocket installer, j 41665, to seat the sprocket fully against the Crankshaft flange. Swivel the crank shaft sprocket so that the alignment mark is at 12 o clock position ensuring that when the sprocket locating pin of the camshaft sprocket alligns with the camshaft sprocket pin alignment hole this will also ensure that the teeth of the sprocket's and Timing Chain hook up correctly. Line up the camshaft and the Crankshaft sprocket marks, then install the camshaft sprocket and the Timing Chain and line it up if needed with the timing marks. Finally, install camshaft sprocket bolts with 35 nm (26 ft. Lbs) and install Oil Pump.
    Posted by ChevyPartsGiant Specialist
    Q:
    How to ensure proper installation of the timing chain on Chevrolet SSR? Posted by Customer
    A:
    To replace the Timing Chain and sprockets, you first have to remove the Oil Pump and turn the Crankshaft so that the timing marks appear on the Crankshaft and camshaft sprockets, not to turn the Crankshaft assembly after the Timing Chain has been removed to avoid damaging the piston assemblies or valves. Secondly, proceed with the removal of the camshaft sprocket bolts, then camshaft sprockets and the Timing Chain. Remove the Crankshaft sprocket with the help of the j 8433 two jaw puller (J 8433), j 41816-2 Crankshaft end protector (J 41816-2) and j 41558 Crankshaft sprocket remover (J 41558) instruments. If needed, unplug the Crankshaft sprocket key, remove, clean and check the Timing Chain and sprockets. In terms of installation, key is to be installed into Crankshaft keyway which is to be tapped until seated on both ends. Mount the crank shaft sprocket onto the front of the crank shaft placing the crank shaft key in the sprockets key way, install the crank shaft balancer and sprocket installer (J 41665), and tighten the Crankshaft sprocket till it is fully up against the Crankshaft flange. Turn the Crankshaft sprocket to the position where the alignment mark is at the 12 o'clock and the locating pin of the camshaft sprocket should have an alignment hole, the sprocket teeth join into Timing Chain, and the camshaft and Crankshaft sprockets have the proper alignment by having the alignment marks in position for the camshaft sprocket is at 6 o'clock. Lastly, install the camshaft sprocket and Timing Chain, the camshaft sprockets or Crankshaft sprockets should be adjusted to align the timing marks before the camshaft sprocket is tightened to 35 nm (26 ft. Lbs.), replace Oil Pump.
    Posted by ChevyPartsGiant Specialist
    Q:
    How to replace the timing chain, crankshaft sprocket, camshaft position actuator, and solenoid valve on Chevrolet Tahoe? Posted by Customer
    A:
    The process starts with removing the Oil Pump to ensure the j 42386-a (Flywheel Holding Tool)'s teeth align with the engine Flywheel before replacing the Timing Chain as well as the Crankshaft sprocket and camshaft position actuator and solenoid valve. You should install the j 42386-a with a single m10-1.5 x 120 mm and a single m10-1.5 x 45 mm bolt and apply torque to 50 nm (37 lb ft). Align the camshaft position (CMP) actuator alignment mark against the Crankshaft sprocket alignment mark as you turn the Crankshaft sprocket. Begin by discarding the cmp actuator solenoid valve (234) followed by removing the cmp actuator (235) and Timing Chain (208) with great caution to the reluctor wheel. Securely fasten a tie strap through the cmp actuator center that extends over the reluctor wheel after separating the Timing Chain from the camshaft. You can use j 41816-2 (Crankshaft End Protector), j 41558 (Crankshaft Sprocket Remover), bolts, and j 8433 (Puller Bar) to remove the Crankshaft sprocket (207) and key if necessary. Begin this process by removing Timing Chain tension bolts (231) and tensioner (232). Install the key (122) into the Crankshaft keyway then gently tap it into place before installing the Crankshaft sprocket (207) onto the Crankshaft where the key must align with the sprocket's keyway. Use the j 41478 (Crankshaft Front Oil Seal Installer) together with the j 41665 (Crankshaft Balancer and Sprocket Installer) to drive in the sprocket until it reaches complete seating. Install en 46330 (Timing Chain Tensioner Retaining Pin) before placing the Timing Chain Tensioner (232) and the bolts (231) in position and tightening them to 25 nm (18 lb ft). Maintain the cmp actuator on the camshaft's locating pin while checking for proper timing sprocket-chain meshing between their teeth and positioning the cmp actuator timing mark at the 6 o'clock indicator. Place both cmp actuator (235) and Timing Chain (208) into position so the alignment hole in the actuator matches the camshaft's locating pin. Install the actuator onto the camshaft with caution avoiding contact to the reluctor wheel then verify alignment using a straight edge inspection across the engine block's front surface. Place a new cmp actuator valve (234) onto the assembly followed by hand tightening until it feels secure then check sprocket alignment. Using j 45059 (Angle Meter) tighten en 46330 (Timing Chain Tensioner Retaining Pin) and the cmp actuator solenoid valve to 65 nm (48 lb ft) first then an additional 90 degrees. Reinstall the Oil Pump after you remove the j 42386-a (Flywheel Holding Tool) and bolts.
    Posted by ChevyPartsGiant Specialist
    Q:
    What tools are required to replace the timing chain and sprocket on engines LC9, LMG, LY2, and LY5 (4.8L and 5.3L) on GMC Yukon? Posted by Customer
    A:
    Engine replacement of Timing Chain and sprocket on lc9 lmg ly2 ly5 (4.8L and 5.3L) requires these necessary tool collection: en 46330 Timing Chain Tensioner retaining pin (EN 46330), j 8433 puller bar (J 8433), j 41478 crankshaft front oil seal installer (J 41478), j 41558 crankshaft sprocket remover (J 41558), j 41665 crankshaft balancer and sprocket installer (J 41665), j 41816-2 the proper tools for Timing Chain and sprocket replacement on engines lc9, lmg, ly2, and ly5 (4.8L and 5.3L) include en 46330 Timing Chain Tensioner retaining pin (EN 46330), j 8433 puller bar (J 8433), j 41478 crankshaft front oil seal installer (J 41478), j 41558 crankshaft sprocket remover (J 41558), j 41665 crankshaft balancer and sprocket installer (J 41665), j 41816 install the j 42386-a Flywheel holding tool after removing the Oil Pump and Starter motor while checking that the tool's teeth fit properly with the engine Flywheel. Once the j 42386-a tool and its bolts are in place tighten the hardware to 50 n.m (37 lb ft). The crankshaft rotation should align the timing marks between the crankshaft and camshaft sprockets. At this point, extract the camshaft sprocket bolt, camshaft sprocket and Timing Chain and Timing Chain Tensioner. Begin by using tools j41816-2 and j41558 and j8433 to remove the crankshaft sprocket before proceeding to remove the crankshaft sprocket key if needed. Begin installation by placing the key inside the crankshaft keyway then tapping it further in before installing the sprocket by aligning the key with the sprocket keyway. The j 41478 and j 41665 tools will help position the crankshaft sprocket so it touches the crankshaft flange. Install the en 46330 before you fit the Timing Chain Tensioner along with its bolts. Tighten these fasteners to 25 n.m (18 lb ft). Check that the teeth of both sprockets mesh correctly and the alignment marks on the crankshaft sprocket and camshaft match accordingly. The camshaft sprocket should face the 6 o'clock direction before its installation with the Timing Chain and bolt and subsequent inspection of alignment quality. Begin by removing the en 46330 then gradually tighten the camshaft sprocket bolt to 90 n.m (66 lb ft) and continue to an additional 40-degree torque using the j 45059. Complete the installation by removing j 42386-a and its bolts then repositioning the Starter motor and Oil Pump.
    Posted by ChevyPartsGiant Specialist
    Q:
    How to replace the camshaft timing chain, sprocket, and tensioner on GMC Sierra 1500? Posted by Customer
    A:
    During camshaft Timing Chain replacement alongside sprocket and tensioner you must first eliminate the engine front cover and Crankshaft position (CKP) sensor reluctor ring. The correct alignment of the rectangular-shaped ckp sensor reluctor ring requires facing the dish towards the engine front cover to protect both parts from damage. Mount the ckp sensor reluctor ring after you place its keyway correctly against the Crankshaft key. Use the rear pinion bearing race installer (J 5590) to push the ckp sensor reluctor ring until it rests fully against the Crankshaft sprocket before reinstalling the engine front cover.
    Posted by ChevyPartsGiant Specialist
    Q:
    How to replace the cam gear and timing chain on GMC Sierra 1500? Posted by Customer
    A:
    The timing chain and sprocket replacement needs you to take off the Oil Pump and Starter motor first, always making sure you follow fastener instructions. Put the j 42386-a flywheel holding tool in place, using a m10-1.5 x 120 mm and a m10-1.5 x 45 mm bolt, and tighten both to 50 nm (37 lb ft). Position the Crankshaft so that the timing marks on both sprockets line up before you take out the timing chain, and do not rotate the Crankshaft afterwards. Once you have removed the Camshaft sprocket bolt, take off both the Camshaft sprocket (205) and timing chain (208). Then, undo the timing chain tension bolts (231) and remove the tensioner (232). Attach the j 41816-2 (Crankshaft End Protector), the j 41558 (Crankshaft Sprocket Remover), the bolts, and the j 8433 (Puller Bar) to take off the Crankshaft sprocket (207) and its key, if required. For assembly, fit the key into the Crankshaft keyway, tap it in all the way, and then put the Crankshaft sprocket (207) on, making sure it is aligned with the keyway. Install the sprocket on the cranksha compress the Timing Chain Tensioner guide, put in the en 46330 (Timing Chain Tensioner Retaining Pin), fit the Timing Chain Tensioner (232) and its bolts, and tighten them to 25 nm (18 lb ft). Be sure the teeth of the sprockets are meshed and that the alignment marks on the sprockets line up. Put the Camshaft sprocket at 6 o'clock, fix it and the timing chain onto the Crankshaft sprocket, and then examine whether the sprockets are aligned. Take off the en 46330, and first tighten the Camshaft sprocket bolt to 75 nm (55 lb ft) and then use the j 45059 to turn it an extra 50 degrees. Take out the j 42386-a as well as the bolts, then reinstall the Starter motor, and afterwards put the Oil Pump back on.
    Posted by ChevyPartsGiant Specialist
    Q:
    What components follow the removal of the right bank secondary camshaft drive chain tensioner for the 2008 Buick LaCrosse? Posted by Customer
    A:
    Remove the right bank secondary camshaft drive chain shoe (Shoe) and the right bank secondary camshaft drive chain guide (Guide).
    Posted by ChevyPartsGiant Specialist
    See expert answers on similar Timing Chain
    Q:
    What additional components need to be removed for the 2006 Buick Rainier? Posted by Customer
    A:
    Remove the cylinder head access hole plugs, the timing chain tensioner shoe bolt, the tensioner shoe, the timing chain tensioner guide bolts, the guide, the timing chain tensioner bolts, and the tensioner itself.
    Posted by ChevyPartsGiant Specialist
    See expert answers on similar Timing Chain
    Q:
    What components should be removed after releasing the tension for the 2007 Buick Rainier? Posted by Customer
    A:
    The top chain guide bolts, top chain guide, exhaust camshaft position actuator bolt and actuator, intake camshaft sprocket bolt and sprocket, timing chain, and crankshaft sprocket.
    Posted by ChevyPartsGiant Specialist
    See expert answers on similar Timing Chain
    Q:
    What is the next step after removing the left bank secondary camshaft drive chain guide for the 2010 Cadillac CTS? Posted by Customer
    A:
    Remove the left bank camshaft intermediate drive chain idler and the left bank secondary camshaft drive chain.
    Posted by ChevyPartsGiant Specialist
    See expert answers on similar Timing Chain
    Q:
    What should be done after removing all the chains and components for the 2006 Cadillac CTS? Posted by Customer
    A:
    Clean and inspect all camshaft timing drive components, replacing any as necessary.
    Posted by ChevyPartsGiant Specialist
    See expert answers on similar Timing Chain
    Q:
    What components need to be removed from the left bank for the 2007 Cadillac CTS? Posted by Customer
    A:
    The left bank secondary camshaft drive chain tensioner, the left bank secondary camshaft drive chain shoe, the left bank secondary camshaft drive chain guide, and the left bank camshaft intermediate drive chain idler.
    Posted by ChevyPartsGiant Specialist
    See expert answers on similar Timing Chain
    Q:
    What should be removed after the right bank secondary camshaft drive chain for the 2010 Cadillac CTS? Posted by Customer
    A:
    Take out the primary camshaft drive chain tensioner and the primary camshaft drive chain upper guide.
    Posted by ChevyPartsGiant Specialist
    See expert answers on similar Timing Chain
    Q:
    What should be removed after the spark plugs for the 2007 Cadillac CTS? Posted by Customer
    A:
    Remove the engine front cover.
    Posted by ChevyPartsGiant Specialist
    See expert answers on similar Timing Chain
    Q:
    What components should be removed from the left bank for the 2005 Cadillac CTS? Posted by Customer
    A:
    Remove the left bank secondary camshaft drive chain tensioner, drive chain shoe, drive chain guide, and the left bank camshaft intermediate drive chain idler, followed by the left bank secondary camshaft drive chain.
    Posted by ChevyPartsGiant Specialist
    See expert answers on similar Timing Chain
    Q:
    What should be installed after the primary camshaft drive chain for the 2009 Cadillac CTS? Posted by Customer
    A:
    Install the primary upper camshaft drive chain guide.
    Posted by ChevyPartsGiant Specialist
    See expert answers on similar Timing Chain
    Q:
    What is the first step to replace the timing chain and sprockets for the 2006 Cadillac Escalade EXT? Posted by Customer
    A:
    First, remove the oil pump and rotate the crankshaft until the timing marks on the crankshaft and camshaft sprockets are aligned.
    Posted by ChevyPartsGiant Specialist
    See expert answers on similar Timing Chain
    Q:
    What is the first step to replace the timing chain and sprockets for the 2005 Chevrolet Express 2500? Posted by Customer
    A:
    Remove the engine front cover and the crankshaft position sensor reluctor ring.
    Posted by ChevyPartsGiant Specialist
    See expert answers on similar Timing Chain
    Q:
    How do you install the crankshaft sprocket for the 2001 Chevrolet Corvette? Posted by Customer
    A:
    Install it onto the front of the crankshaft, aligning the crankshaft key with the sprocket keyway, and use the Crankshaft Balancer and Sprocket Installer (J 41665) to fully seat the sprocket against the crankshaft flange.
    Posted by ChevyPartsGiant Specialist
    See expert answers on similar Timing Chain
    Q:
    How should the camshaft sprocket bolt be installed for the 2000 Chevrolet Camaro? Posted by Customer
    A:
    Install the camshaft sprocket bolt and tighten it to 100 Nm (74 ft. lbs.), using the Torque Angle Meter (J 36660-A) to tighten the bolt an additional 90 degrees.
    Posted by ChevyPartsGiant Specialist
    See expert answers on similar Timing Chain
    Q:
    What components need to be removed after releasing the tension for the 2009 Chevrolet Colorado? Posted by Customer
    A:
    Remove and discard the exhaust camshaft position actuator bolt and the actuator, followed by the intake camshaft sprocket bolt and the sprocket itself, then remove the timing chain and crankshaft sprocket.
    Posted by ChevyPartsGiant Specialist
    See expert answers on similar Timing Chain
    Q:
    What is the torque specification for tightening the bolts using J 42386-A for the 2010 Chevrolet Corvette? Posted by Customer
    A:
    Tighten bolts to 50 Nm (37 lb ft).
    Posted by ChevyPartsGiant Specialist
    See expert answers on similar Timing Chain
    Q:
    How should the crankshaft sprocket be installed for the 2008 Chevrolet Corvette? Posted by Customer
    A:
    Install it onto the crankshaft, aligning the key with the sprocket keyway, and secure it with the J 41478 and J 41665.
    Posted by ChevyPartsGiant Specialist
    See expert answers on similar Timing Chain
    Q:
    What is the torque specification for the timing chain guide bolts for the 2005 Chevrolet Corvette? Posted by Customer
    A:
    25 Nm (18 ft. lbs.).
    Posted by ChevyPartsGiant Specialist
    See expert answers on similar Timing Chain
    Q:
    What is the final step in the installation process for the 2002 Chevrolet Camaro? Posted by Customer
    A:
    Install the timing chain dampener and tighten the timing chain dampener bolt to 22 Nm (16 ft. lbs.).
    Posted by ChevyPartsGiant Specialist
    See expert answers on similar Timing Chain
    Q:
    How do you install the crankshaft sprocket for the 2004 Chevrolet Express 1500? Posted by Customer
    A:
    Place the key into the crankshaft keyway, tapping it into position until both ends are seated, then install the crankshaft sprocket onto the front of the crankshaft.
    Posted by ChevyPartsGiant Specialist
    See expert answers on similar Timing Chain
    Q:
    What follows the installation of the right bank idler for the 2010 Chevrolet Camaro? Posted by Customer
    A:
    Install the primary camshaft drive chain (Chain).
    Posted by ChevyPartsGiant Specialist
    See expert answers on similar Timing Chain
    Q:
    What position should the crankshaft sprocket alignment mark be in for the 2000 Chevrolet Corvette? Posted by Customer
    A:
    Rotate the crankshaft sprocket until the alignment mark is in the 12 o'clock position.
    Posted by ChevyPartsGiant Specialist
    See expert answers on similar Timing Chain
    Q:
    What is the first step in the replacement process for the 2006 Chevrolet Corvette? Posted by Customer
    A:
    Begin by removing the oil pump.
    Posted by ChevyPartsGiant Specialist
    See expert answers on similar Timing Chain
    Q:
    What is the final step in the installation process for the 2007 Chevrolet Express 3500? Posted by Customer
    A:
    Install the camshaft sprocket and timing chain, adjust as necessary to align the timing marks, then install and tighten the camshaft sprocket bolts to 35 N.m (26 lb ft) before reinstalling the oil pump.
    Posted by ChevyPartsGiant Specialist
    See expert answers on similar Timing Chain
    Q:
    What components should be removed next for the 2007 Chevrolet Corvette? Posted by Customer
    A:
    The bolts and timing chain dampener.
    Posted by ChevyPartsGiant Specialist
    See expert answers on similar Timing Chain
    Q:
    What tools are needed to replace the timing chain and sprockets for the 2003 Chevrolet Corvette? Posted by Customer
    A:
    The necessary tools are Pulley Puller (J8433), Crankshaft Sprocket Remover (J41558), Crankshaft End Protector (J41816-2), and Crankshaft Balancer and Sprocket Installer (J41665).
    Posted by ChevyPartsGiant Specialist
    See expert answers on similar Timing Chain
    Q:
    What tool is used to collapse the tensioner for the 2009 Chevrolet Impala? Posted by Customer
    A:
    Use the EN-47719 (Tensioner Compressor) to fully collapse the tensioner and place the retaining pin into the retaining hole.
    Posted by ChevyPartsGiant Specialist
    See expert answers on similar Timing Chain
    Q:
    How do you align the camshaft gear for the 2008 Chevrolet Impala? Posted by Customer
    A:
    Align the timing mark on the camshaft gear with the timing mark on top of the timing chain tensioner and align the dowel in the camshaft sprocket with the dowel hole in the camshaft.
    Posted by ChevyPartsGiant Specialist
    See expert answers on similar Timing Chain
    Q:
    What is the final step after installing the camshaft sprocket and timing chain for the 2003 Chevrolet Express 3500? Posted by Customer
    A:
    Reinstall the oil pump.
    Posted by ChevyPartsGiant Specialist
    See expert answers on similar Timing Chain
    Q:
    How should the CKP sensor reluctor ring be installed for the 2008 Chevrolet Silverado 1500? Posted by Customer
    A:
    Ensure it is properly aligned to avoid component damage and to maintain OBD II system performance; the reluctor ring must face the engine front cover.
    Posted by ChevyPartsGiant Specialist
    See expert answers on similar Timing Chain
    Q:
    What is the correct position for the camshaft sprocket's alignment mark during installation for the 2009 Chevrolet Silverado 1500? Posted by Customer
    A:
    The camshaft sprocket's alignment mark should be at the 6 o'clock position.
    Posted by ChevyPartsGiant Specialist
    See expert answers on similar Timing Chain
    Q:
    How do you install the crankshaft sprocket for the 2006 Chevrolet Monte Carlo? Posted by Customer
    A:
    Place the key into the crankshaft keyway, tap it until both ends are seated, then install the crankshaft sprocket onto the crankshaft, aligning the key with the sprocket keyway.
    Posted by ChevyPartsGiant Specialist
    See expert answers on similar Timing Chain
    Q:
    What should be done after removing the crankshaft sprocket for the 2005 Chevrolet SSR? Posted by Customer
    A:
    Clean and inspect the timing chain and sprockets before installation.
    Posted by ChevyPartsGiant Specialist
    See expert answers on similar Timing Chain
    Q:
    Why is it important not to turn the crankshaft assembly after removing the timing chain for the 2004 Chevrolet SSR? Posted by Customer
    A:
    To prevent damage to the piston assemblies or valves.
    Posted by ChevyPartsGiant Specialist
    See expert answers on similar Timing Chain
    Q:
    What components need to be removed after releasing the tension for the 2008 GMC Envoy? Posted by Customer
    A:
    Remove the exhaust camshaft position actuator bolt and the actuator, followed by the intake camshaft sprocket bolt and sprocket, then the timing chain and crankshaft sprocket.
    Posted by ChevyPartsGiant Specialist
    See expert answers on similar Timing Chain
    Q:
    How do you release the tension on the timing chain for the 2010 GMC Canyon? Posted by Customer
    A:
    Release the tension on the timing chain by moving the tensioner shoe in and place a tee into the tensioner to hold the shoe in place.
    Posted by ChevyPartsGiant Specialist
    See expert answers on similar Timing Chain
    Q:
    How should the tensioner shoe be installed for the 2009 Chevrolet Trailblazer? Posted by Customer
    A:
    Install the tensioner shoe with the bolt tightened to 26 Nm (19 lb ft).
    Posted by ChevyPartsGiant Specialist
    See expert answers on similar Timing Chain
    Q:
    How should the camshaft sprocket be aligned for the 2005 GMC Sierra 1500? Posted by Customer
    A:
    Ensure the camshaft sprocket locating pin aligns with the camshaft sprocket alignment hole, the sprocket teeth mesh with the timing chain, and the alignment marks on both sprockets are properly aligned, with the camshaft sprocket alignment mark at the 6 o'clock position.
    Posted by ChevyPartsGiant Specialist
    See expert answers on similar Timing Chain
    Q:
    What is the procedure for installation of the timing chain tensioner for the 2005 GMC Envoy? Posted by Customer
    A:
    Secure the timing chain tensioner with bolts, tightening them to 25 Nm (18 ft. lbs.).
    Posted by ChevyPartsGiant Specialist
    See expert answers on similar Timing Chain
    Q:
    What should be done after aligning the timing marks for the 2009 GMC Savana 1500? Posted by Customer
    A:
    Remove and discard the camshaft sprocket bolt (206), then take out the camshaft sprocket (205) and timing chain (208).
    Posted by ChevyPartsGiant Specialist
    See expert answers on similar Timing Chain
    Q:
    How do you install the crankshaft sprocket for the 2007 GMC Sierra 3500 Classic? Posted by Customer
    A:
    Install the key into the crankshaft keyway, tap it into place, and install the crankshaft sprocket, aligning it with the keyway.
    Posted by ChevyPartsGiant Specialist
    See expert answers on similar Timing Chain
    Q:
    What position should the crankshaft sprocket alignment mark be in for the 2003 GMC Savana 2500? Posted by Customer
    A:
    The alignment mark should be at the 12 o'clock position.
    Posted by ChevyPartsGiant Specialist
    See expert answers on similar Timing Chain
    Q:
    What is the torque specification for tightening the camshaft sprocket bolts for the 2006 GMC Sierra 3500? Posted by Customer
    A:
    30 Nm (22 ft. lbs.).
    Posted by ChevyPartsGiant Specialist
    See expert answers on similar Timing Chain
    Q:
    What should you do if needed after removing the crankshaft sprocket for the 2006 GMC Sierra 1500? Posted by Customer
    A:
    Remove the timing chain tensioner bracket bolt and bracket, then clean and inspect the timing chain and sprockets.
    Posted by ChevyPartsGiant Specialist
    See expert answers on similar Timing Chain
    Q:
    Where should the alignment mark on the camshaft sprocket be positioned for the 2007 GMC Sierra 1500 Classic? Posted by Customer
    A:
    At the 6 o'clock position.
    Posted by ChevyPartsGiant Specialist
    See expert answers on similar Timing Chain
    Q:
    How should the key be installed into the crankshaft keyway for the 2010 GMC Sierra 1500? Posted by Customer
    A:
    Ensure it is parallel or slightly inclined, then align the crankshaft sprocket's keyway with the balancer key.
    Posted by ChevyPartsGiant Specialist
    See expert answers on similar Timing Chain
    Q:
    What should be done after removing the crankshaft sprocket for the 2006 GMC Savana 3500? Posted by Customer
    A:
    Take out the crankshaft sprocket key if necessary and clean and inspect the timing chain and sprockets.
    Posted by ChevyPartsGiant Specialist
    See expert answers on similar Timing Chain
    If you have any questions about this product, please don't hesitate to ask us. We will be happy to help you!

OEM GM 12646386, Excellent Performance and Perfect Fitment

To ensure reliability, purchase GM part # 12646386 Timing Chain. It is sometimes referred to as GM Timing Chain. Choosing OEM parts is the optimal decision for guaranteeing superior quality and perfect performance. These components undergo stringent quality checks and are carefully constructed to comply with GM's factory specifications, ensuring a smooth installation process.

ChevyPartsGiant.com is a leading supplier of genuine GM parts such as GM 12646386 Timing Chain. Our website boasts an extensive inventory of OEM GM parts, available at highly competitive prices in the market. Should you require any new genuine GM parts, rest assured we will deliver them swiftly and efficiently to your doorstep. Furthermore, all our parts come with the assurance of a manufacturer's warranty. For detailed Chevy parts information, click here.
Choose ChevyPartsGiant for discounted prices, exceptional service and fast delivery