ChevyParts
My Garage
My Account
Cart
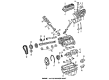
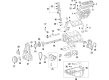
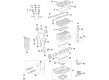
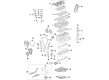
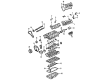
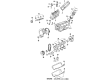
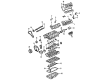
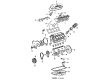
OEM Cadillac Timing Chain
Engine Timing Chain- Select Vehicle by Model
- Select Vehicle by VIN
Select Vehicle by Model
orMake
Model
Year
Select Vehicle by VIN
For the most accurate results, select vehicle by your VIN (Vehicle Identification Number).
28 Timing Chains found


Cadillac Timing Chain Part Number: 14087014
$55.75 MSRP: $94.91You Save: $39.16 (42%)Ships in 1-2 Business DaysProduct Specifications- Other Name: Chain, Engine Timing


Cadillac Timing Chain Part Number: 12646386
$63.56 MSRP: $108.21You Save: $44.65 (42%)Product Specifications- Other Name: Chain, Engine Timing
- Replaced by: 12646387
- Replaces: 12586482, 88958608, 12552954


Cadillac Timing Chain Part Number: 12627107
$68.67 MSRP: $117.93You Save: $49.26 (42%)Ships in 1-2 Business DaysProduct Specifications- Other Name: Chain, Engine Timing


Cadillac Timing Chain Part Number: 12637743
$54.18 MSRP: $93.04You Save: $38.86 (42%)Ships in 1-2 Business DaysProduct Specifications- Other Name: Chain, Engine Timing; Chain Guide; Secondary Chain
- Replaces: 12633452, 12683547, 12616608
Cadillac Timing Chain Part Number: 10128485
$43.02 MSRP: $64.53You Save: $21.51 (34%)Ships in 1-2 Business DaysProduct Specifications- Other Name: Chain, Engine Timing

Cadillac Timing Chain Part Number: 12671642
$50.22 MSRP: $78.67You Save: $28.45 (37%)Ships in 1-3 Business DaysProduct Specifications- Other Name: Chain, Engine Timing
Cadillac Chain Part Number: 55508496
$22.18 MSRP: $34.74You Save: $12.56 (37%)Ships in 1-3 Business DaysProduct Specifications- Other Name: Chain, Engine Crankshaft And Camshaft Balancer; Balance Shaft Chain; Timing Chain
Cadillac Timing Chain Part Number: 14062702
$67.10 MSRP: $105.12You Save: $38.02 (37%)Ships in 1-2 Business DaysProduct Specifications- Other Name: Chain, Engine Timing
- Replaced by: 24577247

Cadillac Timing Chain Part Number: 55515943
$30.22 MSRP: $47.32You Save: $17.10 (37%)Product Specifications- Other Name: Chain, Engine Timing
- Replaces: 55489217
Cadillac Chain Part Number: 55516894
$4.77 MSRP: $7.46You Save: $2.69 (37%)Ships in 1-3 Business DaysProduct Specifications- Other Name: Chain, Engine Crankshaft And Camshaft Balancer; Balance Shaft Chain; Timing Chain

Cadillac Timing Chain Part Number: 55489211
$15.27 MSRP: $23.91You Save: $8.64 (37%)Ships in 1-3 Business DaysProduct Specifications- Other Name: Chain, Engine Timing
Cadillac Chain Part Number: 12663795
$45.94 MSRP: $71.96You Save: $26.02 (37%)Ships in 1-3 Business DaysProduct Specifications- Other Name: Chain, Engine Crankshaft And Camshaft Balancer; Balance Shaft Chain; Timing Chain

Cadillac Timing Chain Part Number: 12666061
$56.54 MSRP: $88.56You Save: $32.02 (37%)Ships in 1-3 Business DaysProduct Specifications- Other Name: Chain, Engine Timing
Cadillac Timing Chain Part Number: 55514729
$15.16 MSRP: $23.76You Save: $8.60 (37%)Ships in 1-3 Business DaysProduct Specifications- Other Name: Chain, Engine Timing
- Replaces: 55506354

Cadillac Timing Chain Part Number: 12694716
$39.97 MSRP: $62.63You Save: $22.66 (37%)Ships in 1-3 Business DaysProduct Specifications- Other Name: Chain, Engine Timing; Secondary Chain; Chain; Chain, Engine Oil Pump
- Replaces: 12647896
Cadillac Timing Chain Part Number: 12647895
$35.87 MSRP: $86.44You Save: $50.57 (59%)Ships in 1-2 Business DaysProduct Specifications- Other Name: Chain, Engine Timing


Cadillac Timing Chain Part Number: 12564273
Product Specifications- Other Name: Chain, Engine Timing; Camshaft Chain

Cadillac Timing Chain Part Number: 14102671
Product Specifications- Other Name: Chain, Engine Timing
Cadillac Timing Chain Part Number: 3522470
Product Specifications- Other Name: Chain Assembly-Camshaft Intermediate Drive; Chain, Engine Timing

Cadillac Timing Chain Part Number: 1640122
Product Specifications- Other Name: Chain Assembly; Chain, Engine Timing
| Page 1 of 2 |Next >
1-20 of 28 Results
Cadillac Timing Chain
Want to cut long-term maintenance and repair costs? Choose OEM Timing Chain. Those parts deliver top durability you can trust. On our site, you'll find a huge catalog of genuine Cadillac parts. Prices are unbeatable, so you can keep more in your pocket. Every OEM Cadillac Timing Chain includes a manufacturer's warranty. You can also get an easy return policy that keeps buying risk free. Fast delivery, get your car on the road quickly. It's simple to search, compare, and order. Stop guessing about quality or fit. Order today and save with parts that last.
Cadillac Timing Chain Parts Questions & Experts Answers
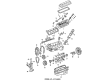
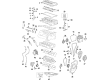
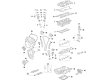
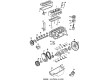
- Q: How to replace the timing chain and sprockets on Cadillac Escalade?A:To replace the Timing Chain and sprockets, start by replacing the Oil Pump and rotate the Crankshaft until the timing marks are aligned on Crankshaft and sprockets are camshaft to not turn the Crankshaft assembly when the Timing Chain is removed to avoid damage to piston assemblies or valves. Next, take off the camshaft sprocket bolts, camshaft sprocket and Timing Chain. Make use of the j8433 (Two Jaw Puller), j41816-2 (Crankshaft End Protector), and j41558 (Crankshaft Sprocket Remover) to remove the Crankshaft sprocket, and then remove the Crankshaft sprocket. In case you require it, take out the Crankshaft sprocket key and clean and check the Timing Chain and sprockets. For installation, you take the key into the Crankshaft keyway and tap it into the place until its two ends are situated. Place the Crankshaft sprocket at the front of the Crankshaft and make sure the Crankshaft key and the sprocket keyway are in line, and install them fully to the Crankshaft flange with the j41665 (Crankshaft Balancer and Sprocket Installer). Rotate the Crankshaft sprocket until the alignment mark corresponds to 12:00 position, ensuring that the locating pin around the camshaft sprocket would align with the alignment hole of the latter, as well as the teeth of the sprocket teeth and Timing Chain are correctly engaged. Find the camshaft sprocket alignment mark at the 6 o'clock position and install the camshaft sprocket & Timing Chain with the required adjustment to the camshaft sprocket or crank sprocketbringing into the timing alignment marks. Finally, install camshaft sprocket bolts by tightening it to 35nm (26ft. Lbs.), and install the Oil Pump.
- Q: How to replace the LH secondary camshaft timing chain on Cadillac CTS?A:When changing the left Timing Chain, first take away the spark plugs to rotate the Crankshaft easily, then remove the engine front cover. Following that, loosen and take out the right bank Timing Chain Tensioner (Tensioner), the Timing Chain shoe (Shoe), the Timing Chain Guide (Guide) and the Timing Chain (Chain). After that, take out the primary Timing Chain Tensioner (Tensioner), the primary upper Timing Chain Guide (Guide) and the primary Timing Chain (Chain) as well. The next step is to uninstall the right bank camshaft intermediate Timing Chain idler (Idler), the left bank Timing Chain Tensioner (Tensioner), the left bank Timing Chain shoe (Shoe), its guide and the chain itself. Check and clean every part of the camshaft timing drive, replacing them if required. To install, begin with the left bank Timing Chain (Chain), then the left bank camshaft intermediate Timing Chain idler (Idler), then the left bank Timing Chain Guide (Guide), the left bank Timing Chain shoe (Shoe) and end with the left bank Timing Chain Tensioner (Tensioner). Next, place the proper idler for your bank camshaft intermediate Timing Chain, install the primary chain, the primary upper guide and the primary tensioner. After this, put in the right bank Timing Chain, install the guide and shoe for the chain, add the Timing Chain Tensioner, place the spark plugs and fit the engine front cover.
- Q: How to replace the primary cam gear and timing chain on Cadillac XLR?A:To replace the timing chain and sprockets, remove the Oil Pump first; secondly, go ahead and remove crankshaft sprocket to Oil Pump drive friction washer. Matching the timing marks employ the j 39946 (Crankshaft Socket). Last, remove the secondary timing chains, and those of the timing chain tensioner along with the oil outlet tube. Remove the timing chain guide bolts and guide as well as the camshaft intermediate sprocket retaining bolt. Consistently disengage the first camshaft motive drive chain, crankshaft sprocket, just as camshaft middle sprocket as an assembly then remove the crankshaft to crankshaft sprocket safe-breaking lacquerification washer. Clean and inspect the camshaft timing drive components (official webpage of Honda). For installation, locate the correct friction washer, and then choose the crankshaft to crankshaft sprocket friction washer that has an outer diameter of 63.5 mm (2.5000 in) and an inner diameter of 45.25 mm (1.7815 in) with a notch to clear the crankshaft pin. Install this washer while the timing marks of the camshaft intermediate and crankshaft sprocket be aligned vertically and install the timing chain of the camshaft by the use of the drive sprockets. Make sure that the number one piston is at top dead center (TDC) and the crankshaft pin is at the 1 o'clock position using the j 39946 (Crankshaft Socket) to rotate the strap as needed. In an assembly, install the timing chain, crankshaft sprocket, and a camshaft intermediate sprocket then bolt the camshaft intermediate sprocket retaining bolt to 60 nm (44 lb ft). Mount the timing chain guide and its bolts and tighten torquing to 25 nm (18 lb ft). Then fit the timing chain tensioner, the oil outlet tube with the bolts tightened to 10 nm (89 lb in) and the secondary timing chains. Pull out the pin from the timing chain tensioner release lever, straighten the primary marking vertically, and finally, bolt the crankshaft sprocket to Oil Pump drive friction washer with an outer diameter of 62.0mm (2.4410mm) and an inner diameter 45.25mm (1.7815 in) before re shall junction of the pump.


Related Cadillac Parts
 Cadillac Timing Belt
 Cadillac Crankshaft Gear
 Cadillac Crankshaft Pulley
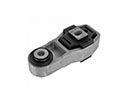 Cadillac Engine Mount Torque Strut
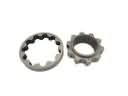 Cadillac Oil Pump Rotor Set
 Cadillac Piston Ring
 Cadillac Pushrod
 Cadillac Rocker Arm
 Cadillac Timing Belt Tensioner
 Cadillac Timing Cover
 Cadillac Timing Cover Gasket
 Cadillac Valve Stem Oil Seal