ChevyParts
My Garage
My Account
Cart
OEM 2003 Buick Century Oil Pan
Oil Drain Pan- Select Vehicle by Model
- Select Vehicle by VIN
Select Vehicle by Model
orMake
Model
Year
Select Vehicle by VIN
For the most accurate results, select vehicle by your VIN (Vehicle Identification Number).
1 Oil Pan found
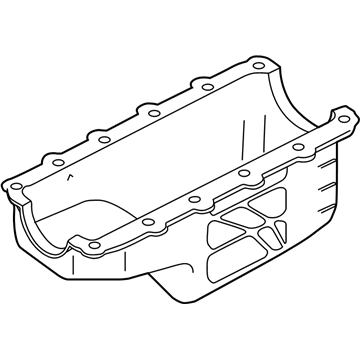
2003 Buick Century Oil Pan Part Number: 12512670
$186.28 MSRP: $276.52You Save: $90.24 (33%)Ships in 1-2 Business DaysProduct Specifications- Other Name: Pan, Engine Oil
- Item Weight: 15.50 Pounds
- Item Dimensions: 21.7 x 12.4 x 9.1 inches
- Condition: New
- Fitment Type: Direct Replacement
- SKU: 12512670
- Warranty: This genuine part is guaranteed by GM's factory warranty.
2003 Buick Century Oil Pan
With a comprehensive array of OEM 2003 Buick Century Oil Pan, from fuel pumps to door handles, our website is a one-stop-shop for your needs. All our genuine 2003 Buick Century Oil Pan are backed by the manufacturer's warranty and are offered at competitive prices in the market. Rest assured, you can shop with complete confidence.
2003 Buick Century Oil Pan Parts Questions & Experts Answers
- Q: How to replace the oil pan on 2003 Buick Century?A: Begin the Oil Pan replacement by disconnecting the negative Battery Cable and removing both left and right Engine Mount struts together with the Drive Belt. First install the fixture known as j35461-b engine support and then lift up the vehicle. First remove A/C Compressor mounting bolts and relocate A/C Compressor before securing it once more then remove the 3-way catalytic converter pipe which connects to the right Exhaust Manifold. Start by draining engine oil while also disconnecting the oil-level sensor electrical connection before removing the Starter motor. Begin by removing the transaxle brace from the Oil Pan followed by relaxing transaxle mount lower nuts then Engine Mount lower nuts before lowering down the vehicle. Place the engine support fixture (J35461-B) beneath the engine to lift it then properly raise the vehicle. First separate the steering shaft intermediate pinch bolt before removing the Engine Mount bracket with the Engine Mount from the Oil Pan followed by extraction of the right lower Ball Joint together with the right outer Tie Rod from the Steering Knuckle. Secure jackstands to the frame assembly while you remove the right side frame bolts and loosens the left side frame bolts. Use the torque wrench adapter (J 39505) to remove right Oil Pan side bolts while lowering the frame right side with jackstands before moving on to left Oil Pan bolts and Oil Pan bolts to extract the Oil Pan and gasket. The rear main bearing cap and engine block need clean surface preparation before applying gm specification gm p/n 1052942 sealant. Afterward the Oil Pan Gasket install begins followed by the Oil Pan itself. Begin by tightening Oil Pan bolts to 25 nm (18 ft. Lbs.) then install left Oil Pan side bolts to 50 nm (37 ft. Lbs.) before using the torque wrench adapter (J 39505) to apply 50 nm (37 ft. Lbs.) of torque to right Oil Pan side bolts. Lower the frame into its original elevation then implement and torque the right and left frame bolts before removing the supporting stands. The first step in repair is to install the right lower Ball Joint and right outer Tie Rod to the Steering Knuckle before moving on to installing the Engine Mount bracket and its Engine Mount to the Oil Pan and steering shaft intermediate pinch bolt. After lowering the vehicle the engine support fixture (J35461-B) can be used to lower the engine while the vehicle returns to its original height. The installation sequence begins with lower nuts at the transaxle mount and Engine Mount and transaxle brace to the Oil Pan and finalizes with the Starter motor installation. Complete installation of the 3-way catalytic converter pipe to the right Exhaust Manifold then secure the oil level sensor electrical connector before installing the A/C Compressor. Proceed with the following steps: remove the engine support fixture (J35461-B), install the left and right Engine Mount struts together with the Drive Belt. Engine top-up with new engine oil must occur before reattaching the negative Battery Cable and leak examination.

