ChevyParts
My Garage
My Account
Cart
OEM 2005 Chevrolet Aveo Alternator
Generator- Select Vehicle by Model
- Select Vehicle by VIN
Select Vehicle by Model
orMake
Model
Year
Select Vehicle by VIN
For the most accurate results, select vehicle by your VIN (Vehicle Identification Number).
1 Alternator found


2005 Chevrolet Aveo Alternator Part Number: 42733403
$418.41 MSRP: $823.43You Save: $405.02 (50%)Ships in 1-2 Business DaysProduct Specifications- Other Name: Generator Assembly-.; Generator, Engine Electrical
- Replaces: 96838439, 96540542, 96954113
- Condition: New
- SKU: 42733403
- Warranty: This genuine part is guaranteed by GM's factory warranty.
2005 Chevrolet Aveo Alternator
With a comprehensive array of OEM 2005 Chevrolet Aveo Alternator, from fuel pumps to door handles, our website is a one-stop-shop for your needs. All our genuine 2005 Chevrolet Aveo Alternator are backed by the manufacturer's warranty and are offered at competitive prices in the market. Rest assured, you can shop with complete confidence.
2005 Chevrolet Aveo Alternator Parts Questions & Experts Answers
- Q: How to overhaul an alternator on 2005 Chevrolet Aveo?A: To do a makeover of the generator, take the generator out of the machine and mark a match line on the end frame to make it easier when reassembling. Here, pry off the plastic cover to make stator connections available, and if welded, then just enough heat to cause the lead to melt with no harsh treatment on the diodes. Cut the wires for disconnection of the stator connections to the rectifier bridge terminals, pry off the baffle and then the disconnect screws for the rectifier-regulator/brush hold assembly. If the brush is re-usable, simply clean it with a soft cloth, and re-mount it back onto the holder with the retaining pin. Next, do remove the brush holder assembly and the regulator, test for the rectifier bridge connecting the ohmmeter terminals with the bridge and the heat sink and retest in reverse. If the readings remain constant replace the rectifier bridge and test the remaining two diodes with any diodes in mind that some of them might not be appropriate metrology for testing. Test the diodes using the ohmmeter, where the ohmmeter terminals are connected to the bridge terminal and the base plate; if the reading is identical, replace the rectifier bridge. Pull out the generator through-bolts by always remembering that the fastening torque for this nut is 81 n.m (60 lb ft) which can take more than manual strength to unbolt. Disassemble to the drive end of the generator to allow the removal of the drive end bearing nut, pulley, and collars. Check the ohmmeter to test the rotor with open circuit; it should read adequately when the reading is high, or the rotor will need to be changed. Check for open and short circuits, the resistances where approximately 1.7 to 2.3 ohms or change the rotor. Eliminate the drive end frame from the shaft and for the vehicles with an internal generator fan as well get the fan off. Go ahead and disassemble the rotor assembly and the stator and test the stator for open circuit by using ohmmeter. Before the assembly, ring off the ring slip end frame, insert it to install the new ring and the stator. Hold the rotor assembly shaft with the drive end frame through the slip ring end assembly so that the space between the slip ring outer lace and end frame casting is 1.9 mm (0.075 in). Mount the generator through-bolts and tighten to 10 n.m (89 lb in). Align the fan, collars, and pulley with the rotor shaft and secure them by using the nut as well as the generator drive and end bearing nut with a torque of 81 n.m (60 lb ft). Replace the generator, attach the brush holder terminal to the regulator terminal in case it was disconnected, attach the brush holder with the retainer pin, and connect the regulator/brush holder assembled terminal to the rectifier terminal. Put the silicone grease between the bridge and the end frame radiation, fix the screws mounting the rectifier regulator/brush holder assembly to the end frame, punch the new baffle with altogether and pin in the brush, be certain to take care of the diode in the rectifier bridge against unnecessary heat throughout welding to stay away from invalidation. Finally, weld the connectors of the rectifier bridge.
Related 2005 Chevrolet Aveo Parts
 2005 Chevrolet Aveo Starter
 2005 Chevrolet Aveo Alternator Bracket
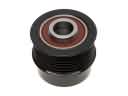 2005 Chevrolet Aveo Alternator Pulley
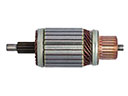 2005 Chevrolet Aveo Armature
 2005 Chevrolet Aveo Battery Cable
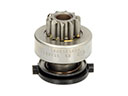 2005 Chevrolet Aveo Starter Drive
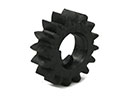 2005 Chevrolet Aveo Starter Drive Gear
 2005 Chevrolet Aveo Starter Solenoid
 2005 Chevrolet Aveo Voltage Regulator