ChevyParts
My Garage
My Account
Cart
OEM 2009 Cadillac XLR Shift Cable
Transmission Shift Cable- Select Vehicle by Model
- Select Vehicle by VIN
Select Vehicle by Model
orMake
Model
Year
Select Vehicle by VIN
For the most accurate results, select vehicle by your VIN (Vehicle Identification Number).
1 Shift Cable found
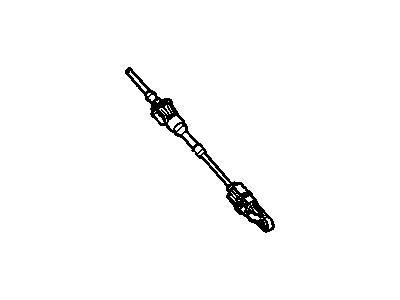
2009 Cadillac XLR Shift Control Cable Part Number: 10347385
Product Specifications- Other Name: Cable Assembly-Automatic Transmission Range Selector Lever; Automatic Transmission Shifter Cable; Cable, Transmission Shift Control Cable
- Item Weight: 0.70 Pounds
- Item Dimensions: 22.7 x 6.2 x 6.3 inches
- Condition: New
- Fitment Type: Direct Replacement
- SKU: 10347385
- Warranty: This genuine part is guaranteed by GM's factory warranty.
2009 Cadillac XLR Shift Cable
With a comprehensive array of OEM 2009 Cadillac XLR Shift Cable, from fuel pumps to door handles, our website is a one-stop-shop for your needs. All our genuine 2009 Cadillac XLR Shift Cable are backed by the manufacturer's warranty and are offered at competitive prices in the market. Rest assured, you can shop with complete confidence.
2009 Cadillac XLR Shift Cable Parts and Q&A
- Q: How to replace the shift cable on 2009 Cadillac XLR?A: Replacement of the Shift Cable requires first beginning by placing the floor shift control into neutral position while also setting the transmission to neutral when replacing damaged cables. The vehicle should be elevated a safe distance from the ground with adequate support. A technician should disconnect the intermediate pipe which gives access to the transmission control assembly cable. During disassembly of the shift control cable remove the driveline tunnel closeout panel yet avoid harsh movement of the shift control cable because its rod end guide tubes are resistant to flexing. A large flat-bladed screwdriver should be used to gently remove shift control cable end clip from floor shift control arm stud while the shift control cable should be extracted from driveline tunnel bracket through a combination of prying cable retaining staple clip off the cable, pushing retaining tab through bracket hole and sliding cable out of slot. The next step entails releasing the shift control cable end clip from the transmission shift lever stud by using a large flat-bladed screwdriver before extracting the shift control cable from the shift control cable bracket through cable retaining staple clip disassembly and Shift Cable retaining tabs depression to pass the tabs through the bracket hole then slide the cable out of the bracket slot. To install the shift control cable position it by entering the small diameter section into the slot and push the retaining tabs through the hole to maintain the cable in place while inserting the Shift Cable retaining staple clip between the tabs. To install the shift control cable on the shift control cable bracket you must slide the smaller diameter portion into the slot until the tabs lock by passing through the bracket hole. The process ends with inserting the Shift Cable retaining staple clip between the tabs. Fasten the shift control cable end clip on the transmission shift lever stud. New installation of a transmission shift control cable requires the removal of shipping guards from the adjuster lock while activating the shift control cable adjuster lock mechanism. After parking the vehicle on the hoist check the shift control cable functions correctly by enabling the parking brake and turning the ignition switch on without starting the engine and applying the regular brakes followed by periodical shifts through gears for one second in each detent position yet should produce an audible sound from the transmission shift lever during these operations. Execute two more repetitions of the previous procedure where you move from park to first. A damaged shift control cable should be inspected after either noticing shift binding or no sound during shifting. To complete the floor shift control operation honestly set the control to park then relax both brakes while turning off the ignition and letting go of the parking brake. You should raise and support the vehicle once more while connecting the intermediate Exhaust Pipe followed by installing the driveline tunnel closeout panel. Perform a test drive on an empty road to verify proper transmission shift quality as well as correct detent maintenance.


