ChevyParts
My Garage
My Account
Cart
OEM Cadillac Catera Hood Cable
Hood Release Cable- Select Vehicle by Model
- Select Vehicle by VIN
Select Vehicle by Model
orMake
Model
Year
Select Vehicle by VIN
For the most accurate results, select vehicle by your VIN (Vehicle Identification Number).
2 Hood Cables found

Cadillac Catera Release Cable Part Number: 90379023
$33.81 MSRP: $81.43You Save: $47.62 (59%)Ships in 1-2 Business Days
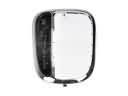
Cadillac Catera Release Handle Part Number: 90191287
Cadillac Catera Hood Cable
Want to cut long-term maintenance and repair costs? Choose OEM Hood Cable. Those parts deliver top durability you can trust. On our site, you'll find a huge catalog of genuine Cadillac Catera parts. Prices are unbeatable, so you can keep more in your pocket. Every OEM Cadillac Catera Hood Cable includes a manufacturer's warranty. You can also get an easy return policy that keeps buying risk free. Fast delivery, get your car on the road quickly. It's simple to search, compare, and order. Stop guessing about quality or fit. Order today and save with parts that last.
Cadillac Catera Hood Cable Parts and Q&A
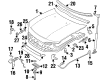
- Q: How to Replace the Hood Cable for Release Cable on Cadillac Catera?A:Begin your Hood Cable replacement by lifting the hood and tugging the hood release lever bracket rearward to unhook it from the pillar mount. Next, undo the self-locking screw from left or driver side radiator cover and get it off. Take out the cable retainer screw and cable retainer bracket, unscrew air inlet duct screws, and reposition the duct. Compress the spring and disconnect the hood cable end from the spring then attach mechanics wire end to the end of the cable to help rout it back through the cowl and strut tower, to aid with pulling the release cable back through the cowl. For installation, route the cable back through the cowl, compress the spring, and install the hood cable to the spring. Install the cable retainer bracket, and make sure that you have not stripped the cable retainer bracket screw, and then tighten it all the way it seated. Place the air inlet duct with screws not stripped and tighten them to fully seated. Tap in the left radiator cover and lock the self-locking screw until it is fully seated. Lastly, pull out the hood release lever bracket and secure it at its place before the hood can be lowered.

Related Cadillac Catera Parts
 Cadillac Catera Automatic Transmission Shift Indicator
 Cadillac Catera Automatic Transmission Shift Levers
 Cadillac Catera Door Armrest
 Cadillac Catera Door Latch Assembly
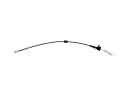 Cadillac Catera Door Latch Cable
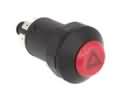 Cadillac Catera Hazard Warning Switch
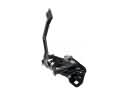 Cadillac Catera Hood Latch
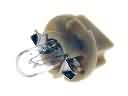 Cadillac Catera Instrument Panel Light Bulb
 Cadillac Catera Lift Support
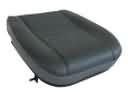 Cadillac Catera Seat Cushion Pad
 Cadillac Catera Trunk Latch
 Cadillac Catera Weather Strip