ChevyParts
My Garage
My Account
Cart
OEM Cadillac DeVille Antenna
Radio Antenna- Select Vehicle by Model
- Select Vehicle by VIN
Select Vehicle by Model
orMake
Model
Year
Select Vehicle by VIN
For the most accurate results, select vehicle by your VIN (Vehicle Identification Number).
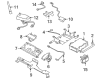
17 Antennas found

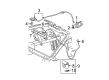
Cadillac DeVille Antenna Assembly Part Number: 25731631
$12.84 MSRP: $91.72You Save: $78.88 (86%)Ships in 1-2 Business Days


Cadillac DeVille Power Antenna Part Number: 88891017


Cadillac DeVille Power Antenna Part Number: 19245563


Cadillac DeVille Power Antenna Part Number: 19245561


Cadillac DeVille Antenna Mast Part Number: 19117040


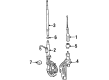
Cadillac DeVille Power Antenna Part Number: 19245562


Cadillac DeVille Antenna Mast Part Number: 19151302

Cadillac DeVille Antenna Assembly Part Number: 25761436

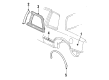
Cadillac DeVille Antenna Part Number: 22072383

Cadillac DeVille Antenna Assembly Part Number: 22048593


Cadillac DeVille Mast Part Number: 1636508

Cadillac DeVille Antenna Assembly Part Number: 12355706
Cadillac DeVille Antenna Assembly Part Number: 25670348
Cadillac DeVille Antenna Part Number: 22039343

Cadillac DeVille Antenna Mast Part Number: 19151300

Cadillac DeVille Antenna Assembly Part Number: 12451037
Cadillac DeVille Antenna Assembly Part Number: 12450709
Cadillac DeVille Antenna
Want to cut long-term maintenance and repair costs? Choose OEM Antenna. Those parts deliver top durability you can trust. On our site, you'll find a huge catalog of genuine Cadillac DeVille parts. Prices are unbeatable, so you can keep more in your pocket. Every OEM Cadillac DeVille Antenna includes a manufacturer's warranty. You can also get an easy return policy that keeps buying risk free. Fast delivery, get your car on the road quickly. It's simple to search, compare, and order. Stop guessing about quality or fit. Order today and save with parts that last.
Cadillac DeVille Antenna Parts Questions & Experts Answers
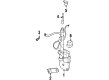
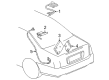
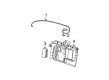
- Q: How to remove and reinstall the GPS antenna on Cadillac DeVille?A:Starting with rear shelf trim panel removal leads to access of the rear shelf carrier panel. Proceed to disconnect electrical connections from rear speaker modules and the rear shelf carrier panel. After accessing the wire harness remove retaining clips on this panel. Start by disconnecting the electrical connections of the rear speaker and the modules found on the rear shelf carrier panel. Then disconnect the wire harness from its retaining clips on that same panel. Use a flatblade screwdriver to pull on the pushpins centers for release followed by removing each gps Antenna assembly. The gps Antenna assembly must be removed after it has been detached from the rear shelf carrier panel. During reassembly position the gps Antenna onto the rear shelf carrier panel then use pushpins to latch it into place by making sure each pin engages through the center first follow these steps to rewire the rear shelf carrier panel: reconnect the harness to its retainers then join wiring to rear speaker components and rear modules and replace the panel with rear shelf trim.

Related Cadillac DeVille Parts
 Cadillac DeVille Fuel Pump Relay
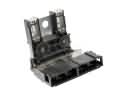 Cadillac DeVille Battery Fuse
 Cadillac DeVille Body Control Module
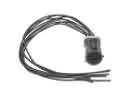 Cadillac DeVille Body Wiring Harness Connector
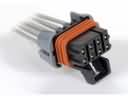 Cadillac DeVille Chassis Wiring Harness Connector
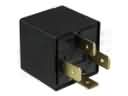 Cadillac DeVille Daytime Running Light Relay
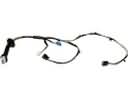 Cadillac DeVille Door Harness Connector
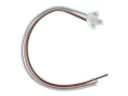 Cadillac DeVille Door Lock Switch Connector
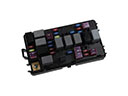 Cadillac DeVille Fuse
 Cadillac DeVille Headlight Relay
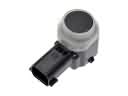 Cadillac DeVille Parking Assist Distance Sensor
 Cadillac DeVille Speaker Connector