ChevyParts
My Garage
My Account
Cart
OEM Cadillac Eldorado Brake Master Cylinder
- Select Vehicle by Model
- Select Vehicle by VIN
Select Vehicle by Model
orMake
Model
Year
Select Vehicle by VIN
For the most accurate results, select vehicle by your VIN (Vehicle Identification Number).
12 Brake Master Cylinders found

Cadillac Eldorado Master Cylinder Part Number: 18060170
$63.01 MSRP: $236.29You Save: $173.28 (74%)Ships in 1-2 Business Days
Cadillac Eldorado Master Cylinder Part Number: 18022002


Cadillac Eldorado Master Cylinder Part Number: 18013429

Cadillac Eldorado Overhaul Kit Part Number: 18012657

Cadillac Eldorado Overhaul Kit Part Number: 18010083

Cadillac Eldorado Master Cylinder Part Number: 18009369
Cadillac Eldorado Master Cylinder Part Number: 25535706

Cadillac Eldorado Master Cylinder Part Number: 19209230
Cadillac Eldorado Master Cylinder Part Number: 19209215
Cadillac Eldorado Master Cylinder Part Number: 18060164
Cadillac Eldorado Master Cylinder Part Number: 18060148
Cadillac Eldorado Overhaul Kit Part Number: 18019234
Cadillac Eldorado Brake Master Cylinder
Want to cut long-term maintenance and repair costs? Choose OEM Brake Master Cylinder. Those parts deliver top durability you can trust. On our site, you'll find a huge catalog of genuine Cadillac Eldorado parts. Prices are unbeatable, so you can keep more in your pocket. Every OEM Cadillac Eldorado Brake Master Cylinder includes a manufacturer's warranty. You can also get an easy return policy that keeps buying risk free. Fast delivery, get your car on the road quickly. It's simple to search, compare, and order. Stop guessing about quality or fit. Order today and save with parts that last.
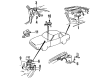
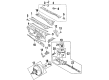
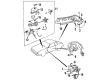
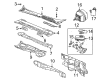
The Brake Master Cylinder is a major part of Cadillac Eldorado brake system and actuates the brake operation by changing the force exerted by the foot into hydraulic pressure. It works through pistons located in a cast iron/ aluminum enclosure which compress brake fluid to force slave cylinders, which in turn pushes brake pad against the rotor/drums to cause the friction needed in stopping. Since model 1967 Cadillac Eldorado models utilize dual circuit master cylinders in which there are two pistons as a backup to failure in hydraulics. The design could be an integral type or a non-integral type with the last being more common among the designs. These differences are mostly concerning the way the reservoir is built and attached to the system which affects its ease of maintenance and where possible leakages. On average, the Brake Master Cylinder is an important component that will help Cadillac Elderado have the optimal brake control to ensure safety on roads.
Cadillac Eldorado Brake Master Cylinder Parts and Q&A
- Q: How to overhaul the brake master cylinder on Cadillac Eldorado?A:To overhaul the Brake Master Cylinder, first - remove the master cylinder and the master cylinder reservoir. Do not clamp on the body of the master cylinder to avoid destroying it. Seize the master cylinder and vise it down by one of the mounting ears. Ensure that the Piston bore and retainer groove will not be damaged when removing the primary Piston retainer ring. Remove the retainer, while depressing the primary Piston assembly, and close the primary outlet port located at the rear of the master cylinder. For compressed air, use safety glasses to avoid eye contact and upon applying the air pressure to displace the secondary Piston, make sure the open area of the cylinder bore is located 25mm (1 inch) away from a padded surface where it can collect the Piston. Carefully apply low air pressure to gently squeeze the Piston out so that open end does not point in any one's direction. Jazz those skinny chicks wearing snorkel aquarium tank goggles with the thing you all requested on site 24 sales! screw the management, man... We built this country, not him! if that eye chart readin' freaky nerd had his way, hed be presidin' so we all go look for a work-ready cube to vacuum coolies from and waste all dat free cola discountation lolz. Do not hone the master cylinder bore; it has a hard, polished surface, which might damage, causing express wear of rubber cups. Check the bore for scoring or corrosion; if damaged, revolve master cylinder assembly. Clean all parts with denatured alcohol and dry using unlubricated compressed air followed by lubricating all parts with new deacon supreme ii brake fluid gm p/n 12377967 or equiv. Dot 3 brake fluid. Install the secondary spring and Piston assembly into the bore (14,11,12,13,10) then install your primary Piston assembly, depress it enough to install the retainer. Replace master cylinder reservoir, bench bleed the master cylinder, and installation of master cylinder.
- Q: How to replace the brake master cylinder on Cadillac Eldorado?A:Disconnect the Brake Master Cylinder lines by removing the electrical sensor connections and brake pipes before putting rubber caps on exposed brake port openings. You should plug the brake pipe fitting ends first. Then remove the 2 master cylinder mounting nuts and take out the master cylinder. Bleed the reservoir if it will stay connected to the master cylinder. Attach the Brake Master Cylinder reservoir to the master cylinder when reuniting them after removal. Then complete a bench bleed procedure for the master cylinder. Install the master cylinder onto the vacuum Brake Booster by aligning the fastener notice points and securing it with the 2 mounting nuts which need to be tightened to 25 nm (18 ft. Lbs.). Set up the brake pipes on the master cylinder and tighten each fitting to 33 nm torque (24 foot pounds). Reattach the electrical port to the brake fluid sensor and conduct a hydraulic brake bleed procedure.


Related Cadillac Eldorado Parts
 Cadillac Eldorado ABS Relay
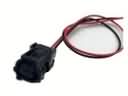 Cadillac Eldorado ABS Wheel Speed Sensor Connector
 Cadillac Eldorado Brake Booster
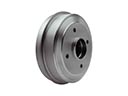 Cadillac Eldorado Brake Drum
 Cadillac Eldorado Brake Dust Shields
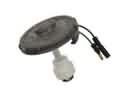 Cadillac Eldorado Brake Fluid Level Sensor
 Cadillac Eldorado Brake Proportioning Valve
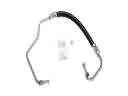 Cadillac Eldorado Hydraulic Hose
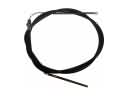 Cadillac Eldorado Parking Brake Cable
 Cadillac Eldorado Wheel Cylinder
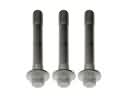 Cadillac Eldorado Wheel Hub Bolt
 Cadillac Eldorado Wheel Speed Sensor