
Popular OEM Cadillac Eldorado Parts
- Body & Hardware Parts View More >
- Steering Parts View More >
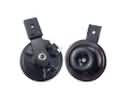
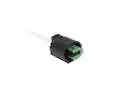
- Electrical Parts View More >
- Air & Fuel Delivery Parts View More >
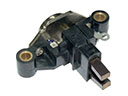
- Charging & Starting Parts View More >
- Engine Parts View More >
- Belts & Cooling Parts View More >
- Suspension Parts View More >
- Emission Control & Exhaust Parts View More >
- Transmission Parts View More >
- Brakes Parts View More >
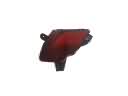
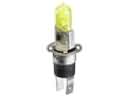
- Headlights & Lighting Parts View More >


Why Buy Genuine Cadillac Eldorado Parts From ChevyPartsGiant.com
Looking for real Cadillac Eldorado parts? ChevyPartsGiant.com may be a better choice to find genuine parts at wallet-friendly prices. We sell only OEM Cadillac Eldorado parts, ensuring perfect fit, reliability, and long-term performance. With our website, you can easily get access to the same parts found at local Cadillac stores. All components are produced by Cadillac and are exclusively fitted on Cadillac Eldorado automobiles. By shopping at our store, you can enjoy the quality of the Cadillac factory without the high prices of brick-and-mortar facilities. We achieve this because we are an online store operating at lower costs, which we pass on to you. We also have a user-friendly platform where you can find and order genuine Cadillac Eldorado parts swiftly. We are here to make your process of restoring a Cadillac Eldorado or dealing with simple repairs quick and inexpensive. We also make it easy to obtain Cadillac Eldorado parts at competitive shipping prices and a team of knowledgeable staff ready to take your order. Choose ChevyPartsGiant.com to save time and money, as well as keep your Cadillac Eldorado in the good condition.
From 1952 until 2002 the Cadillac Eldorado showcased innovative design elements together with luxury features as Cadillac demonstrated its dedication to technical development. The 1957 Eldorado model highlighted a V8 engine as its performance signature element by offering substantial torque and horsepower operations. The engine worked with an advanced automatic transmission system that delivered soft gear transitions while creating better handling which resulted in enhanced refinement during driving sessions. Self-leveling air suspension introduced in the Eldorado enhanced ride quality by providing superior handling and better road condition comfort. Electric brakes along with power steering appeared on the 1960 model to improve both control and response capabilities. During its manufacturing period the Cadillac Eldorado received multiple modifications including its 1965 transition to the Fleetwood body design which focused on stylish and aerodynamic elements. Engineers at Cadillac dedicated their focus to designing the Cadillac Eldorado components by using original Cadillac Eldorado parts which guarantee peak performance alongside dependable operation. Vehicle integrity depends heavily on using original parts since these components fulfill the precise specifications set for Cadillac Eldorado models. The brand's commitment to superior driving experiences becomes evident through its dedication to both quality standards and authentic components which establishes the Cadillac Eldorado as an important automotive historical model.
Cadillac Eldorado groups concerns into starting security, trunk body electronics, and rear suspension leveling. In starting security, Eldorado may not start and the security lamp stays on. Broken column wiring to the ignition lock cylinder blocks key recognition and disables cranking. Replace the ignition lock cylinder, repair the harness, then perform a theft relearn. For trunk electronics, Eldorado can leave the lid ajar or fail to pull down fully. A failed trunk pull down switch stops the cycle, and the latch will not seat. Install a new trunk pull down switch, adjust the striker, and verify smooth travel. In rear suspension, Eldorado can ride too high or sag after parking. A weak auto level ride compressor cannot supply pressure to maintain height. Check fuses and commands, inspect air lines, then replace the auto level ride compressor. Finish with a network scan and a careful road test on the Eldorado. Clear codes, confirm no parasitic draw, and verify battery health on this Cadillac. Lubricate hinges and grounds, then confirm that every Eldorado module sleeps after key off. Document results so Cadillac service history remains consistent across seasons. Follow Cadillac specifications for torque values and relearns.
Cadillac Eldorado Parts and Q&A
- Q: How to replace the overslam bumper on the rear compartment lid on Cadillac Eldorado?A:In order to install the overslam bumper on the rear compartment lid, open the lid, counterclockwisely twist the bumper, and remove it. Installation To install, screw the bumper clockwise. Do not readjust it later and shut the rear compartment lid.
- Q: How to replace the right camshaft on Cadillac Eldorado?A:In order to replace the right camshaft, it is necessary to remove the camshaft cover and position sensor. Turn the crankshaft to TDC, place Camshaft Holding Tool and avoid rotation when taking off the camshaft sprocker bolts. Take off the camshaft bearing caps, clean and wipe off the camshafts and apply lubricant. Installation of components, proper alignment and tightening requirements.
- Q: How to replace the water pump on Cadillac Eldorado?A:In order to change the water pump, drain the cooling system and remove different parts. Detach the pump, clean the surfaces and check the pump with the help of the Water Pump Remover and Installer. Installation: It is necessary to position correctly, screw the pump and reconnect all the parts and then fill the cooling system.


