Make sure this part fits

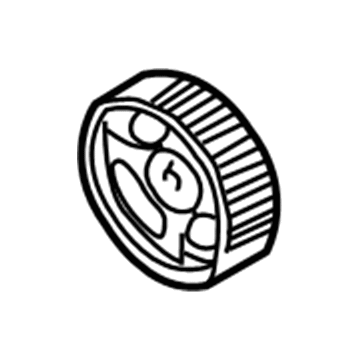
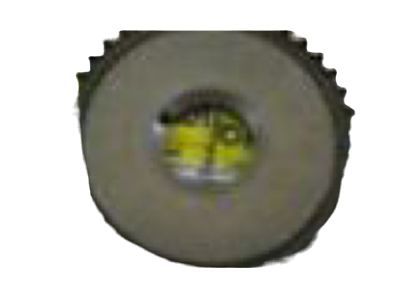
GM 12577790
Drive Shaft

1993-2011 GM

Customer Questions & Expert Answers (37)
GM 12577790 Drive Shaft
  • Part Description
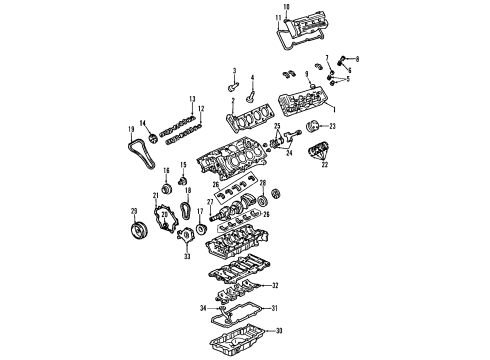
    Shaft-Camshaft Intermediate Drive; Timing Gear
  • Replaces
    12559014
  • Manufacturer
    General Motors
Make sure this part fits
$72.85
Ships in 1-2 Business Days
1
ADD TO CART
  • Related Parts
  • Product Specifications
  • Vehicle Fitment
  • Customer Questions & Expert Answers
  • Product Specifications

    BrandGenuine GM
    Manufacturer Part Number12577790
    Part DescriptionShaft-Camshaft Intermediate Drive; Timing Gear
    Other NamesIntermediate Shaft; Timing Gear Set; Shaft, Engine
    Item Dimensions7.0 x 4.3 x 4.5 inches
    Item Weight1.50 Pounds
    ConditionNew
    Fitment TypeDirect Replacement
    Replaces12559014
    ManufacturerGeneral Motors
    SKU12577790
    Shipping & ReturnShipping Policy Return Policy
    Warning: California's Proposition 65
  • Vehicle Fitment

    Year Make Model Trim Engine
    2006-2011 Cadillac DTSBase, Livery, Luxury, Platinum, Premium8 Cyl 4.6 L GAS
    1994-2005 Cadillac DeVilleBase, Concours, d'Elegance, DHS, DTS, Protection Series8 Cyl 4.6 L GAS
    1993-2002 Cadillac EldoradoBase, ESC, ETC, Sport, Touring8 Cyl 4.6 L GAS
    2004-2009 Cadillac SRXBase8 Cyl 4.6 L GAS
    2006-2009 Cadillac STSV8 Cyl 4.4 L GAS
    1993-2004 Cadillac SevilleSLS, STS8 Cyl 4.6 L GAS
    2004-2009 Cadillac XLRBase, Platinum, V8 Cyl 4.4 L GAS, 8 Cyl 4.6 L GAS
    2001-2003, 1995-1999 Oldsmobile AuroraBase8 Cyl 4.0 L GAS
    2004-2005 Pontiac BonnevilleGXP8 Cyl 4.6 L GAS
  • Customer Questions & Expert Answers

    Q:
    Is this 12577790 designed for my car? Posted by ChevyPartsGiant Specialist
    A:
    Please Select Your Vehicle model to see if part number 12577790 is suitable before ordering.
    Posted by ChevyPartsGiant Specialist
    Q:
    How to replace the camshaft intermediate drive shaft on Cadillac DTS? Posted by Customer
    A:
    When replacing the camshaft intermediate drive shaft the maintenance worker must first detach the sprocket of the drive shaft and should only proceed to shaft removal when signs of wear are present. Proceed to remove both the retaining bolts from the camshaft intermediate drive shaft before pulling the shaft away from the engine. The inspection and cleaning process should be performed on the camshaft intermediate drive shaft. You must place the camshaft intermediate drive shaft into the engine position by securing its bolt holes while tightening the retaining bolts to 10 Nm (89 inch lbs.). Install the camshaft intermediate drive shaft sprocket as the last step of installation.
    Posted by ChevyPartsGiant Specialist
    Q:
    How to replace the left camshaft on Cadillac DTS? Posted by Customer
    A:
    The replacement procedure for the left Camshaft starts with removing the left Camshaft cover while moving the Crankshaft to tdc of compression stroke for #1 cylinder. Both Camshaft sprocket drive pins must be positioned at their highest point of rotation. Using the Camshaft holding tool (J 44212) install it over the camshafts while noting the nearby chain link positions using a paint stick. After installing the Timing Chain retention tool (EN 46327) you should rotate the wing nut (EN 46327) to its highest position. Then position the bottom retention tool on the Cylinder Head near the left exhaust Camshaft sprocket and chain followed by hooking the hook end into a secondary Timing Chain link. Procedure for locking the chain begins with positioning the bottom retention tool near to the left intake Camshaft sprocket and chain. At this point you should not tighten the wing nut. The same steps should then be performed on the upper retention tool located next to the left exhaust Camshaft sprocket and chain. Finish the chain retention process by alternate tighte make use of an open wrench on the hex cast of the camshafts to stop their rotation during the removal of the sprocket bolts and sprockets. Before removing the camshafts with Camshaft followers you need to loosen the bearing cap bolts alternating between each one until valve spring pressure is gone and then remove the bearing caps along with the Camshaft holding tool (J 44212). Carefully examine the camshafts afterward cleaning them while applying lubrication to both the roller pivot pocket on followers and valve slot before mounting them accurately to the valve tip and stationary hydraulic lash adjusters (SHLA). First clean the carriers then apply lubrication to all parts including the Camshaft carriers while placing the Camshaft into the carriers with sprocket drive pins positioned close to the top rotational position. The Camshaft bearing caps need installation following the observation of their markings before applying lubrication to them. Perform bearing cap installation based on these identification marks. The angle meter (J 45059) helps users tighten the Camshaft bearing cap bolts to 5 n.m (44 lb in) while completing another 30 degrees of rotation. The camshafts need alignment followed by Camshaft holding tool (J 44212) reinstallation to install intake and exhaust Camshaft sprockets according to paint marks used during the dismantling process. The open wrench should be used to restrain rotation of the Camshaft sprocket bolts until they reach 120 n.m (89 lb ft) torque. After this, extract the Timing Chain retention tool (EN 46327) and inspect Camshaft sprocket alignment. Finally, remove the Camshaft holding tool (J 44212) for left Camshaft cover installation.
    Posted by ChevyPartsGiant Specialist
    Q:
    How to set the camshaft timing after the camshaft drive system has been disturbed on Cadillac Eldorado? Posted by Customer
    A:
    To establish the Camshaft timing or even to establish the Camshaft timing is significant most of the time when the camb drive had been compromised, you would take it a step by removing the left Camshaft cover, right Camshaft cover, engine front cover and all the three chain tensioners (flipped all the way back if they had been installed) and Oil Pump. Replace the primary and secondary chain guides if they had been removed. Turn the Crankshaft with the help of Crankshaft rotation socket (J 39946) to an approximately 1 o'clock position for the sprocket drive key. Mount the Crankshaft and intermediate sprockets on to primary drive chain with their diagrams facing each other. Assemble the Crankshaft key into the sprocket, avoiding any change of relation in the relation from timing marks with the Crankshaft rotation socket (J 39946). Fasten the intermediate sprocket retainer bolt and tighten it to 60 nm (44 ft. Lbs.). Put on the main stretch of the chain tensioner, tightening the fastening bolts to 25 nm (18 ft.lbs.) and see that the timing marks are oriented vertically. Lock the Crankshaft with the flywheel holder (J44214). Reroute the secondary drive chain for the lh Cylinder Head to be sown the inner array of intermediate shaft teeth and guarantee the chains own contains the Camshaft place sensor incentive. Mount the drive Camshaft sprocket of the exhaust Camshaft for engagement with the Camshaft drive pin marked le (left head exhaust), and intake sprocket for engagement with the pin marked li (left head intake) while the pin is placed parallel to the Cylinder Head face. Loosely install exhaust and intake (W) Camshaft sprocket retainer bolts. Attach the chain tensioner with its mounting bolts to 25 nm (18 ft. Lbs.) and Camshaft sprocket bolts to 120 nm (89 ft.lbs.). Repeat the process for the right side camshafts, which include ri right intake and re right exhaust, and ensure that the re sprocket includes the Camshaft position sensor pick-up. Finally, ensure all timing marks are in place to reinstall the Oil Pump, the three-chain tensioners, the engine front cover, and the two Camshaft covers.
    Posted by ChevyPartsGiant Specialist
    Q:
    How to set the camshaft timing after the camshaft drive system has been disturbed on Cadillac DeVille? Posted by Customer
    A:
    Begin Camshaft timing setup after removing the left Camshaft cover and right Camshaft cover and engine front cover followed by the three chain tensioners and Oil Pump to gain necessary access. In case you removed the primary and secondary chain guides during installation you must reinstall them. Make use of the Crankshaft rotation socket (J 39946) to rotate the Crankshaft until the sprocket drive key reaches about the 1 o'clock position. Mount the Crankshaft together with the intermediate shaft sprockets on the primary drive chain while keeping their timing marks in direct contact. Position the Crankshaft to engage the Crankshaft key with the sprocket while maintaining the timing marks in their original relationship. Secure the primary Camshaft drive chain tensioner using bolts tightened to 25 nm (18 ft. Lbs.). Tighten the Camshaft intermediate sprocket bolt to 60 nm (44 ft. Lbs.). Position the timing marks directly above each other before securing the Crankshaft in position through the use of the flywheel holder (J 44214). Install the secondary drive chain for lh Cylinder Head to run on the inner intermediate shaft teeth while the re Camshaft sprocket must position precisely over the Camshaft position sensor pick-up. Position the exhaust Camshaft sprocket to the chain while both allowing the drive pin to engage the le (left head exhaust) marking on the sprocket and preventing any lower chain slack. Mount the intake Camshaft sprocket until the li (left head intake) marked notch aligns with the pin while maintaining a right angle between the pin and Cylinder Head face. First install the secondary Camshaft drive chain tensioner by tightening its bolts to 25 nm (18 ft. Lbs.) and the Camshaft sprocket bolts to 120 nm (89 ft. Lbs.). Next, loosely install the exhaust and intake Camshaft sprocket retainer bolts. Carefully complete the entire process on the right side, ensuring the re Camshaft sprocket aligns with the Camshaft position sensor. Reassemble the components by installing the Oil Pump followed by the engine front cover and both right and left Camshaft covers.
    Posted by ChevyPartsGiant Specialist
    Q:
    How to set the camshaft timing after the camshaft drive system has been disturbed on Cadillac Seville? Posted by Customer
    A:
    The procedure to reset Camshaft timing requires initial removal of the left Camshaft cover together with the right one and engine front cover and three chain tensioners that need to be retracted if already installed. The next step should involve removal of the Oil Pump. The primary and secondary chain guides should be reinstalled after their previous removal. The Crankshaft requires rotation using the Crankshaft rotation socket (J 39946) until its sprocket drive key reaches the 1 o'clock position. Position the primary drive chain between the Crankshaft and intermediate shaft sprockets with their timing marks kept directly next to each other. Position the Crankshaft assembly onto its shafts and rotate the Crankshaft only if necessary to join the key to the sprocket keeping all timing marks intact. Fasten the Camshaft intermediate sprocket bolt until its torque reaches 60 nm (44 ft. Lbs.). Then attach the primary Camshaft drive chain tensioner according to specifications and tighten its bolts to 25 nm (18 ft. Lbs.) before checking and realigning vertical timing marks. Secure the Crankshaft in its position with the help of the flywheel holder (J 44214). The lh cylinder head secondary drive chain installation must follow the inner teeth of the intermediate shaft with the re Camshaft sprocket properly positioning the Camshaft position sensor. Attach the exhaust Camshaft sprocket to the chain before inserting the Camshaft drive pin into the sprocket notch with marking le while verifying no chain slack exists between components. For installing the intake Camshaft sprocket the pin should point directly at the cylinder head surface. After loosely putting on exhaust and intake Camshaft sprocket retainer bolts, install the secondary Camshaft drive chain tensioner while tightening its bolts to 25 nm (18 ft. Lbs.) and Camshaft sprocket bolts to 120 nm (89 ft. Lbs.). After routing the secondary drive chain over the outer row of intermediate shaft teeth you should repeat the installation process for right side camshafts while double-checking timing marks before putting back the Oil Pump and front cover and right and left Camshaft covers.
    Posted by ChevyPartsGiant Specialist
    Q:
    How to replace the left camshaft on Cadillac XLR? Posted by Customer
    A:
    The necessary tools to replace the left Camshaft include j 45059 angle meter, j 39946 crankshaft socket - 4.01l and 4.6l and en 46328 Camshaft holding tool. Start the procedure by uninstalling both left intake and exhaust Camshaft actuators then you should slowly turn the Camshaft bearing cap bolts one by one until all valve spring tension is eliminated. Commence by removing the Camshaft bearing caps and then take out the camshafts and Camshaft followers one after the other. The camshafts require cleaning followed by inspection before adding generous amounts of gm p/n 12345001 lubricant or equivalent to the roller pivot pocket and valve slot areas on the Camshaft followers. Set every Camshaft follower in position between valve tips and stationary hydraulic lash adjusters (SHLA) with the rounded end facing shla and flat side facing the valve tip. Appy gm p/n 12345001 lubricant or its equivalent to Camshaft carriers and both Camshaft lobes and Camshaft journals after cleaning with a lint-free cloth. Install the Camshaft into the carriers while the sprocket drive pins point toward the highest rotational position and the lobes remain in a resting position while keeping track of Camshaft identification stamps. Place lubricant gm p/n 12345001 or equivalent onto the bearing caps before following the installation procedure according to specified identification marks. First install the Camshaft bearing cap bolts step by step until each one becomes fully seated before torquing them to 5 nm (44 inch lbs.) and continuing to 30 additional degrees with the j 45059 tool. Installation of the en 46328 over the camshafts must be followed by replacing the left exhaust and intake Camshaft actuators in their proper positions.
    Posted by ChevyPartsGiant Specialist
    Q:
    How to replace the left bank camshaft on Cadillac SRX? Posted by Customer
    A:
    The replacement process of left bank camshafts begins by uninstalling upper together with lower intake manifolds before moving onto left bank Camshaft cover along with its sensors and Camshaft position actuator solenoid. The Crankshaft rotation socket (EN 46111) must be used to spin the Crankshaft while the Crankshaft balancer needs removal because this motion positions each Camshaft at low tension with its flats parallel to the Camshaft cover rail. A standard open-end wrench on the Camshaft hex will stop engine rotation as technicians smoothly loosen the Camshaft position actuator bolt while leaving it attached. Following placement of the Timing Chain retention tool (EN 46108) securely into the Timing Chain you should lock the two en 46108 nuts into a tight position. Prior to Camshaft position actuator bolt removal and camshafts disassembly you must write down the marks on the Timing Chain and Camshaft position actuators which will help assembly. Installation requires proper alignment of marks between the Camshaft position actuator and Timing Chain before assembling camshafts to the cylinder head and Camshaft position actuators to their positions. After installing the camshafts together with Camshaft bearing caps remove the en 46108; ensure engine stability through the application of an open-end wrench at the Camshaft hex during Camshaft position actuator installation and tightening. End operations by adding the intake Camshaft position actuator solenoid alongside the Camshaft sensors before installing the Crankshaft balancer and Camshaft cover and attaching both the upper Intake Manifold to the lower Intake Manifold.
    Posted by ChevyPartsGiant Specialist
    Q:
    Is setting the camshaft timing necessary whenever the camshaft drive system has been disturbed on Cadillac STS? Posted by Customer
    A:
    Engineers need to reset Camshaft timing whenever the Camshaft drive system creates misalignment between any chains and sprockets. Proper timing exists between Crankshaft and camshafts when the crank sprocket and intermediate shaft sprocket timing marks line up while all four Camshaft position actuator timing marks point directly (90°) to the cylinder head deck surface at their peak rotation. The access point to the timing chains requires removal of the left Camshaft actuator housing and right Camshaft actuator housing together with engine front cover, engine Oil Pump, right secondary Camshaft drive chain, and left secondary Camshaft drive chain. It is essential to time the primary gears and chain first before using the Crankshaft socket (J 39946) for left or right secondary Camshaft timing adjustment. Turn the Crankshaft so the primary timing gear reaches its upper position alongside the 1 o'clock position of the keyway while the intermediate timing mark points toward the lowest position directly adjacent to the crank gear timing mark. Timing the primary timing gears ensures that the #1 cylinder piston is at top dead center (TDC) beginning its power stroke event. The left bank 2 secondary Timing Chain contains three black links that provide timing support for the bank 2 Camshaft position actuators to the intermediate sprocket. The black link must match the bank 2 exhaust actuator timing mark, bank 2 intake actuator timing mark, and the intermediate sprocket. When attaching the secondary Timing Chain to the intermediate sprocket position the sprocket lb timing mark opposite the Timing Chain black link. Place the li timing mark of the front intake actuator directly on the black timing link before you install the actuator on the Camshaft while maintaining the 90-degree perpendicular alignment to the cylinder head deck surface. Screw in the oil control valve loosely before tightening it to 120 nm (89 ft. Lbs.). Leverage the timing mark on the front of the exhaust actuator which is marked le to line up the actuator at 90 degrees to the cylinder head deck surface before installing it with the oil control valve tightened to 120 nm (89 ft. Lbs.). Next install the left secondary Timing Chain tensioner before moving to the installation of right bank 1 secondary Timing Chain by matching its three black links to respective actuator timing marks and intermediate sprocket position. Secure the secondary Timing Chain to the intermediate sprocket by lining up the sprocket rb timing mark with the black link on the chain. Mount the intake actuator ri on its timing black link position then bolt it into place with a tight 120 nm (89 ft. Lbs.) oil control valve. Drive the timing mark on the re actuator to align it with the black link of your Timing Chain. Install the actuator before using an oil control valve set to 120 nm (89 ft. Lbs.) of torque. Install the engine Oil Pump and front cover together with right and left Camshaft actuator housings when all secondary and primary timing components have the correct alignment.
    Posted by ChevyPartsGiant Specialist
    Q:
    How to replace the right camshaft on Cadillac XLR? Posted by Customer
    A:
    To replace the right Camshaft, first of all collect the required tools: j 45059 angle meter, j 39946 crankshaft socket - 4.0l and 4.6 l , atari / en 46328 Camshaft holdingtool. Start by removing the right intake and exhaust Camshaft actuators than loosen the Camshaft bearing cap a few turns alternatively on each at a time until all valve spring pressure is discharged. Next, followed by the camshafts and Camshaft followers, it is time to retreat the Camshaft bearing caps. Clean and inspect the Camshaft and apply a liberal quantity of lubricant gm p/n 12345001 or equivalent to roller pivot pocket and valve slot areas of the Camshaft followers. Mount the Camshaft followers onto the valve tip and on the stationary hydraulic lash adjusters (SHLA) so that the rounded head of the follower is on the shla. Clean the Camshaft carriers with a lint free cloth and apply lubricant gm p/n 12345001 or equivialent to the Camshaft carriers, Camshaft lobes and the Camshaft journals. Put the Camshaft into the carriers with the sprocket drive pins at the top of the rotation and the lobes in neutral about with mark up the camshafts by stampings. Note the markings on the Camshaft bearing caps for correct norm to be followed during the installation and a lubricant gm p/n 12345001, or equivalent should be applied to the caps before they are installed according to the identification marks. In the sequence, install the Camshaft bearing cap bolts clockwise until fully seated, then tighten to 5 nm (44 inch lbs.) a further 30 degrees. Using the j 45059. Align the camshafts and push en46328 over the camshafts and install right exhaust and intake Camshaft.
    Posted by ChevyPartsGiant Specialist
    Q:
    What is the routing process for the secondary drive chain for the 2006 Cadillac DTS? Posted by Customer
    A:
    Route the secondary drive chain for the LH cylinder head over the inner row of intermediate shaft teeth, ensuring the camshaft drive pin engages the sprocket notch marked LE.
    Posted by ChevyPartsGiant Specialist
    See expert answers on similar Camshaft
    Q:
    How should the camshafts be cleaned and lubricated for the 2000 Cadillac Eldorado? Posted by Customer
    A:
    Clean and inspect the camshafts, applying lubricant GM P/N 12345001 or equivalent to the roller pivot pocket and valve slot areas of the camshaft followers.
    Posted by ChevyPartsGiant Specialist
    See expert answers on similar Camshaft
    Q:
    When should the camshaft intermediate drive shaft be removed for the 2001 Cadillac Eldorado? Posted by Customer
    A:
    The camshaft intermediate drive shaft should only be removed if wear is evident.
    Posted by ChevyPartsGiant Specialist
    See expert answers on similar Camshaft
    Q:
    What is the torque specification for the retaining bolts during installation for the 2009 Cadillac DTS? Posted by Customer
    A:
    Install the camshaft intermediate drive shaft retaining bolts and tighten them to 15 Nm (11 lb ft).
    Posted by ChevyPartsGiant Specialist
    See expert answers on similar Camshaft
    Q:
    What should be done after removing the sprocket for the 2002 Cadillac DeVille? Posted by Customer
    A:
    Next, take out the camshaft intermediate drive shaft retaining bolts.
    Posted by ChevyPartsGiant Specialist
    See expert answers on similar Camshaft
    Q:
    How should the timing marks be aligned for the 2001 Cadillac DeVille? Posted by Customer
    A:
    Ensure the timing marks are aligned vertically and use the Flywheel Holder (J 44214) to lock the crankshaft in position.
    Posted by ChevyPartsGiant Specialist
    See expert answers on similar Camshaft
    Q:
    What should be verified before finishing the installation for the 2003 Cadillac DeVille? Posted by Customer
    A:
    Verify the camshaft sprocket alignment.
    Posted by ChevyPartsGiant Specialist
    See expert answers on similar Camshaft
    Q:
    What is the final step in the process for the 2007 Cadillac DTS? Posted by Customer
    A:
    Finally, install the camshaft intermediate drive shaft sprocket.
    Posted by ChevyPartsGiant Specialist
    See expert answers on similar Camshaft
    Q:
    What is the next step after aligning the camshafts for the 2000 Cadillac DeVille? Posted by Customer
    A:
    Slide the intake and exhaust camshaft sprockets off the J44213 and onto the camshaft pins.
    Posted by ChevyPartsGiant Specialist
    See expert answers on similar Camshaft
    Q:
    What should be done with the camshaft sprocket retainer bolts for the 2002 Cadillac Eldorado? Posted by Customer
    A:
    Loosely install the exhaust and intake camshaft sprocket retainer bolts.
    Posted by ChevyPartsGiant Specialist
    See expert answers on similar Camshaft
    Q:
    What is the next step after installing the camshaft intermediate sprocket bolt for the 2005 Cadillac DeVille? Posted by Customer
    A:
    Install the primary camshaft drive chain tensioner, tightening its bolts to 25 Nm (18 ft. lbs.), and ensure the timing marks are aligned vertically.
    Posted by ChevyPartsGiant Specialist
    See expert answers on similar Camshaft
    Q:
    What should be done after removing the camshaft intermediate drive shaft for the 2008 Cadillac DTS? Posted by Customer
    A:
    Clean and inspect the camshaft intermediate drive shaft.
    Posted by ChevyPartsGiant Specialist
    See expert answers on similar Camshaft
    Q:
    What should be done after aligning the camshafts for the 2000 Cadillac Seville? Posted by Customer
    A:
    Reinstall the J 44212 over them, ensuring proper engagement with the sprocket drive pins.
    Posted by ChevyPartsGiant Specialist
    See expert answers on similar Camshaft
    Q:
    How do you install the new camshaft intermediate drive shaft for the 2001 Cadillac Seville? Posted by Customer
    A:
    Position the camshaft intermediate drive shaft to the engine, aligning the bolt holes, and install the retaining bolts.
    Posted by ChevyPartsGiant Specialist
    See expert answers on similar Camshaft
    Q:
    What should you do after installing the bottom retention tool for the 2004 Cadillac Seville? Posted by Customer
    A:
    Repeat the process for the top retention tool adjacent to the right intake camshaft sprocket and chain, then alternately tighten both wing nuts to retain the chain.
    Posted by ChevyPartsGiant Specialist
    See expert answers on similar Camshaft
    Q:
    What should be done after removing the covers and tensioners for the 2004 Cadillac DeVille? Posted by Customer
    A:
    The oil pump should also be removed, and the primary and secondary chain guides should be reinstalled if they were previously taken off.
    Posted by ChevyPartsGiant Specialist
    See expert answers on similar Camshaft
    Q:
    What is the purpose of the EN-48313 (Timing Chain Retention Tool) for the 2009 Cadillac SRX? Posted by Customer
    A:
    Unscrew the EN-48313 until its legs retract, then insert it between the camshaft actuators, ensuring the top line of the tool is adjacent to the cylinder head.
    Posted by ChevyPartsGiant Specialist
    See expert answers on similar Camshaft
    Q:
    How do you position the crankshaft for timing for the 2002 Cadillac Seville? Posted by Customer
    A:
    Use the Crankshaft Rotation Socket (J 39946) to rotate the crankshaft until the sprocket drive key is at approximately the 1 o'clock position.
    Posted by ChevyPartsGiant Specialist
    See expert answers on similar Camshaft
    Q:
    When should the camshaft intermediate drive shaft be removed for the 2006 Cadillac STS? Posted by Customer
    A:
    The camshaft intermediate drive shaft should only be removed if wear is evident.
    Posted by ChevyPartsGiant Specialist
    See expert answers on similar Camshaft
    Q:
    What should be done with the camshaft intermediate drive shaft after removal for the 2003 Cadillac Seville? Posted by Customer
    A:
    Clean and inspect the camshaft intermediate drive shaft.
    Posted by ChevyPartsGiant Specialist
    See expert answers on similar Camshaft
    Q:
    What is the final step in the camshaft replacement process for the 2009 Cadillac STS? Posted by Customer
    A:
    Reinstall the camshaft cover and the upper intake manifold with the lower intake manifold.
    Posted by ChevyPartsGiant Specialist
    See expert answers on similar Camshaft
    Q:
    What tool should be installed to retain the timing chain for the 2006 Cadillac SRX? Posted by Customer
    A:
    Install the Timing Chain Retention Tool (EN 46108) and firmly tighten the EN 46108 nuts while ensuring the tips are fully engaged into the timing chain.
    Posted by ChevyPartsGiant Specialist
    See expert answers on similar Camshaft
    Q:
    What should be done to create slack in the timing chain for the 2008 Cadillac SRX? Posted by Customer
    A:
    Rotate the camshafts towards each other to create slack in the chain, ensuring the timing chain and camshaft position actuators are marked for proper assembly.
    Posted by ChevyPartsGiant Specialist
    See expert answers on similar Camshaft
    Q:
    What is the next step after removing the camshaft components for the 2007 Cadillac STS? Posted by Customer
    A:
    Remove the crankshaft balancer and rotate the crankshaft using the Crankshaft Rotation Socket (EN 46111) until the camshafts are in a neutral (low tension) position.
    Posted by ChevyPartsGiant Specialist
    See expert answers on similar Camshaft
    Q:
    What should be removed after the intake manifolds for the 2005 Cadillac SRX? Posted by Customer
    A:
    Remove the camshaft cover, camshaft sensors, and the intake camshaft position actuator solenoid.
    Posted by ChevyPartsGiant Specialist
    See expert answers on similar Camshaft
    Q:
    What is the next step after removing the camshaft cover and sensors for the 2008 Cadillac STS? Posted by Customer
    A:
    Remove the intake camshaft position actuator solenoid.
    Posted by ChevyPartsGiant Specialist
    See expert answers on similar Camshaft
    Q:
    How do you install the camshaft intermediate drive shaft for the 2010 Cadillac DTS? Posted by Customer
    A:
    Position the camshaft intermediate drive shaft to the engine, ensuring the bolt holes are aligned.
    Posted by ChevyPartsGiant Specialist
    See expert answers on similar Camshaft
    If you have any questions about this product, please don't hesitate to ask us. We will be happy to help you!

OEM GM 12577790, Excellent Performance and Perfect Fitment

To ensure reliability, purchase GM part # 12577790 Drive Shaft. It is sometimes referred to as GM Camshaft. Choosing OEM parts is the optimal decision for guaranteeing superior quality and perfect performance. These components undergo stringent quality checks and are carefully constructed to comply with GM's factory specifications, ensuring a smooth installation process.

ChevyPartsGiant.com is a leading supplier of genuine GM parts such as GM 12577790 Drive Shaft. Our website boasts an extensive inventory of OEM GM parts, available at highly competitive prices in the market. Should you require any new genuine GM parts, rest assured we will deliver them swiftly and efficiently to your doorstep. Furthermore, all our parts come with the assurance of a manufacturer's warranty. For detailed Cadillac parts information, click here.
Choose ChevyPartsGiant for discounted prices, exceptional service and fast delivery