ChevyParts
My Garage
My Account
Cart
OEM Chevrolet Uplander Door Moldings
- Select Vehicle by Model
- Select Vehicle by VIN
Select Vehicle by Model
orMake
Model
Year
Select Vehicle by VIN
For the most accurate results, select vehicle by your VIN (Vehicle Identification Number).
17 Door Moldings found

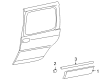
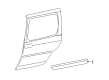
Chevrolet Uplander Body Side Molding, Red, Rear Driver Side Part Number: 15824005
$64.85 MSRP: $96.52You Save: $31.67 (33%)Ships in 1-3 Business DaysChevrolet Uplander Body Side Molding, Blue, Rear Driver Side Part Number: 15815327
$10.40 MSRP: $104.50You Save: $94.10 (91%)Ships in 1-2 Business Days
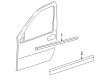
Chevrolet Uplander Body Side Molding, Outer Passenger Side Part Number: 25915131
$13.11 MSRP: $18.75You Save: $5.64 (31%)

Chevrolet Uplander Body Side Molding, Black, Rear Passenger Side Part Number: 25915098
$50.68 MSRP: $72.51You Save: $21.83 (31%)Chevrolet Uplander Body Side Molding, Rear Driver Side Part Number: 15947747
$53.69 MSRP: $81.20You Save: $27.51 (34%)Ships in 1-2 Business Days
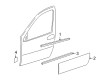
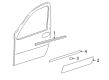
Chevrolet Uplander Belt Weatherstrip, Front Outer Driver Side Part Number: 10395346
$6.94 MSRP: $10.87You Save: $3.93 (37%)Ships in 1-2 Business Days
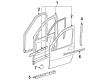
Chevrolet Uplander Body Side Molding, Front Passenger Side Part Number: 25915117
$23.48 MSRP: $34.94You Save: $11.46 (33%)Ships in 1-2 Business Days
Chevrolet Uplander Body Side Molding, Black, Rear Passenger Side Part Number: 15947692
$15.85 MSRP: $23.59You Save: $7.74 (33%)Ships in 1-3 Business Days

Chevrolet Uplander Door Moldings
Want to cut long-term maintenance and repair costs? Choose OEM Door Moldings. Those parts deliver top durability you can trust. On our site, you'll find a huge catalog of genuine Chevrolet Uplander parts. Prices are unbeatable, so you can keep more in your pocket. Every OEM Chevrolet Uplander Door Moldings includes a manufacturer's warranty. You can also get an easy return policy that keeps buying risk free. Fast delivery, get your car on the road quickly. It's simple to search, compare, and order. Stop guessing about quality or fit. Order today and save with parts that last.
Chevrolet Uplander Hubcaps are parts that add value to the style of the Chevrolet Uplander limited edition minivan as well as increase the vehicle's functionality. Sturdy and stylish structural designs of these door moldings are typically made of plastic, polished stainless or chrome, so they can safely serve as a shield between precious metal of the car door and daily scratces, impacts or other forms of abuse. Chevrolet Uplander has side moldings, door edge guards, and belt moldings with their difference being in the purpose that they serve. The side moldings, placed near the vehicle's widest part, boost the side impact resistance of the Uplander, whereas door edge moldings help avoid scuffs while getting in or out of the vehicle. Also, the outside belt moldings are incorporated to the style, making the Chevrolet Uplander a better sedan. The suitable fitment of these door moldings means that they can be fitted in the various forms of Uplander that was produced within 2005 to 2009 without affecting the efficiency and safety of the vehicle. Chevrolet Uplander Door Moldings are not only considered as aesthetic items to be seen on this vehicle but can also be deemed as elements that help to enhance the lifetime and ability of this car. High visibility in the automotive segment Differentiating design aspects such as well-built molds, attractive design, and construction, Chevrolet Uplander Door Moldings are living symbols of the brand's promises in terms of quality and consumer satisfaction.
Chevrolet Uplander Door Moldings Parts Questions & Experts Answers
- Q: How to replace the rear lower door moldings on Chevrolet Uplander?A:To remove the lower rear door molding, first, the Door Trim Pad Clip Remover (J 38778) should be used to disengage the push-in retainers that are on the center front and center back of the lower door molding. Next, heat the lower edge of the door molding with the help of the Heat Gun (J 25070), in a circular motion, for 30 seconds, maintaining the tool at a distance of about 152 mm (6 in) from the surface. Handle with great care a plastic flat-bladed instrument to desist the adhesive tape from the lower edge of the door molding then pull the edge to the lower edge to release it from the tape, thereafter, pull the top edge up to detach from the top edge. Don't remove the door molding just clean the body panel using oil-free naphtha or alcohol and ensure that there is no adhesive trace and that the surface has dried properly before you put the new rear door lower molding. Before installing, make sure that the 2 retainers at the new molding are fixed, while avoiding touching the exposed adhesive tape or accumulations of dirt from the tape. Heat the door to at least 21°C (70°F) using the Heat Gun (J 25070), then peel off the protective liner on the back side of the molding. Place the retainer into the rear hole first, then align the front retainer second and wet-out the molding so as to achieve maximum adhesion to the door.

Related Chevrolet Uplander Parts
 Chevrolet Uplander Window Regulator
 Chevrolet Uplander Body Mount Hole Plug
 Chevrolet Uplander Car Speakers
 Chevrolet Uplander Center Console Base
 Chevrolet Uplander Cup Holder
 Chevrolet Uplander Door Handle
 Chevrolet Uplander Door Seal
 Chevrolet Uplander Emblem
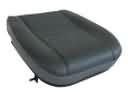 Chevrolet Uplander Seat Cushion Pad
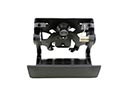 Chevrolet Uplander Tailgate Handle
 Chevrolet Uplander Weather Strip
 Chevrolet Uplander Windshield Wiper