ChevyParts
My Garage
My Account
Cart
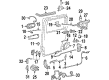
OEM Chevrolet Venture Turn Signal Switch
Turn Signal Indicator Switch- Select Vehicle by Model
- Select Vehicle by VIN
Select Vehicle by Model
orMake
Model
Year
Select Vehicle by VIN
For the most accurate results, select vehicle by your VIN (Vehicle Identification Number).
2 Turn Signal Switches found


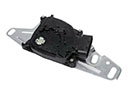
Chevrolet Venture Turn Signal Switch Part Number: 26073715
$291.22 MSRP: $546.90You Save: $255.68 (47%)Ships in 1-2 Business DaysChevrolet Venture Turn Signal Switch Part Number: 26073716
$317.60 MSRP: $479.03You Save: $161.43 (34%)Ships in 1-2 Business Days
Chevrolet Venture Turn Signal Switch
Want to cut long-term maintenance and repair costs? Choose OEM Turn Signal Switch. Those parts deliver top durability you can trust. On our site, you'll find a huge catalog of genuine Chevrolet Venture parts. Prices are unbeatable, so you can keep more in your pocket. Every OEM Chevrolet Venture Turn Signal Switch includes a manufacturer's warranty. You can also get an easy return policy that keeps buying risk free. Fast delivery, get your car on the road quickly. It's simple to search, compare, and order. Stop guessing about quality or fit. Order today and save with parts that last.
A Chevrolet Venture Turn Signal Switch serves as an essential driving component for safe navigation and performance of the car vehicle. The steering column contains this lever mechanism that indicates direction changes to enhance communication with other drivers while on the road. This Chevrolet Venture Turn Signal Switch earned its reputation for performance and reliability which supports the entire series of Chevrolet Venture models made from 1997 to 2005. Through activation of turn signal lights the Turn Signal Switch helps create safe driving environments in Chevrolet Venture vehicles because it allows drivers to signal their movements effectively. Its tough material structure enables the component to address daily operational requirements thus establishing a strong market presence. The car Turn Signal Switch is characterized by two special elements: it features an ergonomic design for smooth handling and it interfaces with other vehicle systems to improve driving experiences. The car Turn Signal Switch establishes itself as a dependable solution for Chevrolet Venture owners because of its dedication to quality alongside compatibility features. Any the automaker model driver needs this piece to guarantee smooth and safe operation on public roads.
Chevrolet Venture Turn Signal Switch Parts and Q&A
- Q: How to replace the Turn Signal Switch on Chevrolet Venture?A:Start by disabling SIR and pulling up the trim parts before taking notes of the connection exiting the abrasion sleeve on the steering column wire harness assembly. First we have to separate the wire harness assembly from its securing strap and disconnect the turn signal and multifunction switch assembly from both the SIR system coil connector and its own connector. Press aside the two connectors at the turn signal and multifunction switch assembly to remove them from the bulkhead connector. Then take out the two pan head tapping screws that hold the turn signal and multifunction switch assembly to the steering column tilt head assembly. Install the turn signal and multifunction switch assembly on the steering column tilt head while keeping the electrical contact in direct contact with the turn signal cancel cam assembly. Use the two pan head screws to fasten the switch assembly onto the tilt head base. Torque the top screw to 3 Nm and the side screw to 7 Nm. Fit the turn signal and multifunction switch assembly connectors into bulkhead connector to join them with the SIR coil connector. Insert the abrasion sleeve back onto the steering column wire harness by aligning its electrical components with the ignition lock cylinder properly. Use the strap to mount the new wire harness and reconnect the trim covers while enabling the SIR system.

Related Chevrolet Venture Parts
 Chevrolet Venture Automatic Transmission Shift Position Sensor Switch
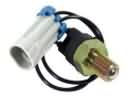 Chevrolet Venture Back Up Light Switch
 Chevrolet Venture Brake Light Switch
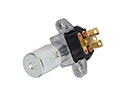 Chevrolet Venture Dimmer Switch
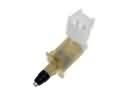 Chevrolet Venture Door Jamb Switch
 Chevrolet Venture Headlight Switch
 Chevrolet Venture Ignition Switch
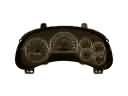 Chevrolet Venture Instrument Cluster
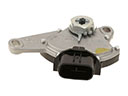 Chevrolet Venture Neutral Safety Switch
 Chevrolet Venture Seat Heater Switch
 Chevrolet Venture Speedometer
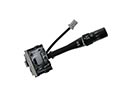 Chevrolet Venture Wiper Switch