ChevyParts
My Garage
My Account
Cart
OEM GMC Sierra 3500 Starter Solenoid
Starter Solenoid Relay- Select Vehicle by Model
- Select Vehicle by VIN
Select Vehicle by Model
orMake
Model
Year
Select Vehicle by VIN
For the most accurate results, select vehicle by your VIN (Vehicle Identification Number).
1 Starter Solenoid found

GMC Sierra 3500 Solenoid Part Number: 97779441
$95.54 MSRP: $191.84You Save: $96.30 (51%)
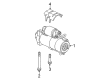
GMC Sierra 3500 Starter Solenoid
Want to cut long-term maintenance and repair costs? Choose OEM Starter Solenoid. Those parts deliver top durability you can trust. On our site, you'll find a huge catalog of genuine GMC Sierra 3500 parts. Prices are unbeatable, so you can keep more in your pocket. Every OEM GMC Sierra 3500 Starter Solenoid includes a manufacturer's warranty. You can also get an easy return policy that keeps buying risk free. Fast delivery, get your car on the road quickly. It's simple to search, compare, and order. Stop guessing about quality or fit. Order today and save with parts that last.
GMC Sierra 3500 Starter Solenoid Parts and Q&A
- Q: How to replace the Starter Solenoid on GMC Sierra 3500?A:For changing the Starter motor solenoid, first, take out the Starter motor and reposition the m-terminal stud weather cover. Clean the epoxy coating off the m-terminal stud after which loosen the m-terminal stud nut and pull the cable out of the m-terminal stud. Then, disconnect the solenoid bolts, separate the solenoid from the housing, and unhook the solenoid plunger from the drive gear lever. It is to be observed that the spring is situating against the drive gear lever and that the drive gear lever is sitting in the solenoid plunger loop. Get rid of the solenoid housing, if necessary the solenoid plunger and spring. For installation, optionally, if required, install solenoidal plunger and spring and three bond silicone 1207b, gm p/n 97720043, to secure a Starter Solenoid attachment area. Mount the solenoid in a manner that the drive gear lever is inserted into the solenoid plunger, loop by pulling the gear lever and the plunger toward itself while tipping the solenoid, to align the lever with the loop then pushing the solenoid towards the house. Make sure that the drive gear lever is properly inserted into the solenoid plunger loop so as to prevent abnormal or no functioning of the Starter. Install the solenoid pump pulsation bolts and torque them to approximately 10 Nm (89 lb in). Remove spill over silicone round solenoid base for weather seal then fit cable to the m-terminal stud between washers and the terminal nut tightening the m-terminal stud nut to 8 Nm (71 lb in). Seal the m-terminal stud connection using three bond silicone 1207b gm p/n 97720043 and replace the m-terminal stud weather cover. Perform pre-installation bench tests; carry out the Starter in the free-run situation, and install the Starter motor.

Related GMC Sierra 3500 Parts
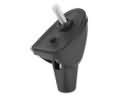 GMC Sierra 3500 Antenna Base
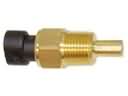 GMC Sierra 3500 Coolant Temperature Sensor
 GMC Sierra 3500 Engine Control Module
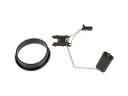 GMC Sierra 3500 Fuel Level Sensor
 GMC Sierra 3500 Headlight Relay
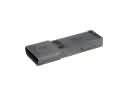 GMC Sierra 3500 Ignition Control Module
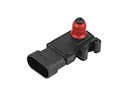 GMC Sierra 3500 MAP Sensor
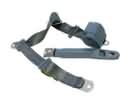 GMC Sierra 3500 Seat Belt
 GMC Sierra 3500 Seat Heater Switch
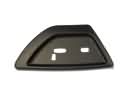 GMC Sierra 3500 Seat Switch Panel
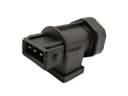 GMC Sierra 3500 Vehicle Speed Sensor
 GMC Sierra 3500 Washer Pump