ChevyParts
My Garage
My Account
Cart
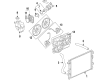
OEM Saturn Fan Blade
Fan Propeller Blade- Select Vehicle by Model
- Select Vehicle by VIN
Select Vehicle by Model
orMake
Model
Year
Select Vehicle by VIN
For the most accurate results, select vehicle by your VIN (Vehicle Identification Number).
29 Fan Blades found


Saturn Fan Blade Part Number: 15875024
$28.56 MSRP: $53.65You Save: $25.09 (47%)Ships in 1-2 Business DaysProduct Specifications- Other Name: Blade Kit, Engine Cooling; Dual Radiator and Condenser Fan Assembly; Cooling Fan Assembly


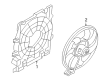
Saturn Fan Shroud Part Number: 23434158
$415.99 MSRP: $854.83You Save: $438.84 (52%)Ships in 1-2 Business DaysProduct Specifications- Other Name: Fan Assembly-Engine Cooler; Dual Radiator and Condenser Fan Assembly.; Fan Assembly; Fan, Engine Air Cooling(Electrical)
- Replaces: 25927026, 15226663, 20972760

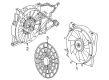
Saturn Cooling Fan Part Number: 89022508
$30.28 MSRP: $105.82You Save: $75.54 (72%)Ships in 1-2 Business DaysProduct Specifications- Other Name: Blade Kit, Engine Cooling; Dual Radiator and Condenser Fan Assembly; Cooling Fan Assembly; Fan Blade

Saturn Fan Shroud Part Number: 15816789
$250.59 MSRP: $380.91You Save: $130.32 (35%)Ships in 1-3 Business DaysProduct Specifications- Other Name: Shroud Assembly-Engine Coolant Fan; Radiator Fan Assembly; Fan Assembly
- Replaces: 15290116, 15112778

Saturn Fan Blade, Green Line Part Number: 15788745
$173.83 MSRP: $357.22You Save: $183.39 (52%)Ships in 1-2 Business DaysProduct Specifications- Other Name: Fan, Engine Air Cooling; Dual Radiator and Condenser Assembly; Cooling Fan Assembly; Fan Assembly; Fan Module; Fan, Engine Air Cooling(Electrical)
- Replaces: 15254643, 22713868, 15236647

Saturn Fan Blade Part Number: 89019136
$121.88 MSRP: $220.59You Save: $98.71 (45%)Ships in 1-2 Business DaysProduct Specifications- Other Name: Blade, Engine Cooling; Dual Radiator and Condenser Fan Assembly; Cooling Fan Assembly; Blade, Engine Air Cooling(Electrical)


Saturn Cooling Fan Part Number: 15860809
$264.92 MSRP: $544.40You Save: $279.48 (52%)Ships in 1-2 Business DaysProduct Specifications- Other Name: Fan, Engine Air Cooling (Electrical); Dual Radiator and Condenser Fan Assembly; Engine Cooling Fan.; Fan Assembly; Fan, Engine Air Cooling(Electrical)
- Replaces: 22722577

Saturn Cooling Fan Part Number: 22718765
$209.83 MSRP: $431.21You Save: $221.38 (52%)Ships in 1-2 Business DaysProduct Specifications- Other Name: Fan, Engine Air Cooling; Dual Radiator and Condenser Fan Assembly.; Fan Assembly; Fan, Engine Air Cooling(Electrical)
Saturn Fan Shroud Part Number: 15849644
$120.89 MSRP: $357.86You Save: $236.97 (67%)Ships in 1-2 Business DaysProduct Specifications- Other Name: Fan, Engine Air Cooling (Electrical); Engine Cooling Fan Assembly; Radiator Fan Assembly; Cooling Fan Assembly; Fan Assembly; Fan Module; Fan, Engine Air Cooling(Electrical)

Saturn Fan Blade Part Number: 20757670
$45.00 MSRP: $84.50You Save: $39.50 (47%)Ships in 1-2 Business DaysProduct Specifications- Other Name: Blade Kit, Engine Cooling; Dual Radiator and Condenser Fan Assembly; Radiator Fan Assembly; Cooling Fan Assembly

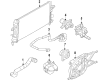
Saturn Fan Assembly Part Number: 15867598
$218.85 MSRP: $412.94You Save: $194.09 (47%)Ships in 1-2 Business DaysProduct Specifications- Other Name: Fan, Engine Air Cooling (Electrical); Radiator Fan Assembly; Fan Module; Fan, Engine Air Cooling(Electrical)

Saturn Fan Blade Part Number: 89019143
$117.98 MSRP: $213.52You Save: $95.54 (45%)Ships in 1-2 Business DaysProduct Specifications- Other Name: Blade, Engine Cooling; Radiator Fan Assembly; Blade, Engine Air Cooling(Electrical)

Saturn Fan & Motor Part Number: 13126382
$333.09 MSRP: $684.50You Save: $351.41 (52%)Ships in 1-2 Business DaysProduct Specifications- Other Name: Fan, Engine Air Cooling (Electrical); Radiator Fan Assembly; Cooling Fan; Fan, Engine Air Cooling(Electrical)
Saturn Fan Shroud Part Number: 15816787
$196.78 MSRP: $299.11You Save: $102.33 (35%)Product Specifications- Other Name: Shroud Assembly-Engine Coolant Fan; Dual Radiator and Condenser Fan.; Fan Assembly
- Replaces: 15112780, 15290118

Saturn Fan Assembly Part Number: 15867597
Product Specifications- Other Name: Fan, Engine Air Cooling (Electrical); Radiator Fan Assembly; Fan, Engine Air Cooling(Electrical)

Saturn Fan & Motor Part Number: 13147274
Product Specifications- Other Name: Fan, Engine Air Cooling (Electrical); Radiator Fan Assembly; Fan; Fan, Engine Air Cooling(Electrical)

Saturn Fan Assembly Part Number: 15211588
Product Specifications- Other Name: Shroud Assembly-Engine Coolant Fan; Radiator Fan Assembly
Saturn Fan Assembly Part Number: 15211589
Product Specifications- Other Name: Shroud Assembly-Engine Coolant Fan; Radiator Fan Assembly

Saturn Fan Blade Part Number: 22719384
Product Specifications- Other Name: Fan Assembly; Dual Radiator and Condenser Fan Assembly; Dual Radiator Condenser Fan Assembly; Radiator Fan Assembly; Fan Module
Saturn Fan & Motor Part Number: 13205947
Product Specifications- Other Name: Fan, Engine Air Cooling (Electrical); Radiator Fan Assembly; Engine Cooling Fan; Fan; Fan, Engine Air Cooling(Electrical)
| Page 1 of 2 |Next >
1-20 of 29 Results
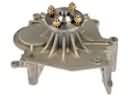
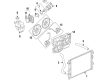
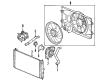
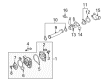
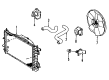
Saturn Fan Blade
Choose OEM Fan Blade, you're making the optimal decision for superior quality and perfect performance. You can feel confident because each component goes through stringent quality checks. Every part is carefully built to comply with Saturn's factory specifications. You'll enjoy a smooth, worry-free installation that fits just right. At ChevyPartsGiant.com, you'll find it easy to get top-quality OEM Saturn Fan Blade. You can shop at highly competitive prices and protect your budget. All our genuine Saturn parts include a dependable manufacturer's warranty. You'll also appreciate our straightforward return policy and swift delivery services for extra convenience.
The heat is pulled by Saturn Fan Blade through the radiator to cool the engine and to maintain the air conditioner in the car even on hot days. Saturn entered the picture in 1991 with a new strategy of making cars that could be experienced by ordinary motorists. The dent resistant plastic panels would laugh at the bumps of the grocery cart hence no paint would chip off. Lost foam casting produced accurate lightweight components of engines, which applied less fuel without becoming weak. The presence of a multistage paint line gave it a three dimensional and lasting effect, and further increased the lifespan of the vehicles. The company also assembles cars on its own dedicated assembly plant and invites Saturn owners to visit it which earned it trust. The introduction of friendly advertising that referred to itself as another type of car created clubs, picnics and plant homecoming parades where a customer became a fan of the reliability and community over style. The Saturn Fan Blade is a composite rotor with curved vanes which bolts on the cooling hub, and which is designed to move air flow and remain quiet. Park, wait till the engine is cool, and unhook the battery before changing a replacement Fan Blade. Take off the fan shroud to create space, keep the hub in one position and unscrew the old fasteners. Loosen the worn blade and push the new Fan Blade onto the hub and align all the mounting holes. Insert thread locker, screw in bolts evenly in crisscross pattern, and move the blade by hand to make sure that the tip is clear. Install the shroud back, reconnect the battery and ensure that the engine starts and that it rotates smoothly without wobbling.