ChevyParts
My Garage
My Account
Cart
OEM Saturn L200 Headlight Bulb
Headlamp Bulb- Select Vehicle by Model
- Select Vehicle by VIN
Select Vehicle by Model
orMake
Model
Year
Select Vehicle by VIN
For the most accurate results, select vehicle by your VIN (Vehicle Identification Number).
5 Headlight Bulbs found


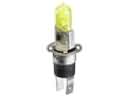
Saturn L200 Headlamp Bulb, Green Line Part Number: 13586977
$14.63 MSRP: $27.48You Save: $12.85 (47%)Ships in 1-2 Business Days

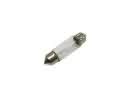
Saturn L200 Signal Lamp Bulb, Front Part Number: 9442399
$4.16 MSRP: $7.42You Save: $3.26 (44%)Ships in 1-3 Business Days


Saturn L200 Turn Signal Bulb Part Number: 13502321
$9.98 MSRP: $17.82You Save: $7.84 (44%)Ships in 1-2 Business Days


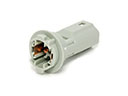
Saturn L200 Bulb & Socket, Green Line Part Number: 9441732
$13.16 MSRP: $23.52You Save: $10.36 (45%)Ships in 1-3 Business Days


Saturn L200 Bulb & Socket Part Number: 19257054
$14.11 MSRP: $25.22You Save: $11.11 (45%)Ships in 1-2 Business Days
Saturn L200 Headlight Bulb
Want to cut long-term maintenance and repair costs? Choose OEM Headlight Bulb. Those parts deliver top durability you can trust. On our site, you'll find a huge catalog of genuine Saturn L200 parts. Prices are unbeatable, so you can keep more in your pocket. Every OEM Saturn L200 Headlight Bulb includes a manufacturer's warranty. You can also get an easy return policy that keeps buying risk free. Fast delivery, get your car on the road quickly. It's simple to search, compare, and order. Stop guessing about quality or fit. Order today and save with parts that last.
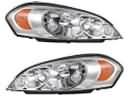
Saturn L200 Headlight Bulb provides clear light on each night drive in the Saturn L200, the smart sedan that combines vibrant handling with reliable comfort, with an economical four cylinder engine, smooth automatic transmission, and lightweight polymer panels that bounce off the dents without making the cabin noisey or violent. The L200 welcomes the drivers with considerate controls, the ability to experience stability, and a variety of air bags that evokes trust and compensates the dedicated Saturn society that appreciates integrity and low costs. The Headlight Bulb is a filament-enclosed by a heat resistant glass shell, which transforms the electrical energy to an intense forward light penetrating the fog, making known to oncoming traffic, or relieving the strain of long travel on the eyes, and all without additional wiring or adapting to the factory socket. The reason why many drivers prefer this Headlight Bulb is that it has long lifespan and is resistant to vibration and it can maintain a clear beam pattern comparable to the original reflector fitted in the L200 headlamp assembly, which makes the L200 noticeable in any type of weather. The proper Headlight Bulb is an easy safety win since an upgrade to a high quality Headlight Bulb allows the Saturn lighting system to remain sharp and avoids any ticket due to lamp burnout. Installation, parking correctly, cutting power, opening the hood, unclipping the harness, twisting out the applied bulb, not touching the new one, pushing it completely in, locking the retainer, connecting back, and ensuring the bright steady light are the installation steps.