ChevyParts
My Garage
My Account
Cart
OEM Saturn Pinion Washer
Pinion Nut Washer- Select Vehicle by Model
- Select Vehicle by VIN
Select Vehicle by Model
orMake
Model
Year
Select Vehicle by VIN
For the most accurate results, select vehicle by your VIN (Vehicle Identification Number).
1 Pinion Washer found

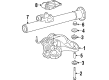
Saturn Differential Washer Part Number: 11517918
$13.27 MSRP: $26.66You Save: $13.39 (51%)Product Specifications- Other Name: Washer; Washer, Differential Carrier
Saturn Pinion Washer
Choose OEM Pinion Washer, you're making the optimal decision for superior quality and perfect performance. You can feel confident because each component goes through stringent quality checks. Every part is carefully built to comply with Saturn's factory specifications. You'll enjoy a smooth, worry-free installation that fits just right. At ChevyPartsGiant.com, you'll find it easy to get top-quality OEM Saturn Pinion Washer. You can shop at highly competitive prices and protect your budget. All our genuine Saturn parts include a dependable manufacturer's warranty. You'll also appreciate our straightforward return policy and swift delivery services for extra convenience.
The Saturn Pinion Washer ensures the differential operates smoothly with the load distributed evenly and the shaft played kept under control, both the yoke and nut are not worn out early. The part is born of the progressive vision of Saturn, the part goes hand-in-hand with the cars that are being produced in the specialized factory introduced by the brand in 1991. The brand had a following due to the fact that its dent resistant plastic body parts bounced off in parking lots, its engines were able to cast their lost foams to trim extra weight and create intricate openings, and a more robust multi-stage paint procedure ensured maintainable colors over the years. These decisions made the cars last longer, cost less when they were serviced and allowed the Saturn drivers to feel proud to have a car that did not look old and still handled sharp even after long distances. A Pinion Washer is a small hardened spacer, which is mounted on the pinion shaft, preloads the nut, and secures it, and the Saturn Pinion Washer is sized to fit exactly the differentiation geometry of the brand. Installation requires levely ground and chocking the wheels, drawing a mark on the driveshaft position, dismounting it, and unloading the yoke off the pinion. Clean threads, check seals, choose Pinion Washer and rub a little oil over it, slip washer over the shaft and replace the yoke, tighten threadlocker, then apply a torque wrench to ensure that factory rotational drag is attained. Finish the installation by turning on the axle and ensuring that the motion is smooth, reattaching the driveshaft, lowering the vehicle, and briefly testing it to make sure there is no noticeable leak in the differential.
Related Saturn Parts
 Saturn Axle Beam Mount
 Saturn Axle Pivot Bushing
 Saturn Axle Shaft
 Saturn Axle Support Bushings
 Saturn Coil Springs
 Saturn Control Arm Bolt
 Saturn Control Arm Bushing
 Saturn Lateral Arm
 Saturn Spindle Nut
 Saturn Sway Bar Kit
 Saturn Trailing Arm Bushing
 Saturn Wheel Seal