Make sure this part fits

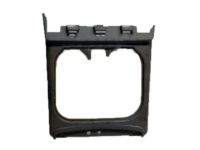
GM 88986684
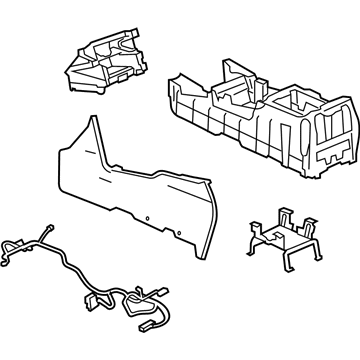
Console Assembly

2003-2007 GM

Customer Questions & Expert Answers (4)
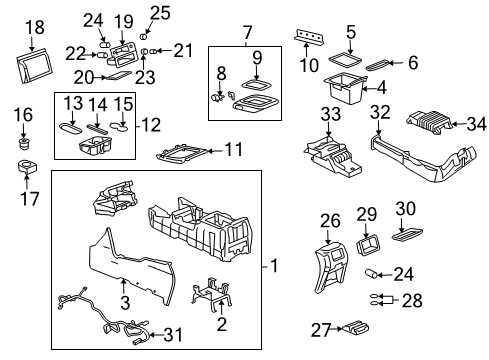
GM 88986684 Console Assembly
  • Part Description
    Compartment, Seat Separator Console; Center Console Base; Console
  • Position
    Front
  • Manufacturer
    General Motors
  • Manufacturer's Notes
    This part is discontinued.
Make sure this part fits
  • Vehicle Fitment

    Year Make Model Trim Engine
    2003-2006 Chevrolet Avalanche 1500Base, LS, LT, North Face, On Road Edition, WBH, Z66, Z718 Cyl 5.3 L FLEX, 8 Cyl 5.3 L GAS
    2003-2006 Chevrolet Avalanche 2500Base, LS, LT8 Cyl 8.1 L GAS
    2003-2007 Chevrolet Silverado 1500Base, LS, LT, LTZ, SS, WT, Z71 Off-Road6 Cyl 4.3 L GAS, 8 Cyl 4.8 L GAS, 8 Cyl 5.3 L FLEX, 8 Cyl 5.3 L GAS, 8 Cyl 6.0 L GAS
    2007 Chevrolet Silverado 1500 ClassicLS, LT, SS, WT6 Cyl 4.3 L GAS, 8 Cyl 4.8 L GAS, 8 Cyl 5.3 L FLEX, 8 Cyl 5.3 L GAS, 8 Cyl 6.0 L GAS
    2005-2006, 2003 Chevrolet Silverado 1500 HDBase, LS, LT8 Cyl 6.0 L GAS
    2007 Chevrolet Silverado 1500 HD ClassicLT8 Cyl 6.0 L GAS
    2003-2004 Chevrolet Silverado 2500Base, LS, LT, WT8 Cyl 6.0 L GAS
    2003-2007 Chevrolet Silverado 2500 HDBase, LS, LT, LTZ, WT8 Cyl 6.0 L CNG, 8 Cyl 6.0 L GAS, 8 Cyl 6.6 L DIESEL, 8 Cyl 8.1 L GAS
    2007 Chevrolet Silverado 2500 HD ClassicLS, LT, WT8 Cyl 6.0 L GAS, 8 Cyl 6.6 L DIESEL, 8 Cyl 8.1 L GAS
    2003-2006 Chevrolet Silverado 3500Base, LS, LT, WT8 Cyl 6.0 L CNG, 8 Cyl 6.0 L GAS, 8 Cyl 6.6 L DIESEL, 8 Cyl 8.1 L GAS
    View More
    Warning: California's Proposition 65
  • Customer Questions & Expert Answers

    Q:
    Is 88986684 compatible with my car? Posted by ChevyPartsGiant Specialist
    A:
    Please Select Your Vehicle model to see if part number 88986684 is suitable before ordering.
    Posted by ChevyPartsGiant Specialist
    Q:
    How to replace the Center Console without the console mounting bracket on Chevrolet Avalanche 1500? Posted by Customer
    A:
    Initially remove the radio amp Fuse located under the hood electrical center if your vehicle has a bose(R) amplifier before trying to replace the console without the console mounting bracket. Begin by taking off the floor console bezel and cup holder and the bolts which fix the console to the i/p. Start by removing the console storage bin while also removing the end panel of the Center Console. The next step involves removing four screws which secure the upper console bracket to the lower console bracket. The front screws have been displayed in the accompanying graphic. Reposition the inboard seat track trim while moving both front seats fully forward to access the screws securing the rear console side panels before removing them all. Move front seats all the way to their maximum rear position and next remove screws securing each front console side panel. Remove the console assembly from the vehicle by disconnecting its electrical connector at the floor console. The floor console installation begins with electrically connecting the floor console before continuing with the rest. The screws connecting upper bracket to lower bracket need a torque of 2 n.m (18 lb in) followed by bolts that join the console to i/p which should reach 4 n.m (35 lb in). Both front console side panel screws require installation followed by a torque setting of 2 n.m (18 lb in). Reinstall and torque to 2 n.m (18 lb in) both rear console side panel screws after pushing both front seats completely forward. Follow these installation steps: reposition the inboard seat track trim , reconnect the floor console electrical connector then mount the Center Console end panel followed by console storage bin installation before adding the cup holder and upper console bezel. You must place the radio amp Fuse back into its appropriate slot.
    Posted by ChevyPartsGiant Specialist
    Q:
    How to replace the Center Console with the console mounting bracket on Chevrolet Avalanche 2500? Posted by Customer
    A:
    Begin the process of console replacement with console mounting bracket installation by first removing both front seats. The vehicle requires a bose(R) amplifier so the radio amp Fuse must be removed from the hood electrical center. As the next step remove both the upper console bezel together with the cup holder. Begin console removal by unscrewing the screws which mount the console to the i/p followed by disconnecting wire connectors so you can extract the console assembly from the vehicle. Extract the rear seat audio control device from the console whenever possible. Start your installation process by attaching any removed rear seat audio controls back to the console. Reattach the console to the vehicle before connecting all wire connectors. Proceed with console installation by sliding into position to secure the retaining screws according to the fastener notice in service precautions. Attach the console using 2 screws, applying 4 n.m (35 lb in) of torque to each screw. Reinstall the cup holder after placing the upper console bezel back into position and then restore the radio amp Fuse only if it had been removed from the system prior to both front seats reinstallation.
    Posted by ChevyPartsGiant Specialist
    Q:
    How to replace the Center Console without the console mounting bracket on Chevrolet Avalanche 2500? Posted by Customer
    A:
    To remove the console without the console mounting bracket, first, if it has a bose(R) amplifier, they are required to pull the radio amp Fuse, which is found under the hood electrical center. Next, take off the floor console bezel, cup holder, and bolts that stabilize the console to the i/p. Subsequently, remove the console storage bin and the Center Console end panel, as well as the 4 screws that hold the upper console bracket to the lower console bracket, the front 2 screws of which are depicted in the graphic. Move front seats fully forward as well as reposition the inboard seat track trim to expose the rear console side panel screw, and remove the rear console side panel screws as well. Push both front seats to their fullest rearward position and take out both front console side panel screws. Pull the floor console electrical connector after disconnecting it and remove the console assembly from the vehicle. For the installation, begin by installing floor console on the floor console electrical connector. Screw on the screws that hold the upper console bracket and the lower console bracket together, tightening them to 2 n.m (18 lb in), and then drill bolts through console to i/p, tightened to 4 n.m (35 lb in). Mount both front console side panel screws and tighten them up to 2 n.m (18 lb in) , then move both front seats fully forward to mount both rear console side panel screws and tighten them up to 2 n.m (18 lb in). Move the inboard seat track trim, attach the floor console electrical connector, set up the Center Console end panel, console storage bin, cup holder, upper console bezel, and finally, radio amp Fuse.
    Posted by ChevyPartsGiant Specialist
    If you have any questions about this product, please don't hesitate to ask us. We will be happy to help you!

OEM GM Console Assembly 88986684 Designed for Proper Fit and Performance

Original OEM GM parts deliver superior quality and meet all performance standards needed for optimal automotive operation. The authentic part identified by 88986684 Console Assembly is available in the market under the name GM Center Console Base, Center Console. This genuine product has a full warranty coverage from the manufacturer available at all authorized GM dealers throughout the United States. This part 88986684 Console Assembly fits certain Chevrolet Silverado 1500, Silverado 2500 HD, Silverado 2500 models, as well as GMC Sierra 1500, Sierra 2500 HD, Sierra 2500 models.
The original GM component designated by manufacturer part number 88986684 maintains top performance when functioning as the Compartment, Seat Separator Console; Center Console Base; Console unit at its Front. The component 88986684 is constructed from durable material and its dimensions span 63.9 x 30.4 x 26.9 inches while weighing 43.00 Pounds. The component is ready in New condition to ensure full compatibility with your vehicle system. The part 88986684 has available replacement options. GM manufacturer provides a warranty that ensures reliable operation of this product. The Shipping Policy and Return Policy pages outline complete details regarding shipping procedures and return processes.
If you want to save money in the long run on maintenance and repairs, you should choose OEM products because they're of the top level of durability. Are you on the quest of finding GM parts, our site is worth a visit. We stock an endless selection of high-quality GM components including things like ignition coils all the way through to fan shrouds and all at prices that can not be matched. You have nothing to worry about because all our OEM parts are covered with a manufacturer warranty, which guarantees superior quality and value.