Popular OEM Chevrolet Silverado 2500 Parts
- Body & Hardware Parts View More >
- Steering Parts View More >
- Electrical Parts View More >
- Air & Fuel Delivery Parts View More >
- Charging & Starting Parts View More >
- Engine Parts View More >
- Belts & Cooling Parts View More >
- Suspension Parts View More >
- Driveline & Axles Parts View More >
- Emission Control & Exhaust Parts View More >
- Transmission Parts View More >
- Brakes Parts View More >
Why Buy Genuine Chevrolet Silverado 2500 Parts From ChevyPartsGiant.com
Looking for real Chevrolet Silverado 2500 parts? ChevyPartsGiant.com may be a better choice to find genuine parts at wallet-friendly prices. We sell only OEM Chevrolet Silverado 2500 parts, ensuring perfect fit, reliability, and long-term performance. With our website, you can easily get access to the same parts found at local Chevrolet stores. All components are produced by Chevrolet and are exclusively fitted on Chevrolet Silverado 2500 automobiles. By shopping at our store, you can enjoy the quality of the Chevrolet factory without the high prices of brick-and-mortar facilities. We achieve this because we are an online store operating at lower costs, which we pass on to you. We also have a user-friendly platform where you can find and order genuine Chevrolet Silverado 2500 parts swiftly. We are here to make your process of restoring a Chevrolet Silverado 2500 or dealing with simple repairs quick and inexpensive. We also make it easy to obtain Chevrolet Silverado 2500 parts at competitive shipping prices and a team of knowledgeable staff ready to take your order. Choose ChevyPartsGiant.com to save time and money, as well as keep your Chevrolet Silverado 2500 in the good condition.
The Chevrolet Silverado 2500 arrived in 1998 to replace the Chevy C/K lineup and the developers have since focused intensely on strengthening its powerful engine and transmission components. The GMT800 platform served as the foundation for the initial Chevrolet Silverado 2500 models which included reinforced suspension systems specifically engineered for heavy-duty towing tasks. The Chevrolet Silverado 2500 achieves about 300 horsepower through its standard 6.0L V8 Vortec 6000 engine. The Chevrolet Silverado 2500 achieves a maximum towing capacity of approximately 18,500 pounds (8,390 kg) when equipped with the optional Duramax 6.6L turbo-diesel engine and the right towing accessories. The high-strength steel frame rails of the chassis undergo hydroforming which boosts rigidity and stability while ensuring long-term durability. The Silverado 2500 gives customers a choice between conventional steel and lightweight composite powertrain components as part of their dedication to modern efficiency standards. The transmission design optimal operation which provides clean shifting between gears to boost the driving experience. The Chevrolet Silverado 2500 provides comfortable operation through the use of new sound-absorbing materials and specially designed glove-friendly controls. Vehicles of the Chevrolet Silverado 2500 maintain their performance and reliability because official GM parts remain available. Tests for quality control establish the parts' durability and compatibility with the Chevrolet Silverado 2500 and guarantee their long-term functionality for the vehicle.
The Chevrolet Silverado 2500 categorizes the issues into fuelling system administration, driver train control, and ignition warranty. In its ignition service, the Silverado 2500 should expect a part replacement of about every 100000 miles in the form of spark plugs. Red-painted or red-marked electrodes contribute to misfire and lengthen cranking time at hot restarts on the Silverado 2500. Replace spark plugs, check wires, and check coil output and idle quality. Drivetrain control Silverado 2500 can show service 4WD and refuse mode changes. A sticking position sensor or transfer case shift motor misreport's range and confuses the module. Change fuses and electricity, rework wiring, regain connections to the metal, and affirm that the Silverado 2500 shifts smoothly. In terms of fuel measurement, the Silverado 2500 leads to an unstable reading of the gauge and inaccurate readings of the range of the fuel in the tank. The fuel level sensor located in the module can have a failure that will register the wrong values to the driver. Replace the fuel pump module in high-mileage trucks and inspect connectors and corrosion. Track Chevrolet test schedules, check grounds, and establish stable pressures on road tests. Apply Chevrolet torque numbers and note performance to ensure it keeps the Silverado 2500 predictable and reliable. Identifying a problem in your Chevrolet service records can then be applied in the future to help diagnose the issue.
Chevrolet Silverado 2500 Parts and Q&A
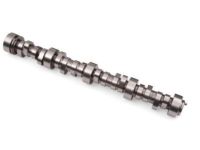
- Q: How to replace the camshaft on Chevrolet Silverado 2500?A:I need to replace the camshaft, to do it, I need to raise the hood and take out the hinge bolts. Then, loosen the radiator support, front cover, valve lifters and camshaft sensor. Position the timing marks, and remove the camshaft sprocket bolts. Pull out the camshaft carefully and clean up and lubricate first before replacing. Screw everything in place.
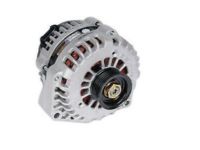
- Q: How to replace the alternator on Chevrolet Silverado 2500?A:In order to change the generator, looseness the negative battery cable and take off accessory drive belt. Unscrew the electrical connector of the generator and take out the generator cable. Turn the generator bolts and pull out the generator. Install the generator again, fix the cables and re-run the battery cable.
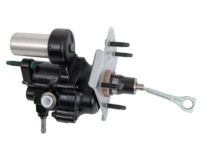
- Q: How to replace the hydraulic brake booster on Chevrolet Silverado 2500?A:In order to change the hydraulic brake booster, block the wheels by pressing the park brake. Unscrew disconnection hoses, pull-out the master-cylinder, and stop lamp switch, and remove the booster assembly. Install a new gasket, fix the booster and reconnect the bits. Bleed the system and bleed the park brake, be careful with brake fluid.


