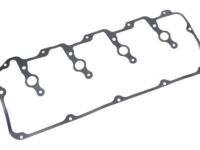
Make sure this part fits

GM 17113542
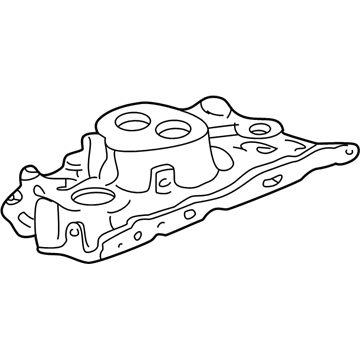
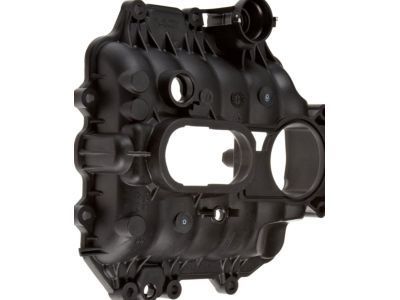
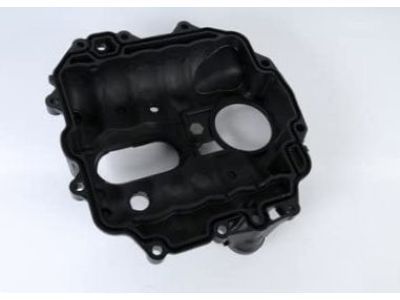
Intake Manifold

1996-2007 GM

Customer Questions & Expert Answers (25)
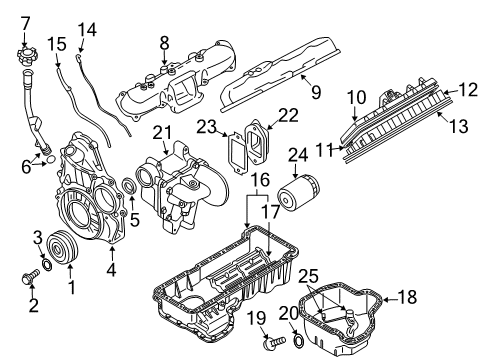
GM 17113542 Intake Manifold
  • Part Description
    Manifold Kit, Engine Fuel Intake Manifold
  • Position
    Upper
  • Replaces
    17113213
  • Manufacturer
    General Motors
  • Manufacturer's Notes
    This part is discontinued.
Make sure this part fits
  • Related Parts
  • Product Specifications
  • Vehicle Fitment
  • Customer Questions & Expert Answers
  • Product Specifications

    BrandGenuine GM
    Manufacturer Part Number17113542
    Part DescriptionManifold Kit, Engine Fuel Intake Manifold
    Other NamesManifold
    Item Dimensions7.4 x 13.5 x 12.5 inches
    Item Weight3.30 Pounds
    PositionUpper
    ConditionNew
    Fitment TypeDirect Replacement
    Replaces17113213
    ManufacturerGeneral Motors
    SKU17113542
    WarrantyThis genuine GM part is guaranteed by GM's factory warranty.
    Shipping & ReturnShipping Policy Return Policy
    Warning: California's Proposition 65
  • Vehicle Fitment

    Year Make Model Trim Engine
    1996-2005 Chevrolet AstroBase, LS, LT6 Cyl 4.3 L GAS
    1996-1998 Chevrolet C1500Base, Cheyenne, Silverado, WT6 Cyl 4.3 L GAS
    2003-2007 Chevrolet Express 1500Base, LS, LT6 Cyl 4.3 L GAS
    1996-2006 Chevrolet Express 2500Base, LS6 Cyl 4.3 L GAS
    1996-1998 Chevrolet K1500Base, Cheyenne, Silverado, WT6 Cyl 4.3 L GAS
    1999-2006 Chevrolet Silverado 1500Base, LS, LT, WT6 Cyl 4.3 L GAS
    2007 Chevrolet Silverado 1500 ClassicLS, WT6 Cyl 4.3 L GAS
    1996-1998 GMC C1500Sierra GT, Sierra SL, Sierra SLE, Sierra SLT, Sierra Special6 Cyl 4.3 L GAS
    1996-1998 GMC K1500Sierra SL, Sierra SLE, Sierra SLT, Sierra Special6 Cyl 4.3 L GAS
    1996-2005 GMC SafariBase, SL, SLE, SLT, SLX6 Cyl 4.3 L GAS
    View More
  • Customer Questions & Expert Answers

    Q:
    Is this 17113542 designed for my car? Posted by ChevyPartsGiant Specialist
    A:
    Please Select Your Vehicle model to see if part number 17113542 is suitable before ordering.
    Posted by ChevyPartsGiant Specialist
    Q:
    How to replace the intake manifold on Chevrolet Express 1500? Posted by Customer
    A:
    To replace the Intake Manifold, remove the Throttle Body, then disconnect the lifters of the quartet, as well as manifold absolute pressure (MAP) sensor and Knock Sensor electrical connectors. Then, remove the Knock Sensor harness connector and lay the electrical harness aside. Remove the pcv hose then remove the MAP Sensor from the Intake Manifold. The accelerator control cable bracket bolts and bracket itself should be removed. For the evap purge solenoid vent tube, first pull the evap tube end off the solenoid, pull out the evap pipe quick connect fitting retainer and then pull the evap tube retainer off the vapor pipe. Then, you need to remove the evap purge solenoid bolt, solenoid, and isolator, from the Intake Manifold, Intake Manifold bolts, and manifold respectively. Replace old Intake Manifold gaskets with new ones. When installing the Intake Manifold, spread a 5 mm (0.20 inch) thickness of thredlock gm p/n 12345382 (Canadian P/N 10953489) or equivalent on the threads of the Intake Manifold bolts. Tighten the Intake Manifold bolts in sequence to 5 nm (44 inch lbs) first pass and 10 nm (89 inch lbs) on final pass. Reinstall the evap purge solenoid, isolator, and bolt by tightening solenoid bolt to 10 nm (89 inch lbs. ). Install the evap purge solenoid vent tube to the solenoid and vapor pipe, and install the accelerator control cable bracket, then the bolts, tightening it to 10 nm (89 inch lbs.). Gently apply some clean engine oil on the seal of MAP Sensor then reattach it back to the Intake Manifold. Reconnect the pcv hose, the Knock Sensor harness connector and the MAP Sensor - knock sensor electrical connections along with the EGR Valve, if so equipped. Finally, install fuel injectors themselves as well as the Throttle Body.
    Posted by ChevyPartsGiant Specialist
    Q:
    How to replace the lower intake manifold on Chevrolet Silverado 1500 Classic? Posted by Customer
    A:
    Draining the cooling system should be the first step before replacing the lower Intake Manifold. Start by disconnecting the fuel pipes/hoses and Distributor and evap canister harness from the purge solenoid valve. Start by opening the heater outlet hose's clamp then remove both the heater outlet hose from the Intake Manifold and the heater inlet hose from the Water Pump. Start by repositioning the hoses then remove the cruise control cable from the Throttle Body lever and disconnect the accelerator control cable from both the Throttle Body lever and the accelerator control cable bracket. Disconnect the electrical connectors for the sequence of components that includes air conditioning (A/C) compressor clutch followed by pressure switch and throttle position (TP) sensor, idle air control (IAC) motor and control port injector module, evap canister purge solenoid valve and manifold absolute pressure (MAP) sensor. Disconnect the engine wiring harness clip bolt, engine wiring harness bracket and ground wire at the rear of the right cylinder head. Separate the positive crankcase ventilation (PCV) valve hose and disconnect the power Brake Booster Vacuum Hose then remove the radiator inlet hose from the Thermostat Housing. Access the front Intake Manifold bolt by removing the Drive Belt and loosening the power steering (P/S) pump rear bracket nut then moving the p/s pump bracket nuts and bolts forward while sliding the bracket ahead. Discard the gaskets while removing the Intake Manifold itself along with the lower bolts. Thoroughly inspect and clean the Intake Manifold-lower before continuing. When installing the gasket place 4.0 mm (0.157 inch) adhesive directly on the cylinder head side of each gasket ending while keeping them in place until the adhesive sets. After setting the locating pins install the Intake Manifold Gasket and use a 5 mm (0.197 inch) bead of adhesive starting from the front and rear engine block tops, which should extend 13 mm (0.50 inch) onto each intake gasket. Install the Intake Manifold while applying thread lock adhesive to the lower Intake Manifold-bolt connections if using existing fasteners. Tighten the bolts in the specified sequence using a three-step method: first pass to 3 nm (27 inch lbs.), second pass to 12 nm (106 inch lbs.)use a three-step torque method to tighten each bolt starting at 3 nm (27 inch lbs.) then 12 nm (106 inch lbs.) before finishing at 15 nm (11 ft. Lbs.). Reinstall the p/s pump bracket, tighten the nuts to 41 nm (30 ft. Lbs.)first install the Drive Belt before reinstalling the p/s pump bracket and connecting the Water Pump inlet hose and radiator inlet hose together with the power Brake Booster Vacuum Hose. Finally connect the PCV Valve Hose. Reinstall the Water Pump inlet hose along with the radiator inlet hose before you attach the power Brake Booster Vacuum Hose followed by the PCV Valve Hose. Position the engine wiring harness and bracket, installing the bracket stud and tightening it to 25 nm (18 ft. Lbs.), followed by the rear bracket nut at the evap canister purge solenoid valve to 9 nm (80 inch lbs.) apply torque of 16 nm (12 ft. Lbs.) when securing the ground nut. Start by reinstalling the engine wiring harness bracket. Secure the nuts to 12 nm (106 inch lbs.) of torque. Install the engine wiring harness clip bolt by torqueing it to 9 nm (80 inch lbs.). After that, connect the evap canister harness, map sensor, tp sensor, iac motor, and control port injector module. Reattach the accelerator control cable bracket with cables to the Throttle Body, tightening the nuts to 9 nm (80 inch lbs.)connect the a/c compressor clutch and a/c pressure switch before reinstalling the engine wiring harness bracket. After fitting the Throttle Body lever to the bracket you should install the accelerator cable while reattaching the cruise control cable if your vehicle has it and placing the heater hoses before refitting the fuel pipes/hoses and Distributor for filling the cooling system.
    Posted by ChevyPartsGiant Specialist
    Q:
    How to install the intake manifold on Chevrolet Astro? Posted by Customer
    A:
    To put on the Intake Manifold, put a 4.0 mm (0.157 in.) dab of adhesive gm p/n 12346141 (Canadian P/N 10953433) or similar to the lower Intake Manifold gasket side of the Cylinder Head gasket on each ending while still wet to the fingers and install the manifold. Next install the lower Intake Manifold gasket onto the Cylinder Head using the locating pins for the gasket to seat correctly. Then also apply a bead of adhesive gm p/n 12346141 (Canadian P/N 10953433) or equivalent approximately 5.0 mm (0.197 in.) wide across the front top of the engine block, extending 13 mm (0.50 in.) onto each lower Intake Manifold gasket and then similar sized bead across the rear top of the engine block, again extending 13 mm (0.50 in.) onto each gasket. Mount the low Intake Manifold onto the engine block and in the event of reuse of fasteners apply threadlock gm p/n 12345382 (Canadian P/N 10953489) or equivalent at the threads of the Intake Manifold bolts prior to installation. It is essential that the required method to tighten lower Intake Manifold fasteners be followed, as a 3-step procedure: first, fasten the bolts as as sequence (1-8) to 3 nm (27 lb.in.), subsequently to 12 nm (106 lb.in.) and, ending-up, to 15 nm (11 lb.ft.). Finally, twist the evaporative emission (EVAP) canister solenoid valve harness to push the elbow inwards to snap the quick connect in position, after which draw it outwards to secure it.
    Posted by ChevyPartsGiant Specialist
    Q:
    How to replace the upper intake manifold on GMC Safari? Posted by Customer
    A:
    Start by removing the engine cover and air cleaner outlet duct away from the Throttle Body to replace the upper Intake Manifold. Cable the accelerator control along with the cruise control from the throttle shaft while removing the bracket. Disassemble the PCV Valve Hose assembly while also removing the Intake Manifold stud-mounted a/c hose bracket nut as well as removing the engine wiring harness bracket from its stud position. Bring power down on all of these system components: a/c compressor clutch and high pressure cutoff switch and Throttle Position Sensor and idle air control motor including fuel meter assembly and absolute pressure sensor and evap canister solenoid valve. Before removing the evap canister purge solenoid allow the engine wiring harness to be properly relocated. Begin by detaching the vacuum hose from the Intake Manifold followed by unbolted the transmission fluid filler tube from the accelerator control cable bracket then remove the accelerator control cable bracket. First remove all fuel lines and upper Intake Manifold studs then detach the upper Intake Manifold and discard both its gasket and seal. Perform cleaning on all sealing components while examining the upper Intake Manifold for any sign of damage. When installing a new upper Intake Manifold you should remove the pcv valve cover so you can discard its seal. Replace the MAP Sensor and Throttle Body when necessary then install a new pcv valve seal before applying clean engine oil and securely replacing the component. Place a new upper Intake Manifold gasket in the groove of the upper Intake Manifold before securing the manifold onto the lower Intake Manifold. Attach a new seal to the fuel meter body assembly then lubricate both components. The team should use threadlock gm p/n 12345382 or comparable product on retained fasteners before installing and tightening the upper Intake Manifold attaching studs to 5 nm (44 inch lbs.) on the first pass and 9 nm (80 inch lbs.) on the final pass. First reconnect the fuel lines then install the evap canister purge solenoid valve and reattach the accelerator control cable bracket while tightening all nuts and studs to 12 nm (106 inch lbs.). Position the engine wiring harness before you attach the transmission fluid fill tube and bolt along with connecting the vacuum hose. The electrical connectors for a/c compressor clutch, a/c high pressure cutoff switch, throttle position sensor, idle air control motor, fuel meter body assembly, manifold absolute pressure sensor and evap canister purge solenoid valve must be reestablished before continuing. Install engine wiring harness bracket with tightness of 12 nm (106 inch lbs.) and place the a/c hose bracket with tightness of 5 nm (44 inch lbs.). Verify proper placement of engine wiring harness bracket at the evap canister purge solenoid valve before tightening to 8 nm (71 inch lbs.). Conclude the PCV Valve Hose assembly then install cruise control components if present before attaching accelerator control components and reattaching the air cleaner outlet duct followed by engine cover replacement.
    Posted by ChevyPartsGiant Specialist
    Q:
    How to replace the intake manifold on GMC Sierra 1500? Posted by Customer
    A:
    Unplug the electrical connectors of the manifold absolute pressure (MAP) sensor and Knock Sensor before removing the Intake Manifold. Remove the Throttle Body and fuel injectors first. Remove the harness connector from the Intake Manifold and put the electrical harness out of the way. For the vehicle with vacuum assisted brakes you should remove vacuum brake booster rope from the rear of the Intake Manifold and positive crankcase ventilation (PCV) rope. Next, disconnect the MAP Sensor and the evaporative emission (EVAP) purge solenoid vent tube by unfastening it from the solenoid and vapor pipe. Remove the bolt, solenoid , and isolator from the inlet manifold, weaken and take off the inlet manifold together with the inlet manifold gaskets , replace them with the new ones. Clean and inspect the Intake Manifold if needed. For installation, you merely install new Intake Manifold gaskets on Intake Manifold and then install the manifold. Apply a bit of threadlock gm p/n 12345382 (Canadian p/n 10953489) on the threads of Intake Manifold bolts and tighten them in order to 5 nm (44 inch lbs.)/first pass, and 10 nm (89 inch lbs.)/last pass. Replace the evap purge solenoid, isolator, and bolt and fasten the bolt 10 nm (89 inch lbs.). Return the evap purge solenoid vent tube to its connections at the solenoid and vapor pipe. Lightly apply clean engine oil on the MAP Sensor seal prior to installation to the Intake Manifold. Install the pcv hose and, if necessary, the vacuum brake booster hose at the back end of the Intake Manifold. Route the electrical harness over the engine and connect the Knock Sensor harness electrical connector to the Intake Manifold , followed by the MAP Sensor and Knock Sensor. Finally, install the fuel injectors and Throttle Body.
    Posted by ChevyPartsGiant Specialist
    Q:
    How to replace the intake manifold on GMC Savana 1500? Posted by Customer
    A:
    In order to replace the Intake Manifold, remove it, as a whole unit with the Throttle Body, oil fill tube, and fuel injectors. Remove the electrical connectors used on the manifold absolute pressure (MAP) sensor, knock sensor, and the exhaust gas recirculation (EGR) valve if so equipped. Disconnect the Knock Sensor harness connector and put the electrical harness aside. If present, remove the egr pipe bolts from the Intake Manifold , cylinder head , and exhaust manifold as well as take out the egr pipe and gasket. Unplug the pcv hose, map sensor, and ignition control cable bracket. Unbolt the outlet tube bolts and the bracket. Remove the evap purge solenoid vent tube by detaching the evap end from the solenoid, and remove the quick connect fitting from the vapor pipe. Take off the evap purge solenoid bolt, solenoid, and isolator from out of the Intake Manifold, remove the Intake Manifold bolts, and the manifold. After that, remove the old Intake Manifold gaskets and clean the gasket surfaces of the egr pipe and exhaust manifold (if present). Install new Intake Manifold gaskets on the manifold, install the manifold and apply a 5mm (0.20 inch) band of threadlock gm p/n 12345382 (Canadian P/N 10953489) or equivalent to Intake Manifold bolts. Tighten the bolts stepwise to 5 nm (44 inch lbs) first and 10 nm (89 inch lbs) on the final turn. Replace the solenoid on the evap, the solenoid isolator, and the solenoid bolt. Tighten the solenoid bolt to 10 nm (89 inch lbs.). Mount the evap purge solenoid vent tube and the accelerator control cable bracket and its bolts, tighten with an 89 inch lbs. (10 Nm). Before installing the MAP Sensor and the pcv hose, apply clean engine oil on the MAP Sensor seal lightly. If provided, replace with a new egr pipe gasket onto the exhaust manifold and install egr pipe (with valve) bolt the egr pipe bolt to the specified torque values: the torque should be approximately 10 nm (89 inch lbs.) for Intake Manifold, 50 nm (37 ft. Lbs.) for the cylinder head, and 30 nm (22 ft. Lbs.) for the exhaust manifold. Return the electrical harness in position, reconnect the Knock Sensor harness, and the electric connectors of the MAP Sensor, knock sensor, and EGR Valve in presence. Lastly, install the fuel injectors, oil fill tube and the Throttle Body.
    Posted by ChevyPartsGiant Specialist
    Q:
    How to replace the upper intake manifold on GMC Sierra 1500 Classic? Posted by Customer
    A:
    To replace the upper Intake Manifold, start by removing the fuel pipe/hoses, and then removing the cruise control cable from the throttle lever and the accelerator control cable bracket if applicable. Next disconnect the accelerator cable from Throttle Body lever and also from accelerator control cable bracket. Remove the connections to the electrical connectors for the a/c compressor clutch and a/c pressure switch if so equipped, along with the engine wire harness clip from the accelerator control cable bracket. Spend time removing the nuts of the accelerator control cable bracket and bracket that has the cables going to them from Throttle Body, and fasten them off to the side. Bars between the throttle position (TP) sensor , idle air control (IAC) motor , and control port injector module connectors and the engine wiring harness clip bolt screws. Make connections from the evaporative emission (EVAP) canister purge solenoid valve and manifold absolute pressure (MAP) sensor, then evap canister tube from the purge solenoid valve. You need to unfasten the engine wiring harness bracket, its nuts, the rear ground nut and wire on the rear of the right Cylinder Head, and the rear bracket nut of the evap canister purge solenoid valve. Lower and repose the engine wiring harness, then remove the positive crankcase ventilation (PCV) valve hose, power Brake Booster Vacuum Hose, accelerator cable bracket nuts, and accelerator cable bracket. Remove the Intake Manifold-upper studs, the Throttle Body studs (first two on the front), the Intake Manifold-upper (discard the gasket and O-ring seals as needed). Take off vacuum fitting from power brake booster, pcv valve cover, and rear Throttle Body stub where necessary, then remove Throttle Body and gasket and MAP Sensor and seal if necessary. Check and clean the Intake Manifold-upper prior to installing it. If necessary, install the purge solenoid valve and its studs, using threadlock when reinstalling old studs if needed and tightening to 10 nm (89 inch lbs.), instead of t.r.a.m. (194). Put a new MAP Sensor seal with a drop of a clean engine oil and follow it with the MAP Sensor, a new Throttle Body Gasket, and the Throttle Body. If the rear Throttle Body stud is reused, apply threadlock and tighten to 9 nm (80 inch lbs.). Put in a new o-ring seal to the pcv cover and the power brake booster vacuum fitting as well as wedging in a new o-ring seal into the fuel meter body and a new upper Intake Manifold gasket. Mount the Intake Manifold-upper and tighten the studs to 9 nm (80 inch lbs), the accelerator cable bracket and its nuts to 12 nm (106 inch lbs). Connect the power Brake Booster Vacuum Hose and PCV Valve Hose and center the engine wiring harness and bracket then install the rear bracket stud applying 25 nm (18 ft. Lbs.) then the rear bracket nut for the evap canister purge solenoid valve 9 nm (80 inch lbs.) and install the ground nut and wire to 16 nm (12 ft. Lbs.). Reattach the engine wiring harness bracket and its nuts to 12 nm (106 inch lbs.) and reconnect evap canister tube to the purge solenoid valve, and connect the evap canister purge solenoid valve and MAP Sensor followed by tp sensor, iac motor, and control port injector module to the related sockets. Install the clip bolt on the engine wiring harness with a 9 nm (80 inch lbs.) torque and position the bracket and cables onto the location at the Throttle Body installation and tighten the nuts with a 9 nm (80 inch lbs.) torque. Lastly, reconnect the a/c compressor clutch and a/c pressure switch connectors, place the engine wiring harness clip back to the accelerator control cable bracket, attach the accelerator cable to the bracket and Throttle Body lever, (and the cruise control cable if installed), and the reinstalling of the fuel pipes/hoses.
    Posted by ChevyPartsGiant Specialist
    Q:
    How to replace the intake manifold on GMC Savana 2500? Posted by Customer
    A:
    In order to replace the Intake Manifold, the following components have to be removed: throttle body; oil fill tube; fuel injectors. Depress the clutch pedal and use a 24-mm socket to remove the crankshaft bolt. Disconnect the Knock Sensor harness connector and take the electrical harness aside. If modified, unscrew the egr pipe bolts from the Intake Manifold , cylinder head and the Exhaust Manifold and then remove the egr pipe (with valve) and egr pipe gasket from the Exhaust Manifold. Firstly remove the positive crankcase ventilation (PCV) hose (with valve), MAP Sensor , accelerator control cable bracket bolts , and the bracket itself. Separate the evaporative emission (EVAP) purge solenoid vent tube by separating the evap section of tube from the solenoid, as well as squeezing the evap pipe quick connect fitting retainer, and the evap section of tube from the vapor pipe. Take out the evap purge solenoid bolt , isolator , and the Intake Manifold bolts , before removing the Intake Manifold and its gaskets , and dump the old gaskets. If equipped, clean the gasket surfaces of the egr pipe and Exhaust Manifold. In installation, new Intake Manifold gaskets should go on the Intake Manifold, then the manifold goes on. Apply a threadlock gm p/n 12345382 (Canadian P/N 10953489) or equivalent, for (5 mm) 0.20 inch band, on the threads of the Intake Manifold bolts. Tighten Intake Manifold bolts in a sequence of 5 nm (44 inch lbs.) for first pass and 10 nm (89 inch lbs.) for the final pass. Mount the evap purge solenoid, isolator and bolt onto the Intake Manifold and tighten the bolt of the solenoid to 10 nm (89 referred to as inch lbs.). Mount the evap purge solenoid vent tube to the solenoid and vapor pipe, and then install the accelerator control cable bracket and its bolts, tightening to 10 nm (89 inch lbs.). Gently apply clean engine oil on the seal of the MAP Sensor and install it onto the Intake Manifold, including the hose of the pcv with valve. If installed, replace the new egr pipe gasket on the Exhaust Manifold and egr pipe (with valve), bolts onto Intake Manifold, cylinder head, and Exhaust Manifold until snug. Lastly, fasten the EGR Valve pipe-to-manifold interface bolts to 10nm (89inch lbs.), the EGR Valve pipe-to-cylinder head bolts to 50nm (37ft lbs.) and finally the EGR Valve pipe-to-exhaust manifold bolts to 30nm (22ft lbs.). Run the electrical harness into position, install the Knock Sensor harness on the Intake Manifold & reattach the MAP Sensor, knock sensor & egr valve if so equipped. Complete by installing the fuel injectors, oil fill tube, and Throttle Body.
    Posted by ChevyPartsGiant Specialist
    Q:
    What is the torque specification for the ignition coil studs for the 2003 Chevrolet Astro? Posted by Customer
    A:
    Tighten the studs to 12 Nm (106 lb.in.).
    Posted by ChevyPartsGiant Specialist
    See expert answers on similar Intake Manifold
    Q:
    What should be disconnected next for the 2002 Chevrolet Astro? Posted by Customer
    A:
    Disconnect the accelerator control cable and the cruise control cable, if equipped, from the throttle shaft and the accelerator control cable bracket.
    Posted by ChevyPartsGiant Specialist
    See expert answers on similar Intake Manifold
    Q:
    What should be done with the engine wiring harness and vacuum hose for the 2005 Chevrolet Astro? Posted by Customer
    A:
    Move the engine wiring harness out of the way and disconnect the vacuum hose from the intake manifold.
    Posted by ChevyPartsGiant Specialist
    See expert answers on similar Intake Manifold
    Q:
    Which electrical connectors need to be disconnected for the 2001 Chevrolet Astro? Posted by Customer
    A:
    Disconnect the electrical connectors for the A/C compressor clutch, A/C high pressure cutoff switch, Throttle Position (TP) sensor, Idle Air Control (IAC) motor, fuel meter body assembly connector, Manifold Absolute Pressure (MAP) sensor, and EVAP canister purge solenoid valve.
    Posted by ChevyPartsGiant Specialist
    See expert answers on similar Intake Manifold
    Q:
    What should be done after draining the cooling system for the 2004 Chevrolet Astro? Posted by Customer
    A:
    Remove the air cleaner assembly and the air cleaner outlet duct from the throttle body assembly.
    Posted by ChevyPartsGiant Specialist
    See expert answers on similar Intake Manifold
    Q:
    What electrical connectors need to be connected for the 2002 Chevrolet Express 2500? Posted by Customer
    A:
    Connect the electrical connectors for the fuel meter body assembly, EVAP canister purge solenoid valve, MAP sensor, Throttle Position (TP) sensor, Idle Air Control (IAC) motor, Engine Coolant Temperature (ECT) gauge sensor, and the A/C high pressure switch if equipped.
    Posted by ChevyPartsGiant Specialist
    See expert answers on similar Intake Manifold
    Q:
    What should be done last for the 2005 Chevrolet Silverado 1500? Posted by Customer
    A:
    Reinstall the fuel pipes/hoses, distributor, and fill the cooling system.
    Posted by ChevyPartsGiant Specialist
    See expert answers on similar Intake Manifold
    Q:
    What components need to be removed next for the 2004 Chevrolet Silverado 1500? Posted by Customer
    A:
    Remove the upper intake manifold studs, the front two throttle body studs, and the upper intake manifold itself, discarding the gasket and O-ring seals as necessary.
    Posted by ChevyPartsGiant Specialist
    See expert answers on similar Intake Manifold
    Q:
    What seals need to be installed before placing the intake manifold - upper for the 2006 Chevrolet Silverado 1500? Posted by Customer
    A:
    Install a new O-ring seal to the PCV cover and the power brake booster vacuum fitting, then a new O-ring seal to the fuel meter body, and a new upper intake manifold gasket.
    Posted by ChevyPartsGiant Specialist
    See expert answers on similar Intake Manifold
    Q:
    What should be done after draining the cooling system for the 2000 GMC Safari? Posted by Customer
    A:
    Remove the air cleaner assembly and the air cleaner outlet duct from the throttle body.
    Posted by ChevyPartsGiant Specialist
    See expert answers on similar Intake Manifold
    Q:
    How do you access the front intake manifold bolt for the 2001 GMC Safari? Posted by Customer
    A:
    Remove the drive belt, A/C compressor side brace, loosen the power steering pump rear bracket nut, and remove the oil filler tube bracket bolt and tube.
    Posted by ChevyPartsGiant Specialist
    See expert answers on similar Intake Manifold
    Q:
    What should be done after removing the lower intake manifold for the 2002 GMC Safari? Posted by Customer
    A:
    Clean all sealing surfaces.
    Posted by ChevyPartsGiant Specialist
    See expert answers on similar Intake Manifold
    Q:
    What is the final step in the process for the 2001 GMC Savana 2500? Posted by Customer
    A:
    Reconnect the battery negative cable and install the engine cover.
    Posted by ChevyPartsGiant Specialist
    See expert answers on similar Intake Manifold
    Q:
    What components should be connected after installing the MAP sensor for the 2005 GMC Savana 2500? Posted by Customer
    A:
    Connect the knock sensor harness electrical connector to the intake manifold and the electrical connectors for the MAP sensor, knock sensor, and EGR valve if equipped.
    Posted by ChevyPartsGiant Specialist
    See expert answers on similar Intake Manifold
    Q:
    What hoses need to be reinstalled for the 2006 GMC Sierra 1500? Posted by Customer
    A:
    Reinstall the water pump inlet hose and position the clamps, followed by the radiator inlet hose to the thermostat housing and its clamps.
    Posted by ChevyPartsGiant Specialist
    See expert answers on similar Intake Manifold
    Q:
    How do you disconnect the accelerator control cable for the 2003 GMC Safari? Posted by Customer
    A:
    Disconnect it from the throttle shaft and bracket, and if equipped, disconnect the cruise control cable as well.
    Posted by ChevyPartsGiant Specialist
    See expert answers on similar Intake Manifold
    If you have any questions about this product, please don't hesitate to ask us. We will be happy to help you!

OEM GM 17113542, Excellent Performance and Perfect Fitment

To ensure reliability, purchase GM part # 17113542 Intake Manifold. It is sometimes referred to as GM Intake Manifold. Choosing OEM parts is the optimal decision for guaranteeing superior quality and perfect performance. These components undergo stringent quality checks and are carefully constructed to comply with GM's factory specifications, ensuring a smooth installation process.

ChevyPartsGiant.com is a leading supplier of genuine GM parts such as GM 17113542 Intake Manifold. Our website boasts an extensive inventory of OEM GM parts, available at highly competitive prices in the market. Should you require any new genuine GM parts, rest assured we will deliver them swiftly and efficiently to your doorstep. Furthermore, all our parts come with the assurance of a manufacturer's warranty. For detailed Chevy parts information, click here.
Choose ChevyPartsGiant for discounted prices, exceptional service and fast delivery