ChevyParts
My Garage
My Account
Cart
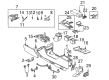
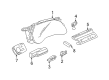
OEM 2000 Cadillac DeVille A/C Switch
Air Conditioning Switch- Select Vehicle by Model
- Select Vehicle by VIN
Select Vehicle by Model
orMake
Model
Year
Select Vehicle by VIN
For the most accurate results, select vehicle by your VIN (Vehicle Identification Number).
6 A/C Switches found

2000 Cadillac DeVille Control Switch, Gray Part Number: 25754560
$59.81 MSRP: $434.10You Save: $374.29 (87%)Ships in 1-2 Business DaysProduct Specifications- Other Name: Control, Heater And Air Conditioner Control; Control Assembly; Control, Heater And A/C Control; Control, Heater Control
- Replaces: 25747325, 25687282, 25746335
- Item Weight: 0.80 Pounds
- Item Dimensions: 5.9 x 5.7 x 5.5 inches
- Condition: New
- Fitment Type: Direct Replacement
- SKU: 25754560
- Warranty: This genuine part is guaranteed by GM's factory warranty.
2000 Cadillac DeVille Control Switch, Blue Part Number: 25754562
Product Specifications- Other Name: Control Assembly, Auxiliary Heater & A/C *Blue; Control Assembly
- Replaces: 25687285
- Item Weight: 0.80 Pounds
- Item Dimensions: 6.1 x 5.6 x 5.6 inches
- Condition: New
- Fitment Type: Direct Replacement
- SKU: 25754562
- Warranty: This genuine part is guaranteed by GM's factory warranty.

2000 Cadillac DeVille Heater Control Part Number: 10359470
Product Specifications- Other Name: Control Assembly-Heater & A/C; Climate Control Module; Blower Control Switch; Dash Control Unit; Control, Heater And A/C Control
- Replaces: 09384546, 09387856, 25742497, 25757867, 9387856, 09390516, 25770176, 25728331, 9384546, 9390516
- Item Weight: 1.50 Pounds
- Item Dimensions: 12.5 x 9.8 x 5.8 inches
- Condition: New
- Fitment Type: Direct Replacement
- SKU: 10359470
- Warranty: This genuine part is guaranteed by GM's factory warranty.
2000 Cadillac DeVille Control Switch, Black Part Number: 25754563
Product Specifications- Other Name: Control, Heater And Air Conditioner Control; Climate Control Module; Control Assembly; Dash Control Unit; Control, Heater And A/C Control; Control, Heater Control
- Replaces: 25746332
- Item Weight: 0.80 Pounds
- Item Dimensions: 5.8 x 5.7 x 5.4 inches
- Condition: New
- Fitment Type: Direct Replacement
- SKU: 25754563
- Warranty: This genuine part is guaranteed by GM's factory warranty.
2000 Cadillac DeVille Control Switch Part Number: 25754561
Product Specifications- Other Name: Control, Heater Control; Control Assembly; Control, Heater And A/C Control
- Replaces: 25687287, 25746334
- Item Weight: 0.80 Pounds
- Item Dimensions: 5.8 x 5.5 x 5.4 inches
- Condition: New
- Fitment Type: Direct Replacement
- SKU: 25754561
- Warranty: This genuine part is guaranteed by GM's factory warranty.
2000 Cadillac DeVille Control Switch Part Number: 25746331
Product Specifications- Other Name: Control, Heater Control; Control Assembly; Control, Heater And A/C Control
- Replaces: 25687283
- Item Weight: 0.80 Pounds
- Item Dimensions: 5.8 x 5.6 x 5.4 inches
- Condition: New
- Fitment Type: Direct Replacement
- SKU: 25746331
- Warranty: This genuine part is guaranteed by GM's factory warranty.
2000 Cadillac DeVille A/C Switch
With a comprehensive array of OEM 2000 Cadillac DeVille A/C Switch, from fuel pumps to door handles, our website is a one-stop-shop for your needs. All our genuine 2000 Cadillac DeVille A/C Switch are backed by the manufacturer's warranty and are offered at competitive prices in the market. Rest assured, you can shop with complete confidence.
2000 Cadillac DeVille A/C Switch Parts and Q&A
- Q: How to replace the rear A/C Switch on 2000 Cadillac DeVille?A: Start by using a flat bladed tool to remove the top part of the rear hvac control which then allows you to pull the control from its position in the Center Console/seat after disconnecting the electrical connector. Follow these installation steps: start by attaching the electrical connector to the rear hvac control before you insert the control into the console with its bottom leading and pull upwards until you feel it lock into place.
Related 2000 Cadillac DeVille Parts
 2000 Cadillac DeVille Blower Motor
 2000 Cadillac DeVille Blower Motor Resistor
 2000 Cadillac DeVille A/C Accumulator
 2000 Cadillac DeVille A/C Clutch
 2000 Cadillac DeVille A/C Compressor
 2000 Cadillac DeVille A/C Compressor Cut-Out Switches
 2000 Cadillac DeVille A/C Condenser
 2000 Cadillac DeVille A/C Orifice Tube
 2000 Cadillac DeVille A/C Service Cap
 2000 Cadillac DeVille Ambient Temperature Sensor
 2000 Cadillac DeVille Cabin Air Filter
 2000 Cadillac DeVille Evaporator