ChevyParts
My Garage
My Account
Cart
OEM 2002 Chevrolet S10 Distributor
Ignition Distributor- Select Vehicle by Model
- Select Vehicle by VIN
Select Vehicle by Model
orMake
Model
Year
Select Vehicle by VIN
For the most accurate results, select vehicle by your VIN (Vehicle Identification Number).
1 Distributor found


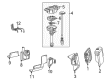
2002 Chevrolet S10 Distributor Assembly Part Number: 12598210
Product Specifications- Other Name: Distributor; Distributor, Ignition
- Replaces: 01104057, 01104078, 01104050, 1104050, 1104078, 1104057, 93441559
- Item Weight: 2.60 Pounds
- Item Dimensions: 15.8 x 8.3 x 5.2 inches
- Condition: New
- Fitment Type: Direct Replacement
- SKU: 12598210
- Warranty: This genuine part is guaranteed by GM's factory warranty.
2002 Chevrolet S10 Distributor
With a comprehensive array of OEM 2002 Chevrolet S10 Distributor, from fuel pumps to door handles, our website is a one-stop-shop for your needs. All our genuine 2002 Chevrolet S10 Distributor are backed by the manufacturer's warranty and are offered at competitive prices in the market. Rest assured, you can shop with complete confidence.
2002 Chevrolet S10 Distributor Parts and Q&A
- Q: How to overhaul the distributor on 2002 Chevrolet S10?A: The first step for Distributor overhaul involves lining up the white paint mark on the bottom Distributor stem with the pre-drilled bottom gear indent hole. Place the v6 engine rotor segment at its correct placement during installation. If not, replace the Distributor. Locate and remove the rotor by taking out its two retaining screws then write down which holes it originally fit into: rotor screw holes and rotor locator pin holes. The Distributor includes a pair of holes for rotor screws along with holes specifically for rotor locator pins. Set the square-cut hole of the vane wheel to match the camshaft position (CMP) sensor before discarding the two screws that attach the cmp sensor. The cmp sensor removal must happen while noting the dimple on one side of the gear which will guide correct positioning during assembly. Place the Distributor drive gear in a v-block or similar fixture while you drive out its roll pin with appropriate hand tools. Disassemble the Distributor shaft to remove the driven gear combined with a round washer and tang washer and shim washer and an old oil seal. Insert the cmp sensor into the housing through its square-cut hole present on the vane wheel. Put in two new cmp sensor screws after torquing them to 2.2 n.m (19 lb in). The correct distribution rotor position becomes established by matching screw holes on the rotor with locator pin holes and rotor index marks and then use two rotor hold down screws to fasten the rotor assembly at 1.9 n.m (17 lb in) torque. Put the shim washer under the Distributor shaft base before you add the tang washer and the round washer. Mount the driven gear by following the index marks which ensure proper rotor segment alignment for v6 engines or v8 engines. Adjust the white paint mark on the Distributor's bottom stem to match the pre-drilled hole on the gear's bottom surface. A wrong installation of the driven gear will position the dimple at a 180-degree angle from the designated rotor segment. Set up the Distributor drive gear inside a v-block or equivalent fixture before hammering the roll pin into place through a well-suited punch to fasten the driven gear. To finish the project install the new oil seal beneath the Distributor base mounting flange before installing the Distributor.
Related 2002 Chevrolet S10 Parts
 2002 Chevrolet S10 Crankshaft Position Sensor
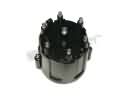 2002 Chevrolet S10 Distributor Cap
 2002 Chevrolet S10 Ignition Coil
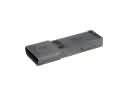 2002 Chevrolet S10 Ignition Control Module
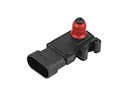 2002 Chevrolet S10 MAP Sensor
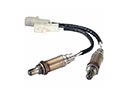 2002 Chevrolet S10 Oxygen Sensor
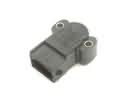 2002 Chevrolet S10 Throttle Position Sensor
 2002 Chevrolet S10 Camshaft Position Sensor
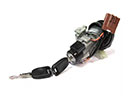 2002 Chevrolet S10 Igniter
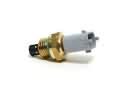 2002 Chevrolet S10 Intake Manifold Temperature Sensor
 2002 Chevrolet S10 Knock Sensor
 2002 Chevrolet S10 PCV Valve Hose