ChevyParts
My Garage
My Account
Cart
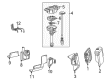
OEM Chevrolet S10 Distributor
Ignition Distributor- Select Vehicle by Model
- Select Vehicle by VIN
Select Vehicle by Model
orMake
Model
Year
Select Vehicle by VIN
For the most accurate results, select vehicle by your VIN (Vehicle Identification Number).
6 Distributors found

Chevrolet S10 Distributor Part Number: 1103521
$109.22 MSRP: $156.28You Save: $47.06 (31%)


Chevrolet S10 Distributor Assembly Part Number: 12598210
Chevrolet S10 Distributor Part Number: 1103620


Chevrolet S10 Distributor Part Number: 1103570
Chevrolet S10 Distributor Part Number: 1103546
Chevrolet S10 Distributor Part Number: 1103520
Chevrolet S10 Distributor
Want to cut long-term maintenance and repair costs? Choose OEM Distributor. Those parts deliver top durability you can trust. On our site, you'll find a huge catalog of genuine Chevrolet S10 parts. Prices are unbeatable, so you can keep more in your pocket. Every OEM Chevrolet S10 Distributor includes a manufacturer's warranty. You can also get an easy return policy that keeps buying risk free. Fast delivery, get your car on the road quickly. It's simple to search, compare, and order. Stop guessing about quality or fit. Order today and save with parts that last.
The Distributor of Chevrolet S10 cars helps to create sparks inside the cylinders of the engine compelling voltage from a single coil to reach all the spark plugs through the distributor with the help of spark plug wires. Distributors have over the years graduated from mechanical breaker points to highly efficient electronic triggering system. There are other kinds of distributors, specifically centrifugal and vacuum advance kinds, which has previously been used to manage the spark timing with regards to the speed and operating of the engine. Traditional distributors on the other hand need consistent servicing and even replacement of the wear and tear parts while on the other hand, kits in existant electronic ignition conversion designs offer an improved and much more efficient conversion together with much lower levels of maintenance needed. Chevrolet S10 distributors come with the options of dual points or electronic ignition having preprogrammed or customized advance curve for the vehicle.
Chevrolet S10 Distributor Parts and Q&A
- Q: How to overhaul the distributor on Chevrolet S10?A:To overhaul the Distributor, you first line up the white paint mark at the bottom stem of the Distributor in the pre-drilled indent hole at the bottom of the gear. Make sure that the rotor segment is properly positioned on a v6 engine ; if not, replace the Distributor. Unscrew the two screws from the rotor and remove the rotor and take note of the locating holes of the rotor screw and locator pin . Bring the square-cut hole of the vane wheel into alignment with the camshaft position (CMP) sensor and take-out the 2 screws securing the cmp sensor and dispose of it. Note the dimple under the roll pin hole on one side of the gear for orientation during assembling. Support the Distributor drive gear on a v-block or comparable fixture, then drive out the roll pin using appropriate sized punch and remove the driven gear from the Distributor shaft, including the round washer / tang washer, shim washer, and old oil seal. For assembly, align the square-cut hole of vane wheel for cmp sensor, insert the sensor into the housing plus installing two new screws for cmp sensor tight it 2.2 n.m 19 lb in. Determine the right rotor mounting position at the rotor screw hole and locator pin holes, install the Distributor rotor using the index marks and secure with two hold-down screws at 1.9 n.m (17 lb in). Place the shim washer at the bottom of the Distributor shaft and follow up with the tang washer and round washer. Mount the driven gear as per the marks of index & make sure the rotor segment is in position correctly for a v6 engine or v8 engine. Mark a white paint on the bottom stem of the Distributor, align with pre-drilled indent hole in the bottom of the gear. When the constable driven gear is put on in the wrong way, the dimple will be about 180 degrees from the rotor segment. Place the Distributor drive gear in a v-block or similar device and later fitting the roll pin by using a suitable punch and hammer and fix the driven gear. Finally, install new oil seal in the mounting flange at the bottom of Distributor base and install Distributor.

Related Chevrolet S10 Parts
 Chevrolet S10 Crankshaft Position Sensor
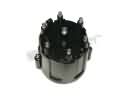 Chevrolet S10 Distributor Cap
 Chevrolet S10 Ignition Coil
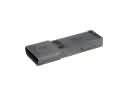 Chevrolet S10 Ignition Control Module
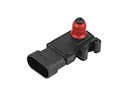 Chevrolet S10 MAP Sensor
 Chevrolet S10 Oxygen Sensor
 Chevrolet S10 Throttle Position Sensor
 Chevrolet S10 Camshaft Position Sensor
 Chevrolet S10 Igniter
 Chevrolet S10 Intake Manifold Temperature Sensor
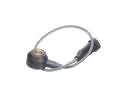 Chevrolet S10 Knock Sensor
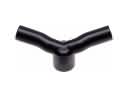 Chevrolet S10 PCV Valve Hose