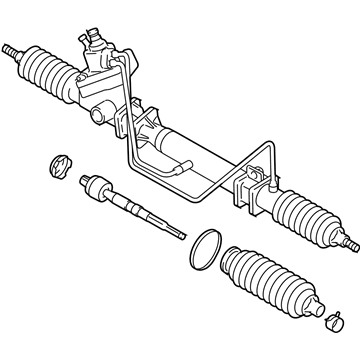
OEM 2003 Chevrolet Tracker Rack And Pinion

Steering Rack And Pinion
  • Select Vehicle by Model
  • Select Vehicle by VIN
Select Vehicle by Model
Make
Model
Year
or
Select Vehicle by VIN
For the most accurate results, select vehicle by your VIN (Vehicle Identification Number).

2 Rack And Pinions found

  • 2003 Chevy Tracker Rack And Pinion - 91175546
    2003 Chevy Tracker Rack And Pinion Diagram - 91175546
    View related parts
    Product Specifications
    • Other Name: Gear, Steering; Gear Assembly
    • Item Weight: 18.90 Pounds
    • Item Dimensions: 52.3 x 10.1 x 6.6 inches
    • Condition: New
    • Fitment Type: Direct Replacement
    • SKU: 91175546
    • Warranty: This genuine part is guaranteed by GM's factory warranty.
    More Info
    Fits the following 2003 Chevrolet Tracker Submodels:
    • Base, LSi, LT, ZR2 | 4 Cyl 1.6 L GAS, 4 Cyl 2.0 L GAS, 6 Cyl 2.5 L GAS
  • 2003 Chevy Tracker Rack And Pinion - 91177194
    2003 Chevy Tracker Rack And Pinion Diagram - 91177194
    View related parts
    Product Specifications
    • Item Weight: 26.70 Pounds
    • Item Dimensions: 55.4 x 10.9 x 8.7 inches
    • Condition: New
    • SKU: 91177194
    • Warranty: This genuine part is guaranteed by GM's factory warranty.
    Fits the following 2003 Chevrolet Tracker Submodels:
    • Base, LT, ZR2 | 4 Cyl 2.0 L GAS, 6 Cyl 2.5 L GAS

2003 Chevrolet Tracker Rack And Pinion

With a comprehensive array of OEM 2003 Chevrolet Tracker Rack And Pinion, from fuel pumps to door handles, our website is a one-stop-shop for your needs. All our genuine 2003 Chevrolet Tracker Rack And Pinion are backed by the manufacturer's warranty and are offered at competitive prices in the market. Rest assured, you can shop with complete confidence.

2003 Chevrolet Tracker Parts Questions & Experts Answers

  • Q: How to replace the Rack and Pinion steering gear on 2003 Chevrolet Tracker?
    A: Replacement of the Rack And Pinion starts by checking that wheels are straight while locking the Steering Column and disabling the supplemental inflatable restraint system. Lift the vehicle and next remove the skid plate if present in your vehicle. Use the Tie Rod puller j6627-a to disconnect the Tie Rod End from the knuckle by first removing the left inner Tie Rod nut from this assembly. The right outer Tie Rod undergoes the same installation steps as the left. The drain pan needs placement while you remove the Rack And Pinion inlet hose fitting and the hose and all gaskets. To prevent fluid loss during replacement of the Rack And Pinion fluid reservoir hose clamp the hose then safely remove it before plugging the ends of all hoses. Bang up decals on the lower Steering Shaft and Rack And Pinion casing before dismounting the shaft and unscrewing four bolts securing the Rack And Pinion. Remove the Rack And Pinion from its mount along with all attached insulators and brackets while taking away the brackets and insulators from the Rack And Pinion itself. Using a marker, note down the inner Tie Rod thread positions before removing the lock nuts to free up the outer Tie Rod ends. During installation measure the replacement Rack And Pinion to match the original inner tie rods before installing the Tie Rod lock nuts and outer Tie Rod ends keeping them loose. Use pins to mark the pinion shaft and Rack And Pinion housing in order to ensure straightness between the steering wheel and front wheels. You should attach the insulators to the brackets before you tighten the four bolts that secure the Rack And Pinion in position by matching the marks. First tighten the clamp bolt of the lower Steering Shaft to 25 nm (18 ft. Lbs.) before proceeding to the bolts securing the Rack And Pinion which need a torque of 55 nm (40 ft. Lbs.). Insert the Rack And Pinion fluid reservoir hose into position along with the hose clamp before securing the Rack And Pinion inlet hose with its gaskets and fitting. Torque the fitting to 35 nm (25.5 ft. Lbs.). The left outer Tie Rod End should be installed to the knuckle using a new nut torqued to 43 nm (31.5 ft. Lbs.). Similarly, the right outer Tie Rod End is installed using a new nut tightened to 43 nm (31.5 ft. Lbs.). After reinstallation of the skid plate complete these steps: lower the vehicle, refill the reservoir then bleed the Rack And Pinion system, turn on the sir function, check wheel alignment and adjust the front toe when necessary before securing the Tie Rod lock nuts to 65 nm (47 ft. Lbs.).

Related 2003 Chevrolet Tracker Parts