ChevyParts
My Garage
My Account
Cart
OEM 2006 Cadillac XLR Window Regulator
Electric Power Window Regulator- Select Vehicle by Model
- Select Vehicle by VIN
Select Vehicle by Model
orMake
Model
Year
Select Vehicle by VIN
For the most accurate results, select vehicle by your VIN (Vehicle Identification Number).
2 Window Regulators found


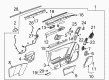 Product Specifications
- Other Name: Regulator, Front Door Window Regulator; Regulator, Door Lock Remote Control
- Position: Front Driver Side
- Replaces: 10387890, 15823582, 25815797, 25842587
- Item Weight: 7.60 Pounds
- Item Dimensions: 25.5 x 14.1 x 6.3 inches
- Condition: New
- Fitment Type: Direct Replacement
- SKU: 20823059
- Warranty: This genuine part is guaranteed by GM's factory warranty.
- Product Specifications
- Other Name: Regulator, Front Door Window Regulator; Regulator, Door Lock Remote Control
- Position: Front Passenger Side
- Replaces: 10387891, 15823583, 25815798, 25842588
- Item Weight: 8.40 Pounds
- Item Dimensions: 24.5 x 14.4 x 5.1 inches
- Condition: New
- Fitment Type: Direct Replacement
- SKU: 20823060
- Warranty: This genuine part is guaranteed by GM's factory warranty.
2006 Cadillac XLR Window Regulator
With a comprehensive array of OEM 2006 Cadillac XLR Window Regulator, from fuel pumps to door handles, our website is a one-stop-shop for your needs. All our genuine 2006 Cadillac XLR Window Regulator are backed by the manufacturer's warranty and are offered at competitive prices in the market. Rest assured, you can shop with complete confidence.
2006 Cadillac XLR Window Regulator Parts Questions & Experts Answers
- Q: How to replace the front door window regulator on 2006 Cadillac XLR?A: Begin by holding the door window at an lowered position and disconnecting the vehicle battery before attempting to replace the front door Window Regulator. A large water deflector together with the door trim panel and door panel electrical connector must be removed before reaching the door's back section. Access the regulator mounting fasteners by removing the small mastic seals from the top part of the door and by removing the small plug from its bottom location. Detach the radio speaker fasteners and electrical connector lock before tying the electrical harness to disconnect the radio speaker from the door through its water deflector. The door window procedure begins with disconnecting the regulator motor electrical connector by sliding the connector lock upward. Stand by the regulator position before removal to record both its mounting pad positions and depth for proper reinstallation. Unscrew the nuts from regulator lower channel studs together with motor studs and upper regulator channel studs so you can compress the regulator through the inner door access opening. When replacing the Window Regulator start by setting the jack screws of the new assembly to match the former regulator while compacting the regulator assembly before inserting it with motor first through the doorway. Secure the motor studs within the door inner panel before fastening nuts until they reach 10 n.m (89 lb in). Insert the regulator channel studs through the door's holes then loosely attach the nuts which secure these studs to their places. Insert the electrical connector to the motor then slide the connector lock into position. The window installation must be done properly then the window needs to be adjusted to match the opening of the door. Connect the battery power first followed by the door window switch before running the regulator clamps up to the glass while tightening them to 16 n.m (12 lb ft). Start by tightening the nuts to the regulator channel studs first upper forward then upper rearward and ending with lower forward and lower rearward at 10 n.m standing for 89 lb in. Insert small mastic seals into the window clamp sight access holes then join the harness electrical connector to the speakers followed by connector lock installation. Position the speaker assembly on the door by using first the upper screws and check that the speaker tab fits correctly before proceeding to install all remaining screws with 3 n.m (27 lb in) torque settings. After reattaching the water deflector the team should connect the door panel electrical connector before replacing the door trim panel. Check the window installation before putting the access plug at the door bottom. Test all electrical functions for mirrors and windows and door switches.
Related 2006 Cadillac XLR Parts
 2006 Cadillac XLR Air Charge Temperature Sensor
 2006 Cadillac XLR Brake Light Switch
 2006 Cadillac XLR Crankshaft Position Sensor
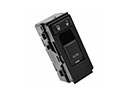 2006 Cadillac XLR Door Lock Switch
 2006 Cadillac XLR Ignition Coil
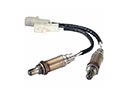 2006 Cadillac XLR Oxygen Sensor
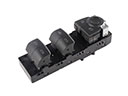 2006 Cadillac XLR Power Window Switch
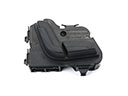 2006 Cadillac XLR Seat Switch
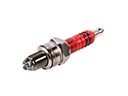 2006 Cadillac XLR Spark Plug
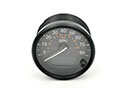 2006 Cadillac XLR Speedometer
 2006 Cadillac XLR Starter
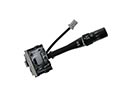 2006 Cadillac XLR Wiper Switch