ChevyParts
My Garage
My Account
Cart
OEM 2006 Chevrolet Corvette Window Regulator
Electric Power Window Regulator- Select Vehicle by Model
- Select Vehicle by VIN
Select Vehicle by Model
orMake
Model
Year
Select Vehicle by VIN
For the most accurate results, select vehicle by your VIN (Vehicle Identification Number).
2 Window Regulators found


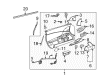
2006 Chevrolet Corvette Window Regulator, Front Driver Side Part Number: 22895755
$609.13 MSRP: $1097.54You Save: $488.41 (45%)Product Specifications- Other Name: Regulator, Front Door Window Regulator; Regulator, Door Lock Remote Control
- Position: Front Driver Side
- Replaces: 15852978, 20823061, 22788443, 25853811, 25842585, 25995141, 20980502, 15823580
- Item Weight: 7.20 Pounds
- Item Dimensions: 23.7 x 11.6 x 9.3 inches
- Condition: New
- Fitment Type: Direct Replacement
- SKU: 22895755
- Warranty: This genuine part is guaranteed by GM's factory warranty.
2006 Chevrolet Corvette Window Regulator, Front Passenger Side Part Number: 22895756
$463.09 MSRP: $834.40You Save: $371.31 (45%)Product Specifications- Other Name: Regulator, Front Door Window Regulator; Regulator, Door Lock Remote Control
- Position: Front Passenger Side
- Replaces: 15852979, 20980503, 22788444, 25842586, 25995142, 25815796, 15823581, 20823062, 25853812
- Item Weight: 5.20 Pounds
- Item Dimensions: 9.2 x 24.2 x 11.2 inches
- Condition: New
- Fitment Type: Direct Replacement
- SKU: 22895756
- Warranty: This genuine part is guaranteed by GM's factory warranty.
2006 Chevrolet Corvette Window Regulator
With a comprehensive array of OEM 2006 Chevrolet Corvette Window Regulator, from fuel pumps to door handles, our website is a one-stop-shop for your needs. All our genuine 2006 Chevrolet Corvette Window Regulator are backed by the manufacturer's warranty and are offered at competitive prices in the market. Rest assured, you can shop with complete confidence.
2006 Chevrolet Corvette Window Regulator Parts and Q&A
- Q: How to replace the front door window regulator on 2006 Chevrolet Corvette?A: Executive front door Window Regulator replacement begins with disconnecting the electrical/audio connector and removal of the speaker retaining screws from door trim panel, water deflector along with the radio speaker assembly. You need to take out the plugs which are positioned in the window clamp sight holes along with the door window. The replacement process begins with disconnecting the motor electrical connector before pulling out the front plug beneath the door bottom and making regulator installation marks. Start by removing the nuts from the regulator lower channel studs as well as the regulator motor studs and upper regulator channel studs before folding the regulator for removal through the door inner opening. Install the new regulator into the door opening by first adjusting the jack screws the same way as the original unit then folding the regulator before placement and securing the motor in the forward position. Follow this procedure to insert motor studs through the door inner panel before attaching nuts to them then tighten the nuts to 10 n.m (89 lb in). Secure the regulator channel studs through door hole openings in the sequence upper forward, lower forward, upper rearward, then lower rearward by torquing them to 10 n.m (89 lb in). Cool the regulator via the door and unite its electrical connector before elevating the regulator to its utmost position by switching on the window function. After setting the window position properly you should replace the access hole plugs of the weather seal clamp. Fasten the top speaker assembly screw while putting the remaining screws in a diagonal sequence before torquing each to 3 n.m (27 lb in). First install the electrical/audio connector then reinstall the water deflector and door trim panel. Afterward check the window fit and perform necessary adjustments followed by installation of access plugs into the door bottom.
Related 2006 Chevrolet Corvette Parts
 2006 Chevrolet Corvette Emblem
 2006 Chevrolet Corvette Door Handle
 2006 Chevrolet Corvette Door Latch Assembly
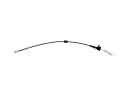 2006 Chevrolet Corvette Door Latch Cable
 2006 Chevrolet Corvette Door Lock
 2006 Chevrolet Corvette Door Lock Actuator
 2006 Chevrolet Corvette Door Lock Cylinder
 2006 Chevrolet Corvette Door Seal
 2006 Chevrolet Corvette Door Striker
 2006 Chevrolet Corvette Lift Support
 2006 Chevrolet Corvette Tailgate Latch
 2006 Chevrolet Corvette Weather Strip