ChevyParts
My Garage
My Account
Cart
OEM 2008 Cadillac XLR Fuel Rail
Engine Fuel Rail- Select Vehicle by Model
- Select Vehicle by VIN
Select Vehicle by Model
orMake
Model
Year
Select Vehicle by VIN
For the most accurate results, select vehicle by your VIN (Vehicle Identification Number).
2 Fuel Rails found


2008 Cadillac XLR Fuel Rail Part Number: 12598328
$76.97 MSRP: $324.14You Save: $247.17 (77%)Ships in 1-2 Business DaysProduct Specifications- Other Name: Rail Kit, Fuel Injection
- Item Weight: 2.30 Pounds
- Item Dimensions: 17.5 x 14.6 x 13.5 inches
- Condition: New
- Fitment Type: Direct Replacement
- SKU: 12598328
- Warranty: This genuine part is guaranteed by GM's factory warranty.


2008 Cadillac XLR Fuel Rail Part Number: 12598840
Product Specifications- Other Name: Rail, Multiport Fuel Injection Fuel; Rail, Fuel Injection
- Item Weight: 2.30 Pounds
- Item Dimensions: 4.0 x 23.5 x 19.8 inches
- Condition: New
- Fitment Type: Direct Replacement
- SKU: 12598840
- Warranty: This genuine part is guaranteed by GM's factory warranty.
2008 Cadillac XLR Fuel Rail
With a comprehensive array of OEM 2008 Cadillac XLR Fuel Rail, from fuel pumps to door handles, our website is a one-stop-shop for your needs. All our genuine 2008 Cadillac XLR Fuel Rail are backed by the manufacturer's warranty and are offered at competitive prices in the market. Rest assured, you can shop with complete confidence.
2008 Cadillac XLR Fuel Rail Parts and Q&A
- Q: How to replace the fuel rail assembly on 2008 Cadillac XLR?A: The replacement of Fuel Rail assembly begins by disconnecting the negative Battery Cable. Beginning with the removal of the Fuel Injector sight shield the technician will follow with fuel pressure relief using ch 48027 or by applicable procedures. Apply gm x 30a spray engine cleaner or an equivalent to clean the Fuel Rail assembly but avoid submerging it in liquid cleaning solvent. The first action detects Fuel Rail, positive crankcase ventilation (PCV) air tube, and each Fuel Injector electrical connectors during the fuel feed and return pipe and pcv air tube removal from the cam cover. Move the engine wiring harness away from the Fuel Rail stud before cutting the retaining clips then place it on the side. Disassemble the Fuel Rail attachment studs before removing the Fuel Rail with a decision to discard the lower o-ring seals contained in the injector assembly. The process of replacing the Fuel Rail requires removal of all the fuel injectors. You need to prepare new lower injector o-ring seals with engine oil before placing them during installation while adding fuel injectors if required. Position new o-ring seals on the tip of each injector spray opening before mounting the Fuel Rail. Secure the Fuel Rail attaching studs at 9 n.m whereas the harness needs installation onto the clips followed by tightening the Fuel Rail stud. Fitting new lower injector o-ring seals with engine oil requires a clean oil application. Install fuel feed and return tubes into the Fuel Rail and connect the Fuel Injector electrical links to each component. Complete the second step by inspecting for leaks after first turning the ignition on with engine off for two seconds then viewing for leaks while keeping the ignition off for ten seconds and re-starting the on position. Reinstall the sight shield after completion of the procedure.
Related 2008 Cadillac XLR Parts
 2008 Cadillac XLR Air Hose
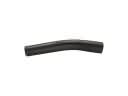 2008 Cadillac XLR Fuel Filler Hose
 2008 Cadillac XLR Fuel Injector
 2008 Cadillac XLR Fuel Pressure Sensor
 2008 Cadillac XLR Fuel Pump
 2008 Cadillac XLR Fuel Pump Gasket
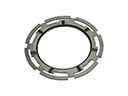 2008 Cadillac XLR Fuel Tank Lock Ring
 2008 Cadillac XLR Gas Cap
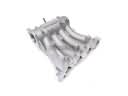 2008 Cadillac XLR Intake Manifold
 2008 Cadillac XLR Throttle Body
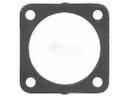 2008 Cadillac XLR Throttle Body Gasket
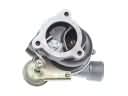 2008 Cadillac XLR Turbocharger