ChevyParts
My Garage
My Account
Cart
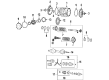
OEM 2009 Cadillac XLR CV Boot
Axle Boot- Select Vehicle by Model
- Select Vehicle by VIN
Select Vehicle by Model
orMake
Model
Year
Select Vehicle by VIN
For the most accurate results, select vehicle by your VIN (Vehicle Identification Number).
2 CV Boots found

2009 Cadillac XLR Inner Boot Part Number: 89047795
Product Specifications- Other Name: Boot Kit, Rear Axle Universal Joint; CV Boot
- Position: Rear Inner
- Item Weight: 1.10 Pounds
- Item Dimensions: 8.7 x 5.1 x 4.7 inches
- Condition: New
- Fitment Type: Direct Replacement
- Require Quantity: 2
- SKU: 89047795
- Warranty: This genuine part is guaranteed by GM's factory warranty.

2009 Cadillac XLR Outer Boot Part Number: 88955486
Product Specifications- Other Name: Boot Kit, Rear Axle Universal Joint; CV Boot
- Position: Rear Outer
- Item Weight: 3.30 Pounds
- Item Dimensions: 7.4 x 5.3 x 10.4 inches
- Condition: New
- Fitment Type: Direct Replacement
- Require Quantity: 2
- SKU: 88955486
- Warranty: This genuine part is guaranteed by GM's factory warranty.
2009 Cadillac XLR CV Boot
With a comprehensive array of OEM 2009 Cadillac XLR CV Boot, from fuel pumps to door handles, our website is a one-stop-shop for your needs. All our genuine 2009 Cadillac XLR CV Boot are backed by the manufacturer's warranty and are offered at competitive prices in the market. Rest assured, you can shop with complete confidence.
2009 Cadillac XLR CV Boot Parts Questions & Experts Answers
- Q: How to replace the outer CV Boot and CV Joint on the wheel drive shaft on 2009 Cadillac XLR?A: You must remove the Drive Shaft from your vehicle before you begin replacing the wheel Drive Shaft outer joint and boot. Insert a shop towel around the Axle Shaft before fixing the wheel Drive Shaft horizontally in a bench vise. The j 46588 tool should be used to remove the large seal retaining clamp which you must then throw away by using a side cutter. Seal removal begins by segmenting the seal from the joint outer race at the large diameter end then placing it behind the joint face. After cleaning the grease from the joint inner race, cage and balls an assistant helps remove the outer joint from the Axle Shaft by placing a wood block next to the seal then hitting the block with a hammer to compress the Axle Shaft retaining clip. Clean each component with solvent before air drying as you remove the Axle Shaft retaining ring and seal from the shaft. Position the cage before cage insertion to accommodate the larger radius corners in an upward direction while arranging the grooved surface of the inner race to face upward. Place the cage with larger radius corners pointing upward before inserting the inner race ball track faces up into the outer race until the larger radius corners face upward as well. Fit balls in a sequential order while making sure each ball maintains perfect contact with the inner race ball track surface. The Axle Shaft requires a new small seal retaining clamp and the seal and Axle Shaft retaining ring installation before filling it with approximatively 60 percent of the service kit grease. Drive the outer joint onto the shaft with a wood block and hammer until full seat is reached by first compressing the Axle Shaft retaining ring and engaging the inner race splines onto the Axle Shaft splines. Add the remaining grease to the seal then mount the small seal retaining clamp onto the seal's neck. Adjust this clamp fit so that the seal edge rests 2.5 mm (0.10 in) from the last Axle Shaft groove. Use a j 42572 tool to crimpen the small seal retaining clamp while achieving a 2-3mm (0.079 to 0.118 in) gap width. Position the large seal retaining clamp onto the seal before adjusting its fit to 0.8 mm (0.03 in) from the edge of the seal to the joint outer race groove. After inspection, check for damage when inspecting the seal for proper shape. Before installing the wheel Drive Shaft back into the vehicle inspect both the outer cv joint and wheel Drive Shaft for proper functioning while using the j 46588 to secure the large seal retaining clamp.
Related 2009 Cadillac XLR Parts
 2009 Cadillac XLR Axle Shaft
 2009 Cadillac XLR Differential
 2009 Cadillac XLR Differential Bearing
 2009 Cadillac XLR Differential Cover
 2009 Cadillac XLR Drive Shaft
 2009 Cadillac XLR Pinion Bearing
 2009 Cadillac XLR Wheel Seal