ChevyParts
My Garage
My Account
Cart
OEM 2009 Chevrolet Impala Transmission Pan
Trans Pan- Select Vehicle by Model
- Select Vehicle by VIN
Select Vehicle by Model
orMake
Model
Year
Select Vehicle by VIN
For the most accurate results, select vehicle by your VIN (Vehicle Identification Number).
1 Transmission Pan found


2009 Chevrolet Impala Oil Pan Part Number: 24206181
$109.30 MSRP: $186.08You Save: $76.78 (42%)Ships in 1-2 Business DaysProduct Specifications- Other Name: Pan, Transmission Oil Pan; Automatic Transmission Oil Pan; Hydraulic Filter; Transmission Pan; Filter; Pan Kit, Transmission Oil Pan; Transmission Oil Pan
- Replaces: 24210461
- Item Weight: 3.90 Pounds
- Item Dimensions: 19.1 x 14.0 x 1.2 inches
- Condition: New
- Fitment Type: Direct Replacement
- SKU: 24206181
- Warranty: This genuine part is guaranteed by GM's factory warranty.
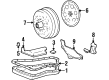
2009 Chevrolet Impala Transmission Pan
With a comprehensive array of OEM 2009 Chevrolet Impala Transmission Pan, from fuel pumps to door handles, our website is a one-stop-shop for your needs. All our genuine 2009 Chevrolet Impala Transmission Pan are backed by the manufacturer's warranty and are offered at competitive prices in the market. Rest assured, you can shop with complete confidence.
2009 Chevrolet Impala Transmission Pan Parts and Q&A
- Q: How to replace the transmission pan on 2009 Chevrolet Impala?A: Start by raising and supporting the vehicle before placing the drain pan directly beneath the transaxle Oil Pan. Detach transaxle Oil Pan bolts from both front and side positions before gradually releasing the bolts at the back. Avoid damaging the Oil Pan surfaces that connect with the case so oil leakage does not occur. A rubber mallet or screwdriver should be used to ease the Oil Pan loose so fluid can drain. After removing the transaxle bolting components you must detached the Oil Pan which includes the gasket assembly. Check the Oil Pan and filter for metal particles, clutch facing material, rubber particles and engine coolant contaminations and fix their source. The Oil Pan flange must be replaced if it shows bent or distorted shape since corrective attempts should not be made. The bolts attaching the Oil Pan require new washers when either the bottom oil needs removal or inverted washers are discovered. Dry the Oil Pan and case flanges before cleaning both surfaces with solvent while leaving them to air dry. You should insert the new Oil Pan Gasket followed by the installation of the Oil Pan before tightening the Oil Pan bolts to 14 nm (10 lb ft). During the refilling operation keep the vehicle at a low position while being watchful of adding excessive fluid because too much can result in fluid foaming which leads to shift complaints and damage to system components. Start by placing the gear selector into park position and then begin the engine along with a slow idle without racing which allows fluid level adjustment while examining for any leaks. The assembly process requires transjel(TM) j 36850 or an equivalent product as the lubricating material.
Related 2009 Chevrolet Impala Parts
 2009 Chevrolet Impala Automatic Transmission Filter
 2009 Chevrolet Impala Automatic Transmission Shift Levers
 2009 Chevrolet Impala Automatic Transmission Shifter
 2009 Chevrolet Impala Flywheel
 2009 Chevrolet Impala Shift Cable
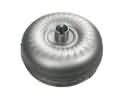 2009 Chevrolet Impala Torque Converter
 2009 Chevrolet Impala Transmission Assembly