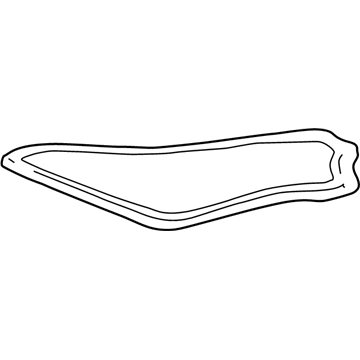
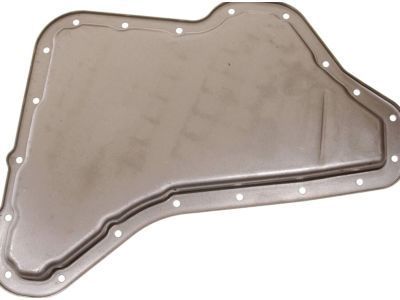
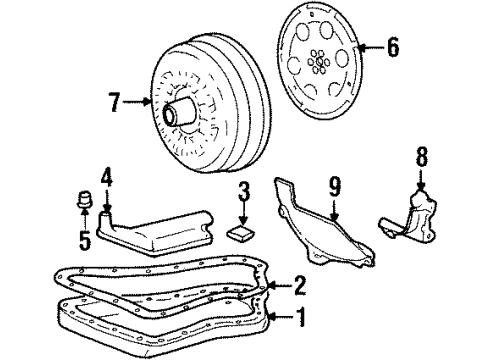
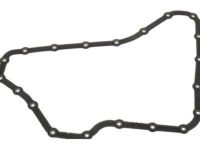
Make sure this part fits

GM 24206181
Oil Pan

1997-2011 GM

Customer Questions & Expert Answers (48)
GM 24206181 Oil Pan
GM 24206181 Oil Pan
  • Part Description
    Pan, Transmission Oil Pan; Automatic Transmission Oil Pan; Hydraulic Filter
  • Replaces
    24210461
  • Manufacturer
    General Motors
Make sure this part fits
$128.83 MSRP: $202.70
You Save: $73.87 (37%)
Ships in 1-2 Business Days
1
ADD TO CART
  • Related Parts
  • Product Specifications
  • Vehicle Fitment
  • Customer Questions & Expert Answers
  • Product Specifications

    BrandGenuine GM
    Manufacturer Part Number24206181
    Part DescriptionPan, Transmission Oil Pan; Automatic Transmission Oil Pan; Hydraulic Filter
    Other NamesTransmission Pan; Filter; Pan Kit, Transmission Oil Pan; Transmission Oil Pan
    Item Dimensions19.1 x 14.0 x 1.2 inches
    Item Weight3.90 Pounds
    ConditionNew
    Fitment TypeDirect Replacement
    Replaces24210461
    ManufacturerGeneral Motors
    SKU24206181
    WarrantyThis genuine GM part is guaranteed by GM's factory warranty.
    Shipping & ReturnShipping Policy Return Policy
    Warning: California's Proposition 65
  • Vehicle Fitment

    Year Make Model Trim Engine
    1999-2005 Buick CenturyCustom, Limited, Special Edition6 Cyl 3.1 L GAS
    2005-2009 Buick LaCrosseCX, CXL, CXS, Super6 Cyl 3.6 L GAS, 6 Cyl 3.8 L GAS, 8 Cyl 5.3 L GAS
    1999-2005 Buick LeSabreCustom, Limited6 Cyl 3.8 L GAS
    2006-2011 Buick LucerneCX, CXL, CXL Special Edition, Super6 Cyl 3.8 L GAS, 6 Cyl 3.9 L FLEX, 6 Cyl 3.9 L GAS, 8 Cyl 4.6 L GAS
    1999-2005 Buick Park AvenueBase, Ultra6 Cyl 3.8 L GAS
    1999-2004 Buick RegalGS, GSE, LS, LSE6 Cyl 3.8 L GAS
    2002-2007 Buick RendezvousCX, CX Plus, CXL, CXL Plus, Ultra6 Cyl 3.4 L GAS, 6 Cyl 3.5 L GAS, 6 Cyl 3.6 L GAS
    1999 Buick RivieraBase6 Cyl 3.8 L GAS
    1997-1998 Buick SkylarkCustom, Gran Sport, Limited4 Cyl 2.4 L GAS, 6 Cyl 3.1 L GAS
    2005-2007 Buick TerrazaCX, CXL6 Cyl 3.5 L GAS, 6 Cyl 3.9 L FLEX, 6 Cyl 3.9 L GAS
    View More
  • Customer Questions & Expert Answers

    Q:
    Can you help me check if this 24206181 is the right part for my car? Posted by ChevyPartsGiant Specialist
    A:
    Please Select Your Vehicle model to see if part number 24206181 is suitable before ordering.
    Posted by ChevyPartsGiant Specialist
    Q:
    How to replace the transmission pan on Buick Lucerne? Posted by Customer
    A:
    The first step to replace an Oil Pan consists of lifting and supporting the vehicle and positioning a drain pan beneath the transaxle Oil Pan. Remove all bolts from the front and side of the transaxle Oil Pan then proceed to loosen the bolts located at the rear. Prevent damage between the Oil Pan mating surfaces and case to block any oil leakages while performing the installation. A rubber mallet should be used to give small taps to the Oil Pan while a screwdriver can carefully pry it loose so the fluid can drain. Take off the Oil Pan along with the Oil Pan Gasket by removing its remaining bolts. After examining the Oil Pan with the filter you must check for foreign materials such as metal particles but also check for clutch facing material and rubber particles as well as engine coolant before determining their source and performing correction. The Oil Pan flange should be checked for bending deformation but the Oil Pan must be replaced if distortion is present rather than attempting to straighten it. Examine the Oil Pan bolts' washers for any reversed orientation in case the bottom oil required removal because these washers should be replaced together with their corresponding bolts. To prevent leakage it is essential that both case flanges and Oil Pan remain free of all oil film while being dry. Wipe the Oil Pan Gasket surfaces and the case areas with solvent which requires drying in air until no traces of the previous gasket material remain. The technician should install both the Oil Pan Gasket and the Oil Pan before torquing the Oil Pan bolts to 14 nm (10 lb ft). During the fluid addition process immediately check the transmission level of dextron(R) iii before vehicle lift because excess fluid can lead to vent tube damage and fluid expulsion. Start the engine while the gear selector is in park position then operate it at a slow idle before setting the fluid level and examining for leakages.
    Posted by ChevyPartsGiant Specialist
    Q:
    How to replace the transmission pan on Buick LeSabre? Posted by Customer
    A:
    The first task before Oil Pan replacement requires vehicle lifting and support for a proper position. A drain pan should be positioned directly under the transaxle Oil Pan to collect the oil. The process of unbolted the Oil Pan requires extreme caution since damage to its sealing surfaces can produce oil leakage. Only remove the bolts from the front and sides of the Oil Pan before loosening the rear bolts by four turns. Use a rubber mallet or light prying motion to drain the fluid from the Oil Pan while checking its fluid color. Draining the transaxle fluid requires the removal of all Oil Pan bolts while using bolt removers to detach the Oil Pan and its gasket. You can reuse Oil Pan gaskets as long as their sealing surfaces remain unharmed during installation process and you should introduce Oil Pan and gasket into its place all at once. Fasten the Oil Pan bolts making sure they achieve a tightening torque of 14 nm (10 ft-lbs). The technician should lower the vehicle before filling the transaxle with dexron fluid or equivalent until the cold fluid level reading indicates the correct amount to prevent overfilling. Conclusion of the operation involves checking for leaks in the Oil Pan gasket.
    Posted by ChevyPartsGiant Specialist
    Q:
    How to service and repair the transmission pan on Buick Century? Posted by Customer
    A:
    Service and repair of the fluid pan begins with vehicle elevation along with supportive tools before putting a drain pan underneath the transaxle bottom Oil Pan. Loosen the rear Oil Pan bolts four turns and keep damaging the mating surfaces in mind to avoid fluid leakage. You should use either a rubber mallet or a screwdriver to gently tap or pry the Oil Pan loose while the fluid drains so you can subsequently remove the remaining Oil Pan bolts and the Oil Pan together with the Oil Pan gasket . Examine the Oil Pan together with filter screen for foreign substances including metal pieces and clutch facing material, rubber debris or engine coolant to detect the origin before fixing it. Replace Oil Pan flanges which show any bending or warping conditions because attempts at straightening will be unsuccessful. Always check the bottom Oil Pan bolts when they are removed for any inverted washers because installing fresh bolt and washer assemblies becomes necessary. Dry both the Oil Pan and the case flanges from oil film by deflating them prior to using solvent for cleaning the gasket application surfaces on the case and Oil Pan. Eliminate all remaining gasket material residue before putting new gasket sheets on top of the case then using new washers and bolts to tighten the assembly to 14 nm (10 ft. Lbs.). After placing the Oil Pan gasket and then the Oil Pan secure the Oil Pan bolts with 14 nm (10 ft. Lbs.) torque. To begin the process of filling the transaxle with dextron(R) you should lower the vehicle while placing the gear selector in park and starting the engine at slow speed without racing. Measure the fluid amount while checking if the maintenance work was successfully completed and to identify any existing fluid leakage points.
    Posted by ChevyPartsGiant Specialist
    Q:
    How to properly service the transmission pan on Buick LaCrosse? Posted by Customer
    A:
    A vehicle elevation and support system combined with a drain pan beneath the transaxle Oil Pan serves as the initial step before removing the transaxle Oil Pan bolts. Drain the transaxle Oil Pan by removing its bolts from front faces and side positions while loosening rear bolts. During the removal process avoid causing any damage to the Oil Pan mating surface with the transmission case so no oil leaks will develop. A rubber mallet should be used for gentle tapping of the Oil Pan while a screwdriver serves to pry it open so fluid can drain out. First remove all yet remaining transaxle bolts and uninstall both the Oil Pan with its gasket . Test the Oil Pan and filter for moderate contaminants consisting of metal fragments, clutch facing fragments, rubber particles and engine coolant then seek the root cause of all contamination to make repairs. Replace the Oil Pan because bent or distorted flanges cannot be repaired. Distortion should be checked on the Oil Pan flange separately after removing the Oil Pan. When the bottom oil pool has been drained check all Oil Pan bolt washers for incorrect orientation and perform a washers and bolts replacement. Dry all surfaces of the Oil Pan and case flanges while removing all oil film residues before cleaning both components with air dry. Drying the Oil Pan Gasket surfaces requires thorough cleaning until all past gasket material disappears. Place the Oil Pan Gasket on the pan before installing the pan followed by Oil Pan bolt torquing at 14 n.m (10 lb ft). After lowering the vehicle users must add fluid as indicated by transaxle capacity parameters. Select park on the gearbox before starting the engine to maintain slow engine operation without high speeds. Seek fluid adjustment for the system while checking for any leaking issues.
    Posted by ChevyPartsGiant Specialist
    Q:
    How to replace the transmission pan on Buick Park Avenue? Posted by Customer
    A:
    A professional must begin Oil Pan replacement by raising and supporting the vehicle. Put the drain pan underneath the transaxle Oil Pan while being careful not to harm the leak-proof surfaces of the Oil Pan when eliminating its bolts because damage could initiate oil leakage. Start by removing all Oil Pan bolts from the front and sides before applying loose rotation to the rear bolts with about four turns. Use a rubber mallet to tap the Oil Pan while draining the fluid or use a suitable prying tool while inspecting the fluid's color. Take off the Oil Pan by doing away with the remaining bolts following an oil drain process and removing the gasket. Reusing Oil Pan gaskets depends on how much damage exists on the sealing surface because you should apply the Oil Pan alongside the gasket during installation. Secure the Oil Pan bolts with torque set at 14 nm equivalent to 10 foot-pounds. The first fluid addition should be limited to the cold fluid level reading while using dexron iii fluid or its equivalent to fill the transaxle until the proper level is reached. Check for any leaks that may appear on the Oil Pan Gasket during the final inspection step.
    Posted by ChevyPartsGiant Specialist
    Q:
    How to replace the transmission pan on Buick Regal? Posted by Customer
    A:
    You should begin pan replacement by first elevating the vehicle while placing a drain pan beneath the transaxle Oil Pan. Begin by removing the bolts secured to the transaxle Oil Pan at its front side followed by carefully releasing back bolts. Prevent damage to the Oil Pan surface which connects to the case because this could lead to oil leakage. A rubber mallet or screwdriver should be used to slowly separate the Oil Pan from its position while the fluid drains out. Complete the bolt removal process of the transaxle and extract both the Oil Pan while separating the gasket from it. Life pan and filter analysis must include the detection and repair of metal particles, clutch facing material, rubber particles and engine coolant. The cause of any contamination should be identified at this stage. You must exchange the Oil Pan flange if it shows any signs of bending or warping because attempts at straightening it will be unsuccessful. The procedure to remove bottom oil requires checking all Oil Pan bolt washers for correct orientation and replacement of any inverted ones. Dry and oil-film-free conditions must be present on both the Oil Pan and case flanges before cleaning the case followed by airspace drying. Wipe off gasket surfaces on the Oil Pan before drying them completely without leaving any residue from the old gasket material. Place the Oil Pan gasket along with the Oil Pan inside the opening before attaching the Oil Pan bolts at 14 nm (10 ft. Lbs.) torque value. The vehicle must be lowered and dextron iii should be added to the transaxle unit when the gear selector points to park. After starting the engine operate it with slow idle without racing before checking the fluid level while searching for any potential leaks.
    Posted by ChevyPartsGiant Specialist
    Q:
    How to replace the transmission pan on Buick LaCrosse? Posted by Customer
    A:
    You should replace the Oil Pan using transjel j 36850 or equal assembly lube instead of using grease because grease can modify transaxle fluid behavior which causes shifting problems and filter blockages. Position the car on a lift platform while shifting the drain container under the Oil Pan of the transaxle. The first front and side bolts of the transaxle Oil Pan need removal followed by rear bolt loosening before gently tapping or prying the Oil Pan free to safeguard mating surfaces. Allow full drain of fluid before you take out the additional Oil Pan bolts and the Oil Pan from its position. Next remove the Oil Pan Gasket . You should carefully examine the Oil Pan together with filter for all types of contaminants like metals or clutch facing material or rubber substances or engine coolant to determine their source before resolving the issue. Distortion of the Oil Pan flange requires replacing the component because attempts at straightening could prove unsuccessful. The inspection of Oil Pan bolts washers should take place when bottom oil removal is performed. Replace inverted washers while changing the bolts. A clean dry Oil Pan and case flange should be used to avoid leakage by cleaning them with solvent followed by natural air drying. The new Oil Pan Gasket combined with the Oil Pan needs to be installed before tightening the Oil Pan bolts to 14 nm (10 ft. Lbs.). The transaxle of the vehicle must be lower while technicians fill it with dextron iii fluid while keeping the gear selector in the park position. After starting the engine at slow speed maintain an idle without race conditions you should inspect for leaks while adjusting the fluid level.
    Posted by ChevyPartsGiant Specialist
    Q:
    How to replace the transmission pan on Buick Rendezvous? Posted by Customer
    A:
    The replacement of an Oil Pan requires vehicle lifting and positioning a drain pan under the transaxle bottom Oil Pan. You need to remove the front and side bolts on the Oil Pan before loosening the rear bolts four turns. To prevent breaking the Oil Pan connection to the case use a rubber mallet or screwdriver for soft separation. Empty the entire fluid before taking out the remaining Oil Pan bolts and removing the Oil Pan together with its gasket. A thorough inspection should be conducted on the Oil Pan combined with its filter screen for identifying metal particles along with clutch facing material and rubber particles and engine coolant. All sources of contamination must be identified to initiate corrections. Replace the Oil Pan because any bending or distortion prevents proper installation. Attempting to manually straighten the pan should be avoided. Replace the bolt assembly with a new one if you find any inverted washer during the inspection. Check the Oil Pan for damage to the sealing surface as well as the dented or cracked bottom surface and examine the Oil Pan gasket for a bent or damaged seal core, damaged rubber seal surface or damaged gasket. Before mounting the Oil Pan check the magnet for damage and improper installation. Clean all sediment loose from the Oil Pan, gasket and magnet before installation. Dry down both the Oil Pan and case flanges thoroughly while eliminating all oil residue through cleaning with solvent. Allow both surfaces to air dry. Place the new Oil Pan gasket together with the Oil Pan before you install and tighten the Oil Pan bolts at 14 nm (10 ft. Lbs.). Lower the vehicle while putting the proper amount of dexron® iii transaxle fluid into place in the park position before starting the engine. Slow-speed engine operation should be maintained until you achieve the correct fluid level that avoids overfilling since this prevents foaming and loss of fluid while eliminating shift complaints and preserving transaxle integrity. The last step should involve examining the repair quality and verifying fluid leakages.
    Posted by ChevyPartsGiant Specialist
    Q:
    How to Ensure Proper Installation of the Transmission Pan on Buick Regal? Posted by Customer
    A:
    Raising and supporting the vehicle creates space to position a drain pan underneath the transaxle bottom Oil Pan. Start by removing transmission Oil Pan bolts located on the front and sides while keeping the rest of the bolts at the rear loose to just four turns without damaging the mating surfaces. Lightly hit the Oil Pan using a rubber mallet so fluid drains before removing the remaining transmission Oil Pan bolts and the transmission Oil Pan with its associated gasket. Check transmission Oil Pan and filter screen for metal particles, clutch facing material, rubber particles and engine coolant and identify their source for necessary correction. Replacement of a bent or distorted transmission Oil Pan flange is necessary when examining it for damage but attempts to straighten this part should be avoided. Before installing the bottom Oil Pan check if any bolt washers are inverted; replace inverted washers by installing a new bolt assembly when detected. First dry both the Oil Pan and case flanges before cleaning the transmission case until completely dry while the technician dried and cleaned the transmission Oil Pan gasket surfaces until all residual old gasket material disappeared. Place the transmission Oil Pan gasket along with the transmission Oil Pan into their correct position before tightening the transmission Oil Pan bolts to 14 nm (10 ft. Lbs.). The vehicle should be placed at the lowest height during fluid filling with dexron iii transmission fluid while gear selection maintains a park position before engine startup at minimal speed. The transmission should not be filled beyond its capacity to stop foaming while ensuring fluid loss and potential damage do not occur. Fluid volume adjustment needs to be made before checking that all repairs are complete and there are no fluid leaks present.
    Posted by ChevyPartsGiant Specialist
    Q:
    How to replace the transmission pan on Buick Terraza? Posted by Customer
    A:
    The replacement of an Oil Pan starts by elevating the vehicle then supporting it with proper tools. A drain pan needs to be positioned beneath the transaxle bottom Oil Pan. You need to extract the Oil Pan bolts from both front and sides before you start to ease the rear bolts by about four turns while protecting the case and Oil Pan mating surfaces to stop leakage. A rubber mallet or flat-bladed tool helps separate the Oil Pan from its position while you drain the fluid before pulling out the remaining bolts and the Oil Pan as well as its gasket. The inspection must include both the Oil Pan and filter screen where you should look for metal particles together with clutch facing material and rubber particles and engine coolant. Determine the origin of contaminants and make necessary corrections. Look for any deformation around the Oil Pan flange then use a straightening technique when needed and check the bolt washers which need to be replaced if they have the wrong orientation. Check the Oil Pan's rubber seal area for damage and its bottom surface forimps and cracks while inspecting the gasket seal core for bend or damage and rubber seal surface for damage. A thorough examination of the Oil Pan magnet requires checking for any sign of damage or improper alignment. Thoroughly clean the Oil Pan with all its components before drying the flanges of the pan and case completely free of oil. The surfaces of the pan and case require cleaning until they show no signs of residual gasket material before allowing complete drying. Attach the new Oil Pan Gasket with the Oil Pan after fastening the Oil Pan bolts to 14 nm (10 ft. Lbs.). Adjust the fluid level properly while lowering the vehicle because overfilling may cause troubles with foaming and fluid loss as well as transmission complaints and component damage. Finally, inspect for fluid leaks. During assembly use transjel lubricant (J 36850) because it preserves the correct transaxle fluid properties.
    Posted by ChevyPartsGiant Specialist
    Q:
    How to service and repair the transmission pan on Chevrolet Impala? Posted by Customer
    A:
    The first step is to lift your vehicle while having a drain pan positioned beneath the transaxle Oil Pan. Start by removing all transaxle Oil Pan bolts from both front edges and sides followed by the careful loosening of the rear bolts. When removing the Oil Pan and case you should avoid creating damage to their mating surfaces thereby keeping oil from leaking out. A rubber mallet should lightly hit the Oil Pan to help it release while a screwdriver can be used as an alternative approach to achieve drainage. After removing transaxle bolts you can take off both the Oil Pan and its gasket. Check the Oil Pan and filter for metallic elements along with clutch facing product and rubber fragments as well as engine coolant while finding the origin of pollutants and fixing the issue. Replace the Oil Pan flange because any bending or distortion which occurred cannot be fixed. Service providers must examine Oil Pan bolt washers when removing the bottom oil to change any inverted components and their respective bolts. Dry oil film must be eliminated from the Oil Pan and case flanges before cleaning the case while it air dries. The service includes cleaning and air drying Oil Pan Gasket surfaces until you remove all remnants from the previous gasket material. Place the Oil Pan Gasket before repositioning the Oil Pan between these components. Secure the Oil Pan bolts by tightening them to 14 nm (10 ft. Lbs.). Begin by lowering the vehicle and add dexron iii fluid into the transaxle while keeping the gear selector in park position. After starting the engine at a slow idle speed without racing the vehicle proceed to adjust fluid level and perform leak inspection.
    Posted by ChevyPartsGiant Specialist
    Q:
    How to service and repair the transmission pan on Buick LeSabre? Posted by Customer
    A:
    A vehicle lift will service and repair the fluid pan by using a drain pan for the transaxle Oil Pan. Put the drain pan beneath the transaxle Oil Pan. During Oil Pan bolt removal avoid damaging either sealing surface since this will result in an oil leak. Unfasten the Oil Pan bolts on the Oil Pan front section along with the sides and next gently rotate the rear Oil Pan bolts by 4 turns. Lightly strike the Oil Pan using a rubber mallet to drain fluid while inspecting the fluid color. When the oil drain processing ends remove all remaining Oil Pan bolts before uninstalling the Oil Pan along with its gasket. The Oil Pan gasket must be installed with a new gasket where sealing ribs become damaged. Place the Oil Pan bolts on their matching holes before tightening them to 14 nm (10 ft. Lbs.). Before filling the transaxle use dexron(R) iii fluid or equivalent to reach the correct fluid mark. Perform the initial fluid fill on the cold level without exceeding capacity and inspect for any leaks throughout the Oil Pan gasket.
    Posted by ChevyPartsGiant Specialist
    Q:
    How to service and repair the Transmission Pan of an automatic transmission on Chevrolet Impala? Posted by Customer
    A:
    Service and repair operations on the fluid pan start with vehicle elevation and support alongside the placement of a drain pan underneath the automatic transmission Oil Pan. Disconnect the Oil Pan bolts but handle the joint surfaces between pan and case with care so oil leakage does not occur. A rubber mallet or screwdriver helps loosen the Oil Pan before users can extract both the Oil Pan and gasket. After the foreign materials check in both the Oil Pan and the filter screen users need to inspect the condition of the Oil Pan flange for distortion and need to replace it when bent beyond recovery. Replace the whole bolt-washer assembly when inverted washers are present. Thoroughly dry the Oil Pan and case flanges while eliminating any oil residue. After cleaning surfacese of the case and Oil Pan Gasket with solvent let them air dry completely. Remove all remnants of old gasket material before continuing. The new Oil Pan Gasket should be installed to the automatic transmission along with the Oil Pan, while securing the Oil Pan bolts to 14 nm (10 ft. Lbs.). Fill up the automatic transmission system with its recommended fluid while the vehicle stays lowered down but avoid exceeding the recommended level to stop foam production that could result in damage. Start by shifting the gear selector to park before ignition and engine operation at medium speed while watching for fluid leakage then remove the drain pan beneath the automobile.
    Posted by ChevyPartsGiant Specialist
    Q:
    How to service and repair the transmission pan on Chevrolet Lumina? Posted by Customer
    A:
    Service and repair procedures start by properly raising and supporting the vehicle during which you should place a drain pan under the transaxle bottom Oil Pan. Begin by safely removing the Oil Pan bolts from both front and side aspects before loosening the rear Oil Pan bolts about four turns with caution towards avoiding damage to the Oil Pan and case mating surfaces to stop oil leaks. Tap the Oil Pan gently with a rubber mallet while leaving a screwdriver to work as a pry tool. This action permits the liquid to exit before you take out the remaining Oil Pan bolts and Oil Pan together with the gasket. An examination of the Oil Pan combined with filter screen must happen to identify any foreign materials such as metal particles, clutch facing material, rubber particles, and engine coolant so their source of contamination can be found and fixed. The Oil Pan flange must be checked for distortion before replacing the Oil Pan unless congratulations can be made to regain its original shape. You should replace the bolt and washer assembly when the washer shows an inverted orientation. The clean process requires dry and oil-free Oil Pan and case flanges which must be solvent-cleaned alongside the removal of all old gasket particles from surfaces. Set the Oil Pan Gasket correctly before mounting the Oil Pan while tightening the Oil Pan bolts to 14 nm (10 ft. Lbs.). Fill the transaxle with proper quantities of dexron(R) iii fluid after lowering the car and engage the park position from the gear selector while letting the engine idle slowly. Transaxle damage will result if you exceed the recommended fluid capacity level since this can lead to foaming and fluid loss along with shift complaints. Check the fluid level before conducting a final inspection for correct work completion as well as monitoring any possible fluid leakage.
    Posted by ChevyPartsGiant Specialist
    Q:
    How to replace the transmission pan on Chevrolet Monte Carlo? Posted by Customer
    A:
    The replacement process for the Oil Pan requires no grease on retained parts because other greases besides transjel (TM) j 36850 or its equivalent may alter fluid characteristics and cause shifting problems or filter blockage. Support the vehicle first and place a drain pan beneath the transaxle Oil Pan. Start by loosening the bolts attaching the Oil Pan at its front and sides while slowly breaking the rear ones loose. Apply a rubber mallet or screwdriver instead of force to prevent oil leakage by maintaining the Oil Pan and case mating surfaces intact. The process requires you to drain all fluid before you can remove the remaining bolts to extract the Oil Pan along with its gasket. Check the oil filter for metal grit and clutch facing material as well as engine coolant contamination. Also identify the source of possible contaminants. The Oil Pan flange must be replaced if it shows bent or distorted features because trying to straighten it will not work. The process requires checking Oil Pan bolt washers which need replacement if inversion is present while performing their installation. Dry both the case flanges and Oil Pan by using solvent then waiting for air drying during the procedure. Use solvent to cleanse Oil Pan Gasket surfaces before air drying them until all old gasket material is fully eliminated. Set the new Oil Pan Gasket along with the Oil Pan in position. Afterward install the Oil Pan bolts before you tighten them to 14 nm (10 ft. Lbs.). Lower the vehicle while filling the transaxle with dextron iii liquid but avoid excess fluid. Begin with the gear selector placed in park and start the engine at slow idle speed which should not exceed racing speed. Check the fluid amount and search for any signs of leakage while performing the inspection.
    Posted by ChevyPartsGiant Specialist
    Q:
    How to replace the transmission pan on Chevrolet Uplander? Posted by Customer
    A:
    The necessary tools for Oil Pan replacement include transjel lubricant (J 36850). Start by lifting the car then support it while placing a drain pan under the bottom section of the transaxle Oil Pan. You should remove the Oil Pan bolts from the front and sides while loosening the rear bolts four turns but maintain the mate surfaces to stop oil leaks. Apply a rubber mallet or flat-bladed tool to separate the Oil Pan gradually until it releases fluid which drains for the removal of additional bolts and the Oil Pan plus Oil Pan Gasket. Users must inspect the Oil Pan along with its filter screen for foreign materials such as metal particles and clutch facing material and rubber particles and engine coolant before identifying their sources of contamination. Inspect the Oil Pan flange for distortion then rectify it if needed after updating inverted washers with new bolt and washer materials. Check the Oil Pan to verify the sealing surface has damage or irregularities as well as examine for cracks and dents. Also inspect the Oil Pan Gasket for any damage to the seal core and identify affected areas on the rubber surface. A thorough inspection should be performed on the Oil Pan magnet alongside an examination for both damage and misalignment. The cleaning process eliminates all sediment from the Oil Pan alongside the gasket and the magnet. Dry conditions must exist for both the Oil Pan flange and the case flange. Transverse all residual old gasket material from both surfaces before their complete drying period. Place the new Oil Pan Gasket followed by the Oil Pan and proceed to tighten the Oil Pan bolts to 14 n.m (10 lb ft). Carefully set the fluid level before finally checking the vehicle for fluid leaks during the process of lowering the vehicle.
    Posted by ChevyPartsGiant Specialist
    Q:
    How to replace the transmission pan on Chevrolet Venture? Posted by Customer
    A:
    Vehicle lifting with fixture support is necessary before replacing the Oil Pan. A drain pan should rest under the transaxle bottom Oil Pan while you remove front and side bolts from the Oil Pan. The rear bolts should be loosened by four turns. You should maintain the cleanliness of Oil Pan and case mating points because any damage will create oil leakages. Slowly loosen the Oil Pan with a flat-bladed tool and a rubber mallet while draining fluid so the rest of the bolts can be removed to take out the Oil Pan with its gasket. Check the Oil Pan and filter screen for material debris that includes metal particles, clutch facing material, rubber particles, engine coolant while identifying the source of contamination to apply necessary corrections. Verify that the Oil Pan flange has no distortions while straightening it if required. The washers must be checked for any upside-down orientation. Those washers will get replaced through new bolt and washer assemblies. Check both the sealing surface of the Oil Pan and the bottom of the pan for damages while inspecting the gasket seal core for warping and checking the rubber seal faces. Check whether the Oil Pan magnet shows signs of any harm or improper positioning. Prepare the Oil Pan and gasket alongside magnet by clearing debris and dry both the case flanges along with the Oil Pan thoroughly. Eliminate any leftover gasket substance from both the pan sealing surface and case sealing surface before their drying period begins. After installing the new Oil Pan Gasket with its associated Oil Pan, secure the Oil Pan bolts by applying a torque of 14 nm (10 ft. Lbs.). The transaxle fluid needs to be adjusted for proper level while keeping the vehicle on a lower position to prevent foam and fluid loss and transmission complaints and component damage. Finally, inspect for fluid leaks. You should use j 36850 Transmission Assembly lubricant when assembling equipment to maintain transaxle fluid characteristics.
    Posted by ChevyPartsGiant Specialist
    Q:
    What should you be careful about when removing the oil pan for the 2005 Buick LaCrosse? Posted by Customer
    A:
    Take care not to damage the mating surfaces of the oil pan and case to prevent oil leaks.
    Posted by ChevyPartsGiant Specialist
    See expert answers on similar Transmission Pan
    Q:
    What should be used during assembly to maintain transaxle fluid characteristics for the 2005 Buick LeSabre? Posted by Customer
    A:
    Use TRANSJEL(TM) J 36850 or equivalent.
    Posted by ChevyPartsGiant Specialist
    See expert answers on similar Transmission Pan
    Q:
    What should you do if the bottom oil requires removal for the 2008 Buick Lucerne? Posted by Customer
    A:
    Inspect the washers on the oil pan bolts and replace any inverted washers.
    Posted by ChevyPartsGiant Specialist
    See expert answers on similar Transmission Pan
    Q:
    What should you be careful about when prying the oil pan loose for the 2005 Buick Century? Posted by Customer
    A:
    Take care not to damage the mating surfaces of the oil pan and case.
    Posted by ChevyPartsGiant Specialist
    See expert answers on similar Transmission Pan
    Q:
    What should you be careful about when removing the oil pan for the 2009 Buick Lucerne? Posted by Customer
    A:
    Take care not to damage the mating surfaces of the oil pan and case to prevent oil leaks.
    Posted by ChevyPartsGiant Specialist
    See expert answers on similar Transmission Pan
    Q:
    What should you do after loosening the oil pan for the 2007 Buick Rendezvous? Posted by Customer
    A:
    Allow the fluid to drain before removing the remaining oil pan bolts and the oil pan along with the oil pan gasket.
    Posted by ChevyPartsGiant Specialist
    See expert answers on similar Transmission Pan
    Q:
    What should you inspect after draining the fluid for the 2000 Buick Park Avenue? Posted by Customer
    A:
    The fluid color.
    Posted by ChevyPartsGiant Specialist
    See expert answers on similar Transmission Pan
    Q:
    What should you inspect after removing the oil pan for the 2006 Buick Lucerne? Posted by Customer
    A:
    Remove the oil pan gasket and inspect the oil pan and filter for foreign materials such as metal particles, clutch facing material, rubber particles, and engine coolant.
    Posted by ChevyPartsGiant Specialist
    See expert answers on similar Transmission Pan
    Q:
    What should you do after removing the oil pan for the 2007 Buick Lucerne? Posted by Customer
    A:
    Remove the remaining transaxle bolts and take out the oil pan along with the oil pan gasket.
    Posted by ChevyPartsGiant Specialist
    See expert answers on similar Transmission Pan
    Q:
    What should you inspect after removing the oil pan for the 2006 Buick Rendezvous? Posted by Customer
    A:
    Inspect the oil pan and filter screen for foreign materials such as metal particles, clutch facing material, rubber particles, and engine coolant.
    Posted by ChevyPartsGiant Specialist
    See expert answers on similar Transmission Pan
    Q:
    What should be done with the old gasket material for the 2001 Buick Century? Posted by Customer
    A:
    Remove all traces of the old gasket material before installing the new oil pan gasket and the oil pan.
    Posted by ChevyPartsGiant Specialist
    See expert answers on similar Transmission Pan
    Q:
    How do you remove the transaxle oil pan for the 2008 Buick LaCrosse? Posted by Customer
    A:
    Remove the transaxle oil pan bolts from the front and sides, and loosen the rear bolts.
    Posted by ChevyPartsGiant Specialist
    See expert answers on similar Transmission Pan
    Q:
    What are the consequences of overfilling the transaxle for the 2002 Buick Rendezvous? Posted by Customer
    A:
    It can lead to foaming, loss of fluid, shift complaints, and possible damage.
    Posted by ChevyPartsGiant Specialist
    See expert answers on similar Transmission Pan
    Q:
    How do you ensure the oil pan and case flanges are ready for installation for the 2003 Buick Rendezvous? Posted by Customer
    A:
    Clean the oil pan, gasket, and magnet to remove any sediment, ensuring they are dry and free of oil.
    Posted by ChevyPartsGiant Specialist
    See expert answers on similar Transmission Pan
    Q:
    How should the oil pan bolts be tightened for the 2007 Buick Terraza? Posted by Customer
    A:
    Install and tighten the oil pan bolts to 14 N.m (10 lb ft).
    Posted by ChevyPartsGiant Specialist
    See expert answers on similar Transmission Pan
    Q:
    How do you remove the transaxle oil pan for the 2008 Chevrolet Impala? Posted by Customer
    A:
    Remove the transaxle oil pan bolts from the front and sides, and loosen the rear bolts.
    Posted by ChevyPartsGiant Specialist
    See expert answers on similar Transmission Pan
    Q:
    What should you do after lowering for the 2009 Chevrolet Impala? Posted by Customer
    A:
    Fill the transaxle, being careful not to overfill as this can cause foaming, loss of fluid, shift complaints, and potential damage.
    Posted by ChevyPartsGiant Specialist
    See expert answers on similar Transmission Pan
    Q:
    What should be done with the oil pan bolts for the 2006 Chevrolet Malibu? Posted by Customer
    A:
    Remove the oil pan bolts from the front and sides, then loosen the rear bolts approximately 4 turns.
    Posted by ChevyPartsGiant Specialist
    See expert answers on similar Transmission Pan
    Q:
    What should you do after lowering for the 2010 Chevrolet Impala? Posted by Customer
    A:
    Fill the transaxle, ensuring not to overfill to avoid foaming and potential damage.
    Posted by ChevyPartsGiant Specialist
    See expert answers on similar Transmission Pan
    Q:
    How do you prepare the oil pan and case for reinstallation for the 2007 Chevrolet Impala? Posted by Customer
    A:
    Ensure the oil pan and case flanges are dry and free of oil film, then clean the surfaces with solvent and air dry them.
    Posted by ChevyPartsGiant Specialist
    See expert answers on similar Transmission Pan
    Q:
    What is the next step after cleaning the surfaces for the 2004 Chevrolet Monte Carlo? Posted by Customer
    A:
    Install the oil pan gasket and the oil pan, then install the oil pan bolts and tighten them to 14 Nm (10 ft. lbs.).
    Posted by ChevyPartsGiant Specialist
    See expert answers on similar Transmission Pan
    Q:
    What is the first step to replace the oil pan for the 2001 Chevrolet Monte Carlo? Posted by Customer
    A:
    Raise and support the vehicle, then place a drain pan under the automatic transmission oil pan.
    Posted by ChevyPartsGiant Specialist
    See expert answers on similar Transmission Pan
    Q:
    What are the specified refill capacities for the transaxle for the 2007 Chevrolet Malibu? Posted by Customer
    A:
    Approximately 6.5 L (6.9 qt) for bottom pan removal, 9 L (9.5 qt) for complete overhaul, and 12.2 L (12.9 qt) for dry capacity.
    Posted by ChevyPartsGiant Specialist
    See expert answers on similar Transmission Pan
    Q:
    What should you check for on the oil pan flange for the 2005 Chevrolet Monte Carlo? Posted by Customer
    A:
    Check the oil pan flange for distortion and replace it if bent or distorted without attempting to straighten it.
    Posted by ChevyPartsGiant Specialist
    See expert answers on similar Transmission Pan
    Q:
    What should you check the oil pan gasket for for the 2002 Chevrolet Venture? Posted by Customer
    A:
    Check for a bent or damaged seal core and a damaged rubber seal surface.
    Posted by ChevyPartsGiant Specialist
    See expert answers on similar Transmission Pan
    Q:
    What should you do after lowering the 2007 Chevrolet Malibu? Posted by Customer
    A:
    Fill the transaxle with DEXRON(R) III, placing the gear selector in the PARK position.
    Posted by ChevyPartsGiant Specialist
    See expert answers on similar Transmission Pan
    Q:
    What should be ensured while tapping the oil pan for the 2005 Chevrolet Venture? Posted by Customer
    A:
    Ensure not to damage the mating surfaces to prevent oil leaks.
    Posted by ChevyPartsGiant Specialist
    See expert answers on similar Transmission Pan
    Q:
    What tool can be used to pry the oil pan loose for the 2006 Chevrolet Uplander? Posted by Customer
    A:
    Use a rubber mallet or a flat-bladed tool to pry the oil pan loose.
    Posted by ChevyPartsGiant Specialist
    See expert answers on similar Transmission Pan
    Q:
    What should you inspect the oil pan and filter screen for for the 2004 Chevrolet Venture? Posted by Customer
    A:
    Inspect for foreign materials such as metal particles, clutch facing material, rubber particles, and engine coolant.
    Posted by ChevyPartsGiant Specialist
    See expert answers on similar Transmission Pan
    Q:
    What is the first step to service and repair the fluid pan for the 2000 Chevrolet Venture? Posted by Customer
    A:
    Begin by raising and supporting the vehicle.
    Posted by ChevyPartsGiant Specialist
    See expert answers on similar Transmission Pan
    If you have any questions about this product, please don't hesitate to ask us. We will be happy to help you!

OEM GM 24206181, Excellent Performance and Perfect Fitment

To ensure reliability, purchase GM part # 24206181 Oil Pan. It is sometimes referred to as GM Transmission Pan. Choosing OEM parts is the optimal decision for guaranteeing superior quality and perfect performance. These components undergo stringent quality checks and are carefully constructed to comply with GM's factory specifications, ensuring a smooth installation process.

ChevyPartsGiant.com is a leading supplier of genuine GM parts such as GM 24206181 Oil Pan. Our website boasts an extensive inventory of OEM GM parts, available at highly competitive prices in the market. Should you require any new genuine GM parts, rest assured we will deliver them swiftly and efficiently to your doorstep. Furthermore, all our parts come with the assurance of a manufacturer's warranty. For detailed Chevy parts information, click here.
Choose ChevyPartsGiant for discounted prices, exceptional service and fast delivery