ChevyParts
My Garage
My Account
Cart
OEM 2010 Chevrolet Corvette Window Regulator
Electric Power Window Regulator- Select Vehicle by Model
- Select Vehicle by VIN
Select Vehicle by Model
orMake
Model
Year
Select Vehicle by VIN
For the most accurate results, select vehicle by your VIN (Vehicle Identification Number).
4 Window Regulators found

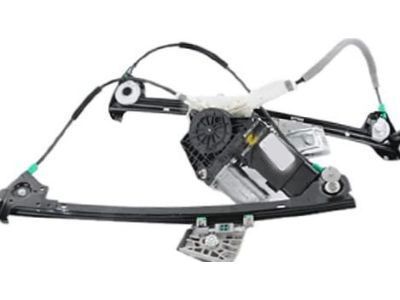
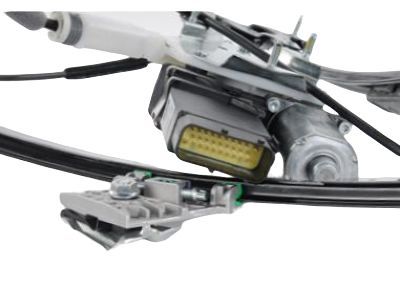
2010 Chevrolet Corvette Window Regulator, Front Driver Side Part Number: 22895755
$609.13 MSRP: $1097.54You Save: $488.41 (45%)Product Specifications- Other Name: Regulator, Front Door Window Regulator; Regulator, Door Lock Remote Control
- Position: Front Driver Side
- Replaces: 15852978, 20823061, 22788443, 25853811, 25842585, 25995141, 20980502, 15823580
- Item Weight: 7.20 Pounds
- Item Dimensions: 23.7 x 11.6 x 9.3 inches
- Condition: New
- Fitment Type: Direct Replacement
- SKU: 22895755
- Warranty: This genuine part is guaranteed by GM's factory warranty.
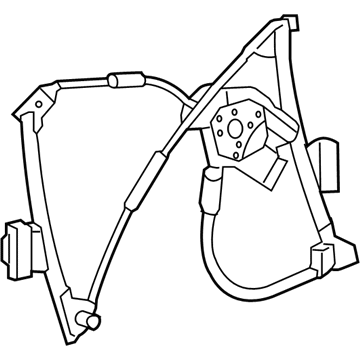
2010 Chevrolet Corvette Window Regulator, Front Part Number: 20914968
Product Specifications- Other Name: Regulator, Front Door Window Regulator
- Position: Front
- Item Weight: 5.50 Pounds
- Item Dimensions: 7.4 x 20.2 x 13.7 inches
- Condition: New
- Fitment Type: Direct Replacement
- SKU: 20914968
- Warranty: This genuine part is guaranteed by GM's factory warranty.
2010 Chevrolet Corvette Window Regulator, Front Part Number: 22895753
Product Specifications- Other Name: Regulator, Front Door Window Regulator; Regulator, Door Lock Remote Control
- Position: Front
- Replaces: 20914967
- Item Weight: 5.10 Pounds
- Item Dimensions: 5.2 x 26.5 x 10.4 inches
- Condition: New
- Fitment Type: Direct Replacement
- SKU: 22895753
- Warranty: This genuine part is guaranteed by GM's factory warranty.
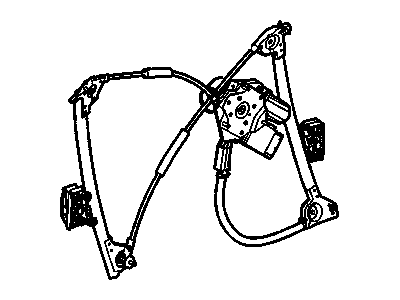
2010 Chevrolet Corvette Window Regulator, Front Passenger Side Part Number: 22895756
$463.09 MSRP: $834.40You Save: $371.31 (45%)Product Specifications- Other Name: Regulator, Front Door Window Regulator; Regulator, Door Lock Remote Control
- Position: Front Passenger Side
- Replaces: 15852979, 20980503, 22788444, 25842586, 25995142, 25815796, 15823581, 20823062, 25853812
- Item Weight: 5.20 Pounds
- Item Dimensions: 9.2 x 24.2 x 11.2 inches
- Condition: New
- Fitment Type: Direct Replacement
- SKU: 22895756
- Warranty: This genuine part is guaranteed by GM's factory warranty.
2010 Chevrolet Corvette Window Regulator
With a comprehensive array of OEM 2010 Chevrolet Corvette Window Regulator, from fuel pumps to door handles, our website is a one-stop-shop for your needs. All our genuine 2010 Chevrolet Corvette Window Regulator are backed by the manufacturer's warranty and are offered at competitive prices in the market. Rest assured, you can shop with complete confidence.
2010 Chevrolet Corvette Window Regulator Parts and Q&A
- Q: How to replace the door window regulator on 2010 Chevrolet Corvette?A: Start replacement work by taking out the door trim panel and moving to its internal components until you find the electrical/audio connector. Gently pull out the plugs sitting above the access holes for the window clamps first then take out the door window. Untwist the electrical connection to the motor the regulator and shift the front fitting out from below the door base. Note the regulator placement to aid reassembly. Take out the regulator by folding it through the door inner opening after you remove nuts from the lower channel studs, regulator motor studs, and upper channel studs. After matching regulator jack screws to the old setup you can insert the folded regulator into the door toward its forward direction. Insert the motor studs into the door inner panel holes and fasten nuts by turning them to 10 nm (89 lb in). Insert the channel studs of the regulator through the door openings and fix them in this sequence: first upper forward then lower forward and finally upper rearward before lower rearward. Connect the regulator rose bud clip to the door and torquen the regulator channel stud nuts to 10 nm (89 lb in) while linking the electrical connector to the motor. Open the Power Window Switch and push the regulator to the highest position prior to setting the window in its door opening. Put back the window clamp plugs then put on top screw for speaker assembly and tighten all cross-positioned screws to 3 nm (27 lb in). Join back the electrical/audio connection and put in both pieces as you put them back on. Make sure the window fit is correct then use plugs to finish installing at the bottom of the door surface.


