ChevyParts
My Garage
My Account
Cart
OEM Buick Century Rod Bearing
Engine Connecting Rod Bearing- Select Vehicle by Model
- Select Vehicle by VIN
Select Vehicle by Model
orMake
Model
Year
Select Vehicle by VIN
For the most accurate results, select vehicle by your VIN (Vehicle Identification Number).
5 Rod Bearings found


Buick Century Bearings Part Number: 12329989
$13.11 MSRP: $18.75You Save: $5.64 (31%)
Buick Century Connecting Rod Bearing Part Number: 12522143
$20.50 MSRP: $41.18You Save: $20.68 (51%)
Buick Century Connecting Rod Bearing Part Number: 10181335
$16.33 MSRP: $32.80You Save: $16.47 (51%)
Buick Century Connecting Rod Bearing Part Number: 12480255
$0.38 MSRP: $0.59You Save: $0.21 (36%)Ships in 1-2 Business Days
Buick Century Rod Bearings Part Number: 89017700
$16.09 MSRP: $25.21You Save: $9.12 (37%)Ships in 1-2 Business Days
Buick Century Rod Bearing
Want to cut long-term maintenance and repair costs? Choose OEM Rod Bearing. Those parts deliver top durability you can trust. On our site, you'll find a huge catalog of genuine Buick Century parts. Prices are unbeatable, so you can keep more in your pocket. Every OEM Buick Century Rod Bearing includes a manufacturer's warranty. You can also get an easy return policy that keeps buying risk free. Fast delivery, get your car on the road quickly. It's simple to search, compare, and order. Stop guessing about quality or fit. Order today and save with parts that last.
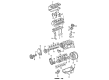
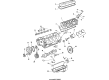
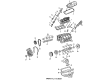
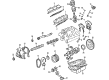
The Buick Century Rod Bearing is an important part which is popular for its durability and efficiency for numerous Buick Century cars ranging from 1973 to 2005 models. This Rod Bearing focuses on critical engine parts such as the crankshaft and the camshaft to allow them to rotate on a thin layer of engine oil provided under pressure by the engine oil pump. The improved Buick Century Rod Bearing- Through precision engineering techniques that in many instances include the tri-metal construction, performance and safety is boosted since the right oil clearance is upheld to ensure the car has a long useful life. The Buick Century Rod Bearing is broader in its responsibilities than would appear on the surface; it directly influences and helps in minimizing the friction and at the same time helps in increasing the strength and heat tolerance especially in the high power output engines. This is accomplished via being innovative design features, some of which include Dry Film Coatings, which are Dura's exclusive feature. This Buick Century Rod Bearing fits different models, which means that engine block integrity can be maintained across the different generations of this model line. These roles make it famous in the automotive market since it can improve general vehicle performance notwithstanding safety and reliability. Therefore, Buick Century Rod Bearing exhibits all these qualities and compatibility that make it a significant part of the excellence in automobiles, representing the Buick Century brand.
Buick Century Rod Bearing Parts and Q&A
- Q: What additional engine repair information can be found for the service and repair of the connecting rod bearing on Buick Century?A:For information on repairing and servicing bearing on connecting rods, additional engine repair directions are available elsewhere. When an internal engine component is not given a special service procedure, it shows that the manufacturer has not prepared one. To do engine overhaul, important steps in unit repair include service operations, machining, cleaning, inspection and fitting, including boring and honing the cylinder, fitting connecting rod with bearings, Crankshaft with bearings and camshaft bearings, disassembling the connecting rod and Piston, cylinder head, valve-related components and Oil Pump, fitting in Piston and rings and fixing thread damage, as well as valve and seat grinding tasks found during Cylinder Head assembly. Chain, belt and gears are the main parts in timing components service.

Related Buick Century Parts
 Buick Century Oil Filter
 Buick Century Camshaft Bearing
 Buick Century Crankshaft
 Buick Century Crankshaft Thrust Washer Set
 Buick Century Cylinder Head
 Buick Century Engine Mount
 Buick Century Exhaust Valve
 Buick Century Motor And Transmission Mount
 Buick Century Oil Pump
 Buick Century Piston
 Buick Century Piston Ring
 Buick Century Timing Chain Tensioner