ChevyParts
My Garage
My Account
Cart
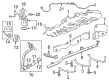
OEM Buick Enclave Fuel Rail
Engine Fuel Rail- Select Vehicle by Model
- Select Vehicle by VIN
Select Vehicle by Model
orMake
Model
Year
Select Vehicle by VIN
For the most accurate results, select vehicle by your VIN (Vehicle Identification Number).
6 Fuel Rails found


Buick Enclave Fuel Rail Part Number: 12629929
$160.74 MSRP: $326.46You Save: $165.72 (51%)


Buick Enclave Fuel Rail Part Number: 12623366
$151.28 MSRP: $297.74You Save: $146.46 (50%)Ships in 1-2 Business Days
Buick Enclave Fuel Rail Part Number: 12623365
$163.31 MSRP: $295.58You Save: $132.27 (45%)Ships in 1-2 Business Days
Buick Enclave Rail Part Number: 25876063
$245.58 MSRP: $367.08You Save: $121.50 (34%)
Buick Enclave Fuel Rail Part Number: 12701658
$183.80 MSRP: $329.68You Save: $145.88 (45%)Ships in 1-3 Business Days
Buick Enclave Fuel Rail Part Number: 12603212
Buick Enclave Fuel Rail
Want to cut long-term maintenance and repair costs? Choose OEM Fuel Rail. Those parts deliver top durability you can trust. On our site, you'll find a huge catalog of genuine Buick Enclave parts. Prices are unbeatable, so you can keep more in your pocket. Every OEM Buick Enclave Fuel Rail includes a manufacturer's warranty. You can also get an easy return policy that keeps buying risk free. Fast delivery, get your car on the road quickly. It's simple to search, compare, and order. Stop guessing about quality or fit. Order today and save with parts that last.
Buick Enclave Fuel Rail Parts Questions & Experts Answers
- Q: How to replace the Fuel Injection Fuel Rail Assembly for Bank 2 (LLT) (3.6L) on Buick Enclave?A:Before starting the fuel injection Fuel Rail assembly for bank 2 (LLT) (3.6L) replacement process it is necessary to drain the fuel system pressure using ch-48027 or without it. Start by removing the fuel pipe shield as well as high pressure fuel sensor and Fuel Rail crossover pipe before discarding the crossover pipe. You should remove the Fuel Rail bolts and lift the bank 2 Fuel Rail from the engine while easing its rear section for complete extraction. You must discard the direct Fuel Injector hold down clamps since rebuilding the direct fuel injectors becomes necessary when they are taken off from their Fuel Rail or cylinder head position. Recovery of the Fuel Rail requires you to rebuild all the fuel injectors. The rebuilt direct fuel injectors need installation on cylinder heads with new hold down clamps to secure them. Position the new Fuel Rail by placing the front over the front injector then rotating the rear segment downward while applying gm p/n 12345610 (Canadian P/N 9931930) or equivalent silicon-free engine oil to the Fuel Injector cups. Begin installing the outer Fuel Rail bolts first before moving to the inner bolts while keeping all valves by hand. The first step in tightening bank 1 Fuel Rail bolts should be with a torque of 12 nm (106 lb in) followed by reaching a final torque of 23 nm (17 lb ft). Place new crossover fuel pipes on the rail before installing the high pressure fuel sensor. First connect the electrical connector of the Fuel Injector wiring harness to both the fuel injectors and Fuel Rail as well as the Fuel Pressure Sensor. To detect fuel leaks you should enable the ignition for two seconds while the engine is off followed by a ten-second off period before ending with a vehicle off ignition state to conduct leak examination. Tier the installation by putting in the fuel pipe shield and low side fuel pressure service port cap and fuel tank cap.

Related Buick Enclave Parts
 Buick Enclave Fuel Pump
 Buick Enclave Fuel Pressure Sensor
 Buick Enclave Fuel Tank
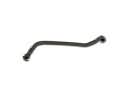 Buick Enclave Crankcase Breather Hose
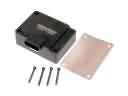 Buick Enclave Fuel Pump Driver Module
 Buick Enclave Fuel Pump Gasket
 Buick Enclave Fuel Pump Seal
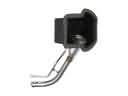 Buick Enclave Fuel Tank Filler Neck
 Buick Enclave Fuel Tank Sending Unit
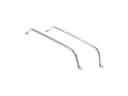 Buick Enclave Fuel Tank Strap
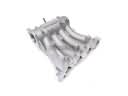 Buick Enclave Intake Manifold
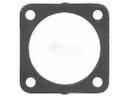 Buick Enclave Throttle Body Gasket