ChevyParts
My Garage
My Account
Cart
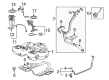
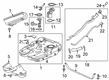
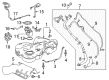
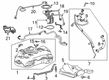
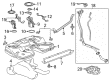
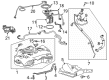
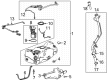
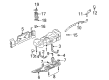
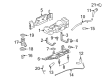
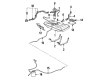
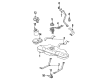
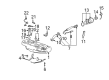
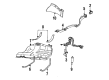
OEM Buick Fuel Tank
Gas Tank- Select Vehicle by Model
- Select Vehicle by VIN
Select Vehicle by Model
orMake
Model
Year
Select Vehicle by VIN
For the most accurate results, select vehicle by your VIN (Vehicle Identification Number).
57 Fuel Tanks found

Buick Fuel Tank Part Number: 13247863
$483.15 MSRP: $737.74You Save: $254.59 (35%)Ships in 1-3 Business DaysProduct Specifications- Other Name: Tank, Fuel

Buick Fuel Tank Part Number: 85138839
$782.15 MSRP: $1174.43You Save: $392.28 (34%)Ships in 1-3 Business DaysProduct Specifications- Other Name: Tank, Fuel
- Replaced by: 85743892

Buick Fuel Tank Part Number: 84760125
$820.13 MSRP: $1231.46You Save: $411.33 (34%)Ships in 1-3 Business DaysProduct Specifications- Other Name: Tank Kit, Fuel
- Replaced by: 42828709

Buick Fuel Tank Part Number: 85123711
$858.36 MSRP: $1288.86You Save: $430.50 (34%)Ships in 1-3 Business DaysProduct Specifications- Other Name: Tank Kit, Fuel
- Replaced by: 42846552
- Replaces: 84446350, 84525442, 85117382, 84931275, 84598272

Buick Fuel Tank Part Number: 23247270
$930.89 MSRP: $1397.73You Save: $466.84 (34%)Ships in 1-3 Business DaysProduct Specifications- Other Name: Tank, Fuel
- Replaced by: 84666904

Buick Fuel Tank Part Number: 86779198
$862.47 MSRP: $1295.03You Save: $432.56 (34%)Ships in 1-2 Business DaysProduct Specifications- Other Name: Tank Kit, Fuel
- Replaced by: 85091032
- Replaces: 84940679, 84446349, 84525441

Buick Fuel Tank Part Number: 42779252
$333.28 MSRP: $498.28You Save: $165.00 (34%)Ships in 1-3 Business DaysProduct Specifications- Other Name: Tank, Fuel
- Replaced by: 42935045
Buick Fuel Tank Part Number: 84507517
$797.73 MSRP: $1197.79You Save: $400.06 (34%)Ships in 1-3 Business DaysProduct Specifications- Other Name: Tank Kit, Fuel
- Replaces: 23151165, 84457348, 84017666


Buick Fuel Tank Part Number: 42783761
$288.04 MSRP: $430.55You Save: $142.51 (34%)Ships in 1-3 Business DaysProduct Specifications- Other Name: Tank, Fuel
- Replaced by: 42935047

Buick Fuel Tank Part Number: 84343947
$819.28 MSRP: $1230.18You Save: $410.90 (34%)Ships in 1-3 Business DaysProduct Specifications- Other Name: Tank Kit, Fuel

Buick Fuel Tank Part Number: 85138842
$914.44 MSRP: $1373.03You Save: $458.59 (34%)Ships in 1-3 Business DaysProduct Specifications- Other Name: Tank, Fuel
- Replaced by: 85743893


Buick Fuel Tank Part Number: 15229311
$635.26 MSRP: $953.85You Save: $318.59 (34%)Product Specifications- Other Name: Tank, Fuel


Buick Fuel Tank Part Number: 25973153
Product Specifications- Other Name: Tank, Fuel
- Replaces: 15236132

Buick Fuel Tank Part Number: 15231628
Product Specifications- Other Name: Tank, Fuel

Buick Fuel Tank Part Number: 10218495
Product Specifications- Other Name: Tank, Fuel
- Replaces: 10207964

Buick Fuel Tank Part Number: 22555664
Product Specifications- Other Name: Tank, Fuel; Tank Assembly; Tank


Buick Fuel Tank Part Number: 22505822
Product Specifications- Other Name: Tank, Fuel

Buick Fuel Tank Part Number: 22527443
Product Specifications- Other Name: Tank, Fuel; Tank Assembly

Buick Fuel Tank Part Number: 25744936
Product Specifications- Other Name: Tank, Fuel
- Replaces: 25696213

Buick Fuel Tank Part Number: 25635148
Product Specifications- Other Name: Tank, Fuel (W/O Sender); Tank Assembly; Tank, Fuel
| Page 1 of 3 |Next >
1-20 of 57 Results
Buick Fuel Tank
Want to cut long-term maintenance and repair costs? Choose OEM Fuel Tank. Those parts deliver top durability you can trust. On our site, you'll find a huge catalog of genuine Buick parts. Prices are unbeatable, so you can keep more in your pocket. Every OEM Buick Fuel Tank includes a manufacturer's warranty. You can also get an easy return policy that keeps buying risk free. Fast delivery, get your car on the road quickly. It's simple to search, compare, and order. Stop guessing about quality or fit. Order today and save with parts that last.
Buick Fuel Tank Parts Questions & Experts Answers
- Q: How to replace the fuel tank module (NT7) on Buick Lucerne?A:Before replacing the Fuel Tank module (NT7) personnel must first follow the correct method to reduce fuel system pressure. First unfasten the rear compartment liner and fuel sender access hole cover bolts before removing the cover itself. The sender requires removal of its fuel feed rear pipe quick connect fitting after which the pressure sensor and sender get their Fuel Level Sensor wiring harness electrical connectors (1, 2) taken off. The j 45722 (Fuel Sender Lock Ring Wrench) should be used to remove the fuel sender lock ring by turning it counterclockwise while keeping the lock ring from getting damaged. Use the j 45722 to unlock and remove both the lock ring and the fuel sender assembly but ensure the Fuel Level Sensor float arm remains straight since tilting prevents bends and drain the fuel from the reservoir bucket into an approved storage container. We should remove the old fuel pump module o-ring seal for inspection while testing the lock ring for any damage that extends more than 0.41 mm (0.016 in) requires it must be replaced. Install the new fuel pump module o-ring seal onto the Fuel Tank then fit the float arm of the fuel sender while tilting the assembly before lowering it into position inside the tank. Secure the module lock ring clockwise using the j 45722 until it reaches full lock position. Reattach the Fuel Level Sensor wiring harness electrical connectors (1, 2) as well as the fuel feed rear pipe quick connect fitting. Use the correct instructions to turn the ignition on and off while verifying that no leaks exist when checking for leaks after attaching the negative Battery Cable. Conclude the process by installing the fuel sender access hole cover which needs to be bolted to 2 nm (18 lb in). Proceed by reinstalling the rear compartment liner and intake manifold cover.
- Q: What tools are required to replace the fuel tank module on a long wheelbase on Buick Terraza?A:You need to use the fuel sender lock nut wrench (J 45722) to replace the Fuel Tank module of a long wheelbase vehicle. Start by taking off the Fuel Tank followed by disconnecting wires from the Fuel Tank module. All fuel pipe and hose connections require cleaning before any disconnect procedure becomes necessary to avoid contamination. The first step is to disconnect both quick connect fittings that lead the fuel feed pipe and the evaporative emission (EVAP) pipe from their module positions. Unlock the fuel sender lock ring through counterclockwise rotation using the fuel sender lock nut wrench (J 45722) together with a long breaker-bar while draining the fuel to safe containers as a fire precaution. Extract the Fuel Tank module with its seal while disposing of the aging module seal then clean both sealing areas. Check for damage on the lock ring while also measuring its warpage against 0.41 mm (0.016 inches); perform a replacement if warpage exceeds this measurement. The installation of a new Fuel Tank module requires users to place a fresh Fuel Tank module seal on the Fuel Tank so the Fuel Pump Strainer remains untwisted and unfolded. Place the new Fuel Tank module into the Fuel Tank before securing the lock ring through clockwise rotation of the fuel sender lock nut wrench (J 45722). The procedure ends by reconnecting the evap quick connect fittings, the fuel feed pipe quick connect fitting, the Fuel Tank harness electrical connectors, and placing the Fuel Tank back in position.


Related Buick Parts
 Buick Fuel Pump
 Buick Intake Manifold Gasket
 Buick Air Charge Temperature Sensor
 Buick Air Filter Box
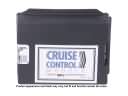 Buick Cruise Control Module
 Buick Fuel Injection Pump
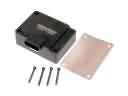 Buick Fuel Pump Driver Module
 Buick Fuel Pump Gasket
 Buick Fuel Pump Wiring Harness
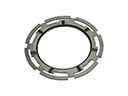 Buick Fuel Tank Lock Ring
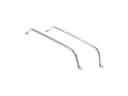 Buick Fuel Tank Strap
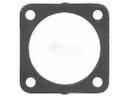 Buick Throttle Body Gasket