ChevyParts
My Garage
My Account
Cart
OEM Buick Piston
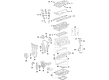
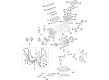
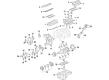
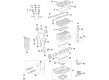
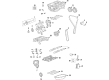
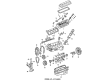
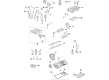
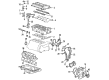
Engine Pistons- Select Vehicle by Model
- Select Vehicle by VIN
Select Vehicle by Model
orMake
Model
Year
Select Vehicle by VIN
For the most accurate results, select vehicle by your VIN (Vehicle Identification Number).
69 Pistons found

Buick Piston Part Number: 12669767
$32.35 MSRP: $53.31You Save: $20.96 (40%)Ships in 1-2 Business DaysProduct Specifications- Other Name: Piston Kit, Engine Piston


Buick Piston Rings Part Number: 12686358
$32.91 MSRP: $51.53You Save: $18.62 (37%)Ships in 1-2 Business DaysProduct Specifications- Other Name: Piston Assembly- (W/ Pinion & Compression & Oil Ring) (Left-Hand); Piston; Piston, Engine Piston
- Replaces: 12624949


Buick Piston Part Number: 12616971
$72.52 MSRP: $113.56You Save: $41.04 (37%)Ships in 1-2 Business DaysProduct Specifications- Other Name: Piston, (W/Pinion); Piston, Engine Piston


Buick Piston Part Number: 12674055
$35.81 MSRP: $56.08You Save: $20.27 (37%)Ships in 1-3 Business DaysProduct Specifications- Other Name: Piston Kit, Engine Piston

Buick Piston Part Number: 12674056
$35.81 MSRP: $56.09You Save: $20.28 (37%)Ships in 1-3 Business DaysProduct Specifications- Other Name: Piston Kit, Engine Piston


Buick Piston Part Number: 12590866
$25.16 MSRP: $39.41You Save: $14.25 (37%)Ships in 1-3 Business DaysProduct Specifications- Other Name: Piston, (W/Pinion); Piston, Engine Piston
- Replaces: 92068320


Buick Piston Part Number: 12616972
$47.46 MSRP: $114.39You Save: $66.93 (59%)Ships in 1-3 Business DaysProduct Specifications- Other Name: Piston, (W/Pinion); Piston, Engine Piston


Buick Piston Part Number: 12652809
$19.14 MSRP: $31.54You Save: $12.40 (40%)Product Specifications- Other Name: Piston Kit, Engine Piston

Buick Piston Part Number: 12710889
$17.28 MSRP: $27.07You Save: $9.79 (37%)Ships in 1-3 Business DaysProduct Specifications- Other Name: Piston Kit, .; Piston Kit, Engine; Piston, Engine

Buick Piston Assembly Part Number: 10159436
$151.68 MSRP: $238.65You Save: $86.97 (37%)Product Specifications- Other Name: Piston, Engine Piston; Piston
- Replaced by: 19434034
Buick Piston Part Number: 12663172
$16.70 MSRP: $26.16You Save: $9.46 (37%)Ships in 1-3 Business DaysProduct Specifications- Other Name: Piston, Engine
- Replaces: 12698557

Buick Pistons Part Number: 89018108
$135.58 MSRP: $213.33You Save: $77.75 (37%)Ships in 1-2 Business DaysProduct Specifications- Other Name: Piston Assembly, (W/Pinion); Piston; Piston, Engine Piston

Buick Pistons Part Number: 12539085
$119.61 MSRP: $163.76You Save: $44.15 (27%)Ships in 1-3 Business DaysProduct Specifications- Other Name: Piston, (W/Pinion); Piston; Piston, Engine Piston
Buick Piston Part Number: 25195028
$250.67 MSRP: $394.24You Save: $143.57 (37%)Ships in 1-3 Business DaysProduct Specifications- Other Name: Piston, Engine Piston
- Replaces: 55580186, 55577097, 55565426
Buick Piston Part Number: 55581706
$57.86 MSRP: $90.64You Save: $32.78 (37%)Ships in 1-3 Business DaysProduct Specifications- Other Name: Piston, Engine Piston
Buick Piston Rings Part Number: 12686359
$32.91 MSRP: $51.53You Save: $18.62 (37%)Ships in 1-2 Business DaysProduct Specifications- Other Name: Piston Assembly- (W/ Pinion & Compression & Oil Ring) (Right-Hand); Piston; Piston, Engine Piston
- Replaces: 12624950

Buick Piston Part Number: 55488406
$44.33 MSRP: $69.41You Save: $25.08 (37%)Ships in 1-3 Business DaysProduct Specifications- Other Name: Piston, Engine Piston
- Replaces: 55511513

Buick Piston Part Number: 89017429
$65.71 MSRP: $102.93You Save: $37.22 (37%)Ships in 1-3 Business DaysProduct Specifications- Other Name: Piston Assembly, (W/Pinion) (Standard); Piston, Engine Piston

Buick Piston Part Number: 22527481
Product Specifications- Other Name: Piston, Engine Piston

Buick Pistons Part Number: 10112444
Product Specifications- Other Name: Piston; Piston, Engine Piston
| Page 1 of 4 |Next >
1-20 of 69 Results
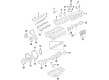
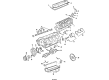
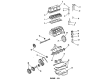
Buick Piston
Choose OEM Piston, you're making the optimal decision for superior quality and perfect performance. You can feel confident because each component goes through stringent quality checks. Every part is carefully built to comply with Buick's factory specifications. You'll enjoy a smooth, worry-free installation that fits just right. At ChevyPartsGiant.com, you'll find it easy to get top-quality OEM Buick Piston. You can shop at highly competitive prices and protect your budget. All our genuine Buick parts include a dependable manufacturer's warranty. You'll also appreciate our straightforward return policy and swift delivery services for extra convenience.
Buick Piston Parts and Q&A
- Q: How to replace the piston and rod bearing in an engine on Buick Century?A:The replacement process for the piston starts with removing the cylinder heads at first. Use the cylinder bore ridge reamer (J24270) on top of the piston that rests at the bottom of its stroke while covered by a cloth. Once the piston reaches the top of its stroke turn the Crankshaft then remove the cloth along with cutting debris before raising the vehicle for support and removing the Oil Pan and Oil Pump and Crankshaft oil deflector. The service technician should turn the Crankshaft to bottom dead center position while applying matchmarks on connecting rod components before removal. You should first remove the connecting rod nuts then remove the connecting rod cap together with the lower connecting rod bearing but you need to protect the Crankshaft journal with a thread protector. The installing rod guide (J5239) allows you to advance the piston along with rod into the cylinder before lowering the vehicle. Extraction of the engine block top components including connecting rod, upper connecting rod bearing, and piston will be followed by wiping oil from the connecting rod bearings and Crankshaft journal and performing inspections on the connecting rod bearings, cap, and Crankshaft journal. Apply engine oil to clean cylinder bores after cleaning with a light honing process followed by hot water with detergent then dry out the surface with a new clean cloth. The procedure begins with applying new engine oil to both the piston along with the piston rings and cylinder bore and bearing surfaces before installing the j5239 tool for ring compression with the Piston Ring compressor j8037. After mounting the piston and connecting rod assembly check that the piston stamped arrow faces forward before dropping the piston into its original cylinder using j5239 and j8037 while giving a light tap on the piston top. Support the vehicle again while placing the upper connecting rod bearing into the rod followed by engine oil application and slow piston and rod descent using the j5239 tool. Insert the lower connecting rod bearing into the connecting rod cap before applying fresh engine oil onto it. Then install the connecting rod cap. Use the electronic torque angle meter (J36660-A) to perform extra 75-degree rotations on connecting rod nuts which have been tightened to 20 nm (15 ft. Lbs.). Open the connecting rod for inspection then measure its internal clearance. To finish the operation install the Crankshaft oil deflector and Oil Pump and Oil Pan followed by lowering the vehicle then mounting the cylinder heads.
- Q: What additional engine repair information is available for piston service and repair on Buick LeSabre?A:The engine repair procedures for pistons are available at another source. A missing separate service procedure for any internal engine component suggests the manufacturer decided not to provide such documentation. Unit repair typically encompasses service procedures, machining, cleaning, inspection, and fitting necessary for engine overhaul, including cylinder boring and honing, connecting rod and bearings - fitting, crankshaft and bearings - fitting, camshaft bearings - replacement, connecting rod and Piston - disassembly, cylinder head - disassembly, valve train components (Valves, Seats, Springs, Rockers, etc.), Oil Pump - disassembly, pistons and rings - fitting, thread repair information, and valve and seat grinding (Valve Job) as well as timing components (Chain, Belt, Gears) service.


Related Buick Parts
 Buick Oil Filter
 Buick Automatic Transmission Seal
 Buick Camshaft Seal
 Buick Cylinder Head
 Buick Dipstick Tube
 Buick Engine Mount Bracket
 Buick Engine Mount Torque Strut
 Buick Oil Drain Plug Gasket
 Buick Oil Pan Gasket
 Buick Timing Belt Tensioner
 Buick Timing Cover Gasket
 Buick Valve Stem Oil Seal