Make sure this part fits

GM 12564008
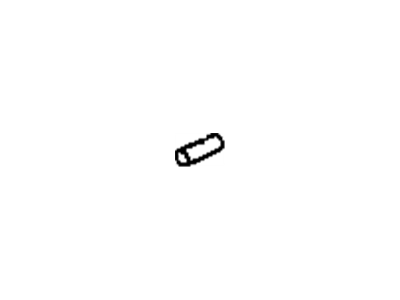
Piston

1999-2005 GM

Customer Questions & Expert Answers (4)
GM 12564008 Piston
  • Part Description
    Piston, Engine
  • Replaces
    12564009, 24508305
  • Manufacturer
    General Motors
Make sure this part fits
$26.70 MSRP: $43.98
You Save: $17.28 (40%)
Ships in 1-2 Business Days
1
ADD TO CART
  • Related Parts
  • Product Specifications
  • Vehicle Fitment
  • Customer Questions & Expert Answers
  • Product Specifications

    BrandGenuine GM
    Manufacturer Part Number12564008
    Part DescriptionPiston, Engine
    Other NamesPiston, Engine Piston
    Item Dimensions10.5 x 4.5 x 4.3 inches
    Item Weight2.70 Pounds
    ConditionNew
    Fitment TypeDirect Replacement
    Replaces12564009, 24508305
    Require Quantity6
    ManufacturerGeneral Motors
    SKU12564008
    WarrantyThis genuine GM part is guaranteed by GM's factory warranty.
    Shipping & ReturnShipping Policy Return Policy
    Warning: California's Proposition 65
  • Vehicle Fitment

    Year Make Model Trim Engine
    2000-2005 Buick CenturyCustom, Limited, Special Edition6 Cyl 3.1 L GAS
    2000-2001 Chevrolet LuminaBase6 Cyl 3.1 L GAS
    1999-2003 Chevrolet MalibuBase, LS6 Cyl 3.1 L GAS
    1999 Oldsmobile CutlassGL, GLS6 Cyl 3.1 L GAS
    2000-2003 Pontiac Grand PrixSE6 Cyl 3.1 L GAS
  • Customer Questions & Expert Answers

    Q:
    Is this 12564008 designed for my car? Posted by ChevyPartsGiant Specialist
    A:
    Please Select Your Vehicle model to see if part number 12564008 is suitable before ordering.
    Posted by ChevyPartsGiant Specialist
    Q:
    How to replace the piston and rod bearing in an engine on Buick Century? Posted by Customer
    A:
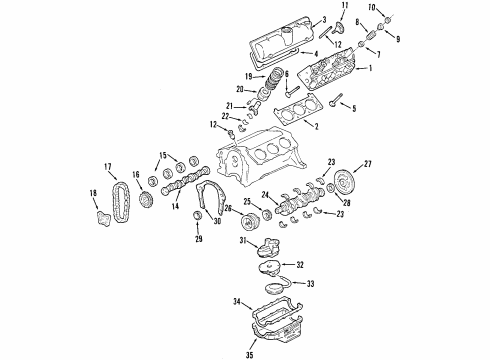
    The replacement process for the piston starts with removing the cylinder heads at first. Use the cylinder bore ridge reamer (J24270) on top of the piston that rests at the bottom of its stroke while covered by a cloth. Once the piston reaches the top of its stroke turn the Crankshaft then remove the cloth along with cutting debris before raising the vehicle for support and removing the Oil Pan and Oil Pump and Crankshaft oil deflector. The service technician should turn the Crankshaft to bottom dead center position while applying matchmarks on connecting rod components before removal. You should first remove the connecting rod nuts then remove the connecting rod cap together with the lower connecting rod bearing but you need to protect the Crankshaft journal with a thread protector. The installing rod guide (J5239) allows you to advance the piston along with rod into the cylinder before lowering the vehicle. Extraction of the engine block top components including connecting rod, upper connecting rod bearing, and piston will be followed by wiping oil from the connecting rod bearings and Crankshaft journal and performing inspections on the connecting rod bearings, cap, and Crankshaft journal. Apply engine oil to clean cylinder bores after cleaning with a light honing process followed by hot water with detergent then dry out the surface with a new clean cloth. The procedure begins with applying new engine oil to both the piston along with the piston rings and cylinder bore and bearing surfaces before installing the j5239 tool for ring compression with the Piston Ring compressor j8037. After mounting the piston and connecting rod assembly check that the piston stamped arrow faces forward before dropping the piston into its original cylinder using j5239 and j8037 while giving a light tap on the piston top. Support the vehicle again while placing the upper connecting rod bearing into the rod followed by engine oil application and slow piston and rod descent using the j5239 tool. Insert the lower connecting rod bearing into the connecting rod cap before applying fresh engine oil onto it. Then install the connecting rod cap. Use the electronic torque angle meter (J36660-A) to perform extra 75-degree rotations on connecting rod nuts which have been tightened to 20 nm (15 ft. Lbs.). Open the connecting rod for inspection then measure its internal clearance. To finish the operation install the Crankshaft oil deflector and Oil Pump and Oil Pan followed by lowering the vehicle then mounting the cylinder heads.
    Posted by ChevyPartsGiant Specialist
    Q:
    What additional engine repair information is available for piston service and repair on Buick Century? Posted by Customer
    A:
    The engine repair procedures for pistons are available at another source. A missing separate service procedure for any internal engine component suggests the manufacturer decided not to provide such documentation. Unit repair typically encompasses service procedures, machining, cleaning, inspection, and fitting necessary for engine overhaul, including cylinder boring and honing, connecting rod and bearings - fitting, crankshaft and bearings - fitting, Camshaft bearings - replacement, connecting rod and Piston - disassembly, cylinder head - disassembly, valve train components (Valves, Seats, Springs, Rockers, etc.), oil pump - disassembly, pistons and rings - fitting, thread repair information, and valve and seat grinding (Valve Job) as well as timing components (Chain, Belt, Gears) service.
    Posted by ChevyPartsGiant Specialist
    Q:
    How to replace the piston, rod bearing in an engine on Chevrolet Lumina? Posted by Customer
    A:
    The first step for replacing piston and connecting rod and bearing begins with removing the cylinder heads. Insert the Crankshaft into the bottom of piston travel then set a cloth above the piston while leveraging the cylinder bore ridge reamer (J24270) to eliminate the Piston Ring ridge. Rotate the Crankshaft until the piston reaches its uppermost point after which you should remove the material including the cloth and support the vehicle. You should now detach the Oil Pan and Oil Pump as well as removing the Crankshaft oil deflector. Set the Crankshaft at bottom dead center (BDC) position for the rod assembly service while applying matchmarks to connecting rod and caps. The removal of connecting rod nuts will open the path for connecting rod cap and lower connecting rod bearing extraction. Secure thread protectors onto the Crankshaft journal for prevention of damage. Follow up installation of the connecting rod bolt guide set (J5239) by pushing the piston and rod assembly through the cylinder before lowering the vehicle. Clean the engine block top with oil before removing its piston and connecting rod assembly and upper bearing components and connecting rod bearings for examination. Use honing followed by hot water detergent cleaning then dry it with a clean cloth before adding new engine oil for cylinder bore cleaning. Narrow down installation steps by applying new engine oil onto the piston rings and bearing surfaces and cylinder bore and piston. Then implement the j5239. Use the Piston Ring compressor (J8037) to stretch the rings before installation which should have their stamped arrows facing toward the front of the engine. The j5239 and j8037 should help install the piston in its bore by using a wooden hammer handle to tap lightly while keeping the j8037 against the engine block until all rings enter the cylinder bore. The technician should support the vehicle again while installing the upper connecting rod bearing and apply fresh engine oil before lowering the piston and rod assembly to the Crankshaft through the use of the j5239. The procedure requires you to first remove the j5239, insert the lower connecting rod bearing into the connecting rod cap which you should then coat with new engine oil before installation. To achieve a proper installation use the electronic torque angle meter (J36660-A) for an additional 75-degree rotation on the connecting rod nuts which should initially be tightened to 20 nm (15 ft. Lbs.). Check for binding in the connecting rod before measuring connecting rod clearance as you confirm all bearings are present along with light parallel rod tapping against the crankpin. As the final step install the Crankshaft oil deflector together with the Oil Pump and the Oil Pan before lowering the vehicle to install the Cylinder Head(s).
    Posted by ChevyPartsGiant Specialist
    If you have any questions about this product, please don't hesitate to ask us. We will be happy to help you!

OEM GM 12564008, Excellent Performance and Perfect Fitment

To ensure reliability, purchase GM part # 12564008 Piston. It is sometimes referred to as GM Piston. Choosing OEM parts is the optimal decision for guaranteeing superior quality and perfect performance. These components undergo stringent quality checks and are carefully constructed to comply with GM's factory specifications, ensuring a smooth installation process.

ChevyPartsGiant.com is a leading supplier of genuine GM parts such as GM 12564008 Piston. Our website boasts an extensive inventory of OEM GM parts, available at highly competitive prices in the market. Should you require any new genuine GM parts, rest assured we will deliver them swiftly and efficiently to your doorstep. Furthermore, all our parts come with the assurance of a manufacturer's warranty. For detailed Chevy parts information, click here.
Choose ChevyPartsGiant for discounted prices, exceptional service and fast delivery