ChevyParts
My Garage
My Account
Cart
OEM Buick Terraza Evaporator
A/C Evaporator Core- Select Vehicle by Model
- Select Vehicle by VIN
Select Vehicle by Model
orMake
Model
Year
Select Vehicle by VIN
For the most accurate results, select vehicle by your VIN (Vehicle Identification Number).
2 Evaporators found

Buick Terraza Evaporator Core Part Number: 10364925
$176.41 MSRP: $319.30You Save: $142.89 (45%)Ships in 1-2 Business Days
Buick Terraza Evaporator Core Part Number: 15925708
Buick Terraza Evaporator
Want to cut long-term maintenance and repair costs? Choose OEM Evaporator. Those parts deliver top durability you can trust. On our site, you'll find a huge catalog of genuine Buick Terraza parts. Prices are unbeatable, so you can keep more in your pocket. Every OEM Buick Terraza Evaporator includes a manufacturer's warranty. You can also get an easy return policy that keeps buying risk free. Fast delivery, get your car on the road quickly. It's simple to search, compare, and order. Stop guessing about quality or fit. Order today and save with parts that last.
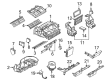
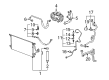
The Evaporator plays an important part in the A/C system of Buick Terraza cars mainly characterized by high reliability and driving performance. This Evaporator has a crucial function of conditioning the cabin by taking heat out and transforming the liquid refrigerant into the gaseous form to benefit the passengers. It is mounted unobtrusively low under the dash of a Buick Terraza; the evaporator's structure consists of thin-walled aluminum tubes bordered by fins that conduct heat more effectively. Also, it works as a dehumider, pulling the humidity level out of the air and this is important to keep the inside of the car comfortable. The Buick Terraza has options for several models of the car manufactured between 2005 and 2007, thus the Evaporator plays a significant role in the general layout of the car. It is not only about comfort; Evaporator plays the role of maintaining climate conditions throughout the vehicle's cabin that is critical to safety due to the required concentration of the driver and passengers' comfort. First of all, the Evaporator has pretty high thermal stability and is resistant to formation of the debris; however, the operation may be problematic due to leaks and the device should be changed occasionally. In the competitive landscape of automobile Sector, Evaporator has built the quality and proficiency in its building that complements the Terraza, which is considered as a prestige minivan of Buick. The Evaporator is well-engineered and well-designed to underscore the Buick name's devotion to quality and its clientele.
Buick Terraza Evaporator Parts and Q&A
- Q: How to replace the auxiliary evaporator core on Buick Terraza?A:A halogen leak detector model j 39400-a should be used to check for leaks in the component fittings after installation. Start by taking away the auxiliary hvac module assembly followed by removing screws from the auxiliary thermal expansion valve (TXV) line clamp then disconnecting the auxiliary txv line clamp from the hvac module assembly. Afterwards you should remove the txv insulation and the bolt from the auxiliary txv line block fitting before disconnecting the a/c lines from the auxiliary thermal expansion value. All sealing washers should be discarded. There should be immediate application of caps or tape to both open a/c lines to stop system contamination. Evacuate the auxiliary txv from the auxiliary Evaporator core by taking out its bolts before discarding the sealing washers. Start by unplugging the auxiliary temperature actuator screws along with its component from the auxiliary hvac module beneath the blower motor housing screws which you must also detach from the hvac module. Use heat to obtain the auxiliary Evaporator core by first removing all case screws from the lower hvac module case then separating the halves. The specified pag oil amount must be applied directly to a new auxiliary Evaporator core before placing it inside the lower hvac module case for assembly. Secure the case with screws at 1.6 n.m (14 lb in) torque setting. The service continues with housing the auxiliary blower motor and its screws to 1.6 n.m (14 lb in) torque before proceeding to tighten the auxiliary temperature actuator and its screws to 1.6 n.m (14 lb in). You must install new sealing washers in the auxiliary Evaporator core before removing the cap or tape from a/c lines to connect the auxiliary txv to the core while using mounting bolts that need a torque of 3.5 n.m (31 lb in). Fasten new sealing washers to the auxiliary txv line block fitting then use this fitting to join with the auxiliary Evaporator core while using the retaining bolt at 11 n.m (97 lb in). The last step includes installing new txv insulation while attaching the auxiliary txv line clamp to the hvac module assembly before tightening its screws to 1.6 n.m (14 lb in) to reinstall the assembly.

Related Buick Terraza Parts
 Buick Terraza A/C Accumulator
 Buick Terraza A/C Compressor
 Buick Terraza A/C Compressor Cut-Out Switches
 Buick Terraza A/C Condenser
 Buick Terraza A/C Expansion Valve
 Buick Terraza A/C Orifice Tube
 Buick Terraza A/C Service Cap
 Buick Terraza Blend Door Actuator
 Buick Terraza Blower Motor
 Buick Terraza Blower Motor Resistor
 Buick Terraza Cabin Air Filter
 Buick Terraza Heater Core