ChevyParts
My Garage
My Account
Cart
OEM Cadillac Catera Steering Knuckle
Front Steering Knuckle- Select Vehicle by Model
- Select Vehicle by VIN
Select Vehicle by Model
orMake
Model
Year
Select Vehicle by VIN
For the most accurate results, select vehicle by your VIN (Vehicle Identification Number).
2 Steering Knuckles found


Cadillac Catera Knuckle Part Number: 90445667

Cadillac Catera Knuckle Part Number: 9191639
Cadillac Catera Steering Knuckle
Want to cut long-term maintenance and repair costs? Choose OEM Steering Knuckle. Those parts deliver top durability you can trust. On our site, you'll find a huge catalog of genuine Cadillac Catera parts. Prices are unbeatable, so you can keep more in your pocket. Every OEM Cadillac Catera Steering Knuckle includes a manufacturer's warranty. You can also get an easy return policy that keeps buying risk free. Fast delivery, get your car on the road quickly. It's simple to search, compare, and order. Stop guessing about quality or fit. Order today and save with parts that last.
The Steering Knuckle on Cadillac Catera models functions as a crucial element that displays both reliable performance and quality in the luxury sedan range. Through its essential position between suspensio and steering systems the Steering Knuckle enables front wheel movement to maintain optimal vehicle handling alongside stability. The Cadillac Catera Steering Knuckle supports both RWD and FWD/AWD/4WD systems across different Catera models because it incorporates a spindle unit for RWD applications and a drive axle component for FWD/AWD models to enhance vehicle safety. The knuckle design enables both exact direction changes and position adjustments which make it responsive to multiple road circumstances. Jurisdictional inspections of the Steering Knuckle need to happen regularly to ensure operational safety because the knuckle stud bores and spindles represent key components for proper function. The Cadillac Catera model series produced between 1996 through 2001 earned acclaim for its premium features together with powerful performance because its Steering Knuckle functioned as a core element of its driving controls. The brief duration of the Catera's production dedicated to competing in luxury markets demonstrated Cadillac's continuous pursuit of innovative high-quality products. The nearly 100,000 units sold Cadillac Catera upholds a remarkable position in Cadillac history while the Steering Knuckle stands as a symbol of the automaker's commitment to expert engineering and satisfied customers.
Cadillac Catera Steering Knuckle Parts Questions & Experts Answers
- Q: How to service and repair the steering knuckle on Cadillac Catera?A:To service and repair the Steering Knuckle, first, lift the vehicle and support on a jack-stand. If these parts are still there, take out the front wheel assembly, the Wheel Hub and all the pieces that were attached to it. Following this, take off the brake disc rotor splash shield bolts and the splash shield. Disconnect the ball nut stud in the outer tie rod and then apply the tie rod/wheel stud puller (J6627-A), which will pull apart the outer tie rod from the Steering Knuckle. Do the above and take off the Steering Knuckle bolts from the strut and the Steering Knuckle from the strut. Pull off the lower control arm ball stud pinch bolt and remove the Steering Knuckle from the lower control arm ball stud. For installation, bolt the Steering Knuckle on to the lower control arm pinched stud and insert this bolt in the rear-to-front direction of the vehicle and tighten with 100 nm (74 ft. Lbs). Then install Steering Knuckle to the strut using a new bolt, then insert them from half the vehicle's front to backside and tighten till snug. Mount the outer tie rod onto the Steering Knuckle and examine the threads of the ball stud for cleanliness and smoothing as well as to lightly file or sand any nicks on the ball stud taper. Put the outer tie rod into the Steering Knuckle, and tighten the tie rod ball stud to 30 nm (22 ft. Lbs), using linkage installer (J42089) so that it allows the ball stud taper seat. After de-installing the linkage installer (J42089), install a new self-locking tie rod nut and tighten it up to a torque of 60nm (44 ft. Lbs.). Fit back the brake disc rotor splash shield and bolts, tightening to 4 nm (35 inch lbs). Last, replace the Wheel Hub and front wheel assembly, lower the vehicle, and align the wheels.

Related Cadillac Catera Parts
 Cadillac Catera Ball Joint
 Cadillac Catera Coil Spring Insulator
 Cadillac Catera Coil Springs
 Cadillac Catera Control Arm
 Cadillac Catera Control Arm Bolt
 Cadillac Catera Control Arm Bushing
 Cadillac Catera Shock Absorber
 Cadillac Catera Spindle
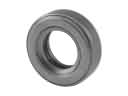 Cadillac Catera Strut Bearing
 Cadillac Catera Sway Bar Bracket
 Cadillac Catera Sway Bar Bushing
 Cadillac Catera Wheel Hub