ChevyParts
My Garage
My Account
Cart
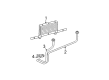
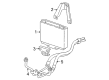
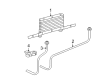
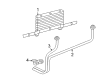
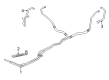
OEM Cadillac Escalade Oil Cooler Hose
Oil Cooler Line- Select Vehicle by Model
- Select Vehicle by VIN
Select Vehicle by Model
orMake
Model
Year
Select Vehicle by VIN
For the most accurate results, select vehicle by your VIN (Vehicle Identification Number).
21 Oil Cooler Hoses found


Cadillac Escalade Outlet Pipe, Lower Part Number: 15773661
$35.11 MSRP: $57.85You Save: $22.74 (40%)Ships in 1-2 Business Days


Cadillac Escalade Outlet Hose Part Number: 12472314
$67.65 MSRP: $116.16You Save: $48.51 (42%)Ships in 1-2 Business Days


Cadillac Escalade Inlet Pipe, Upper Part Number: 25999416
$27.96 MSRP: $46.05You Save: $18.09 (40%)Ships in 1-2 Business Days


Cadillac Escalade Inlet Pipe, Upper Part Number: 15809053
$39.59 MSRP: $67.98You Save: $28.39 (42%)Ships in 1-2 Business Days


Cadillac Escalade Inlet Pipe Part Number: 15809058
$26.78 MSRP: $44.12You Save: $17.34 (40%)Ships in 1 Business Day


Cadillac Escalade Auxiliary Fluid Cooler Inlet Line Part Number: 15779543
$25.49 MSRP: $41.98You Save: $16.49 (40%)Ships in 1-3 Business Days


Cadillac Escalade Inlet Pipe Part Number: 15809057
$31.52 MSRP: $51.93You Save: $20.41 (40%)Ships in 1 Business Day


Cadillac Escalade Tube Assembly Part Number: 23370657
$73.76 MSRP: $120.73You Save: $46.97 (39%)

Cadillac Escalade Tube Assembly Part Number: 23370658
$113.66 MSRP: $193.50You Save: $79.84 (42%)
Cadillac Escalade Tube Assembly Part Number: 84036743
$88.08 MSRP: $149.99You Save: $61.91 (42%)
Cadillac Escalade Cooler Pipe Part Number: 86818093
$180.54 MSRP: $284.00You Save: $103.46 (37%)Ships in 1-3 Business Days
Cadillac Escalade Cooler Pipe Part Number: 85569816
$236.11 MSRP: $371.51You Save: $135.40 (37%)Ships in 1-3 Business Days
Cadillac Escalade Oil Cooler Tube Part Number: 86788216
$187.03 MSRP: $294.22You Save: $107.19 (37%)Ships in 1-3 Business Days
Cadillac Escalade Inlet Pipe, Upper Part Number: 25999417
$39.42 MSRP: $67.13You Save: $27.71 (42%)Ships in 1-2 Business Days
Cadillac Escalade Cooler Pipe Part Number: 85529071
$116.36 MSRP: $183.06You Save: $66.70 (37%)Ships in 1-3 Business Days
Cadillac Escalade Inlet Hose Part Number: 15104800
$116.33 MSRP: $280.53You Save: $164.20 (59%)Ships in 1-2 Business Days
Cadillac Escalade Oil Line Part Number: 85136335
$91.63 MSRP: $143.52You Save: $51.89 (37%)Cadillac Escalade Coolant Line Part Number: 86788215
$109.96 MSRP: $188.80You Save: $78.84 (42%)
Cadillac Escalade Tube Assembly Part Number: 84305556
$75.33 MSRP: $128.24You Save: $52.91 (42%)Ships in 1-2 Business DaysCadillac Escalade Tube Assembly Part Number: 85132191
$109.82 MSRP: $186.96You Save: $77.14 (42%)Ships in 1-3 Business Days
| Page 1 of 2 |Next >
1-20 of 21 Results
Cadillac Escalade Oil Cooler Hose
Our website offers an extensive catalog of genuine Cadillac Escalade Oil Cooler Hose at unbeatable prices. Every OEM Cadillac Escalade Oil Cooler Hose comes with a manufacturer's warranty, an easy return policy, and rapid delivery service. Don't miss out on this great opportunity!
Cadillac Escalade Oil Cooler Hose Parts Questions & Experts Answers
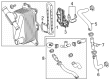
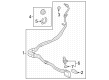
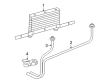
- Q: How to replace the Engine Oil Cooler Hose/Pipe on Cadillac Escalade?A: The oil cooler which can be built into the Radiator or placed separately in front of it has serviceable cooler lines and hoses. To replace the Engine Oil Cooler hose/pipe, you should first remove the plastic caps of the quick connect fitting and pull them back, along their pipe. Cradle one leg of the retaining clip and with a small pick type tool (or slightly bent screwdriver) pry the other end off of the quick connect fitting pulling the clip slightly and then rotate and remove the clip completely and discard the old clip. With a 6.0l engine, open the Oil Cooler Hose clip on the lower Fan Shroud, pull the hoses out of the clip, and carefully pull the pipe fittings downwards out of the Radiator quick connect fittings. Lift and support the vehicle, followed by the disassembly of the Exhaust Manifold pipe nuts and reposition them. To remove the oil cooler hoses for an 8.1l engine, disconnect the oil cooler hoses from the clip then pull out the pipe fittings directly from the Radiator quick connect fittings and then lift and support the vehicle. If available, remove the engine shield bolts and remove the shield. For 6.0l engine, you must remove the Oil Cooler Hose bracket bolt and Oil Cooler Hose adapter bolts to remove the hose assembly and gasket, disagrade the gasket and inspecting fittings and hoses for damage. For an 8.1l engine remove the hose bracket bolt, disconnect quick connect fittings at the engine and remove the hose assembly, dump the gasket and examine for damage. In the course of installation ensure that a distinct snap is heard when installing the tube ends of the hose assembly to the quick connectors ensuring that you do a pull on the tube thereby giving it a forceful push. For the 8.1l engine, attach quick connect fittings at the engine, secure hose bracket bolt and tighten it tightly to 50 nm (37 ft. Lbs.). For 6.0l, install a hose assy w/company new gasket, attach the hose adapter bolts at 12 nm (106 inch lbs) limit the hose bracket bolt at 25 nm (18 ft. Lbs.). If fitted, mount the engine shield and bolts, tightening to 20 nm (15 ft. Lbs.). Insert the new retaining clip into the quick connect fitting with your thumb and forefinger so that it will fit into all three slots, and turn it until it locks in place to ensure that the ears can be seen and the clip is able to swing freely. Make sure to have a new retaining clip in hand to install in the other quick connect fitting, and then the pipe to the Exhaust Manifold and tighten nuts to 50 nm (37 ft. Lbs.). Lower the vehicle and for a 6.0l engine, hook up the hoses to hose clip on the Fan Shroud and snap to close with ample plastic cap at the top end of the cooler line connecting to the fitting. For an 8.1l engine, install the hoses-to-clip, but the lines to the Radiator, which must be inserted straight into the quick connect fitting till you hear/feel a click then pull it back sharply to top off the installation. Lastly, snap the fasten plastic cap over the quick connect fitting, making sure that there is no gap between the fitting and the cap.

Related Cadillac Escalade Parts
 Cadillac Escalade Automatic Transmission Oil Cooler Line
 Cadillac Escalade Coolant Pipe
 Cadillac Escalade Coolant Reservoir Cap
 Cadillac Escalade Cooling Hose
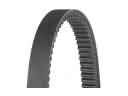 Cadillac Escalade Drive Belt
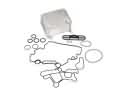 Cadillac Escalade Engine Oil Cooler
 Cadillac Escalade Fan Motor
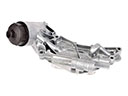 Cadillac Escalade Oil Cooler
 Cadillac Escalade Radiator Cap
 Cadillac Escalade Radiator fan
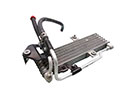 Cadillac Escalade Transmission Oil Cooler
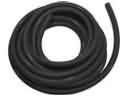 Cadillac Escalade Transmission Oil Cooler Hose