Make sure this part fits

GM 15809058
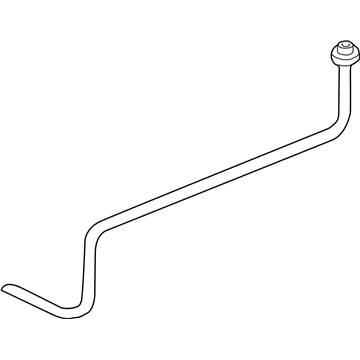
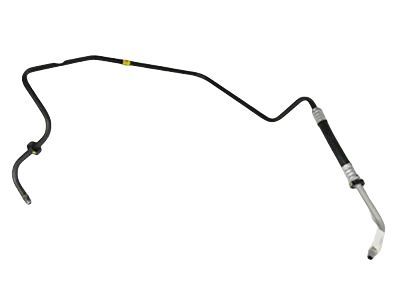
Inlet Pipe

1999-2007 GM

Customer Questions & Expert Answers (9)
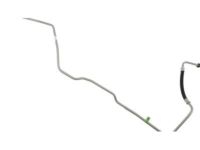
GM 15809058 Inlet Pipe
  • Part Description
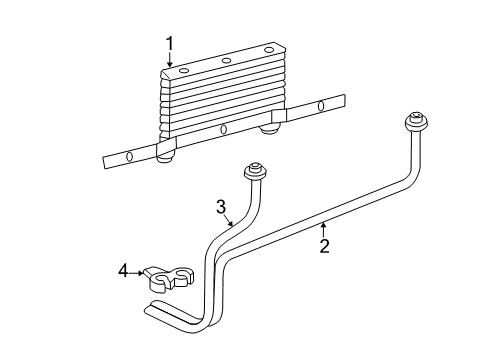
    Hose, Transmission Fluid Auxiliary Cooler Inlet
  • Replaces
    15710131, 15190207, 15052883
  • Manufacturer
    General Motors
Make sure this part fits
$26.26 MSRP: $43.26
You Save: $17.00 (40%)
Ships in 1 Business Day
1
ADD TO CART
  • Vehicle Fitment

    Year Make Model Trim Engine
    2006 Cadillac EscaladeBase8 Cyl 6.0 L GAS
    2003-2006 Cadillac Escalade ESVBase8 Cyl 6.0 L GAS
    2002-2006 Cadillac Escalade EXTBase8 Cyl 6.0 L GAS
    2002-2006 Chevrolet Avalanche 1500Base, LS, LT, North Face, On Road Edition, WBH, Z66, Z718 Cyl 5.3 L FLEX, 8 Cyl 5.3 L GAS
    2002-2006 Chevrolet Avalanche 2500Base, LS, LT8 Cyl 8.1 L GAS
    1999-2007 Chevrolet Silverado 1500Base, LS, LT, WT6 Cyl 4.3 L GAS, 8 Cyl 4.8 L GAS, 8 Cyl 5.3 L GAS
    2007 Chevrolet Silverado 1500 ClassicLS, WT6 Cyl 4.3 L GAS
    1999 Chevrolet Silverado 2500Base, LS, LT8 Cyl 5.3 L GAS, 8 Cyl 6.0 L GAS
    2000-2006 Chevrolet Suburban 1500Base, LS, LT, LTZ, Z718 Cyl 5.3 L FLEX, 8 Cyl 5.3 L GAS, 8 Cyl 6.0 L GAS
    2006 Chevrolet TahoeBase, LS, LT, Z718 Cyl 4.8 L GAS, 8 Cyl 5.3 L FLEX, 8 Cyl 5.3 L GAS
    View More
    Warning: California's Proposition 65
  • Customer Questions & Expert Answers

    Q:
    Is this 15809058 designed for my car? Posted by ChevyPartsGiant Specialist
    A:
    Please Select Your Vehicle model to see if part number 15809058 is suitable before ordering.
    Posted by ChevyPartsGiant Specialist
    Q:
    How to replace the oil cooler hose on Chevrolet Suburban 1500? Posted by Customer
    A:
    The replacement of the oil cooler line should begin with taking the front grill assembly off and placing a drain pan below the vehicle. Dismantle the lower oil cooler line from its fitting at the radiator and the oil cooler line from its fitting at the auxiliary cooler. First support the vehicle while raising it and take the existing plastic cap covering from the fitting's quick connect assembly to a length of two inches. Apply the bent-tip screwdriver to extract one side of the e-clip until it disconnects from its position and then discard the component. Start by extracting the cooler line directly from the quick connect fitting before removing the oil cooler pipes from the Oil Pan clip and transmitting the oil cooler pipes. New e-clips should be used for the quick connect fittings by inserting one end into a slot while rotating until all three ears pass through the slots. Check that the retaining ring can spin effortlessly when installing the cooler line but keep the plastic cap for a separate purpose. A plastic cap should be present at both ends of the cooler line and a new one must be obtained for use if the cap gets damaged. Before completing the installation verify that the retaining ring is held down by the fitting through a process of seating the plastic o-ring cap completely without force. Properly secure the cooler line by tugging it hard to check the fitment while confirming that the cap remains free from any gaps against the fitting. The transmission quick connect fittings should have the cooler line ends inserted until you hear or feel a click. The oil cooler lines should be installed into the Oil Pan clip and secured with a torque pressure of 9 nm (80 inch lbs.). Lower the vehicle and proceed with fitting the oil cooler line to the auxiliary oil cooler fitting followed by connecting the lower oil cooler line to the radiator fitting then reinstall the front grill assembly. Finally, check the transmission fluid.
    Posted by ChevyPartsGiant Specialist
    Q:
    How to replace the oil cooler hose on GMC Yukon XL 1500? Posted by Customer
    A:
    The replacement of the oil cooler line should begin with taking the front grill assembly off and placing a drain pan below the vehicle. Dismantle the lower oil cooler line from its fitting at the radiator and the oil cooler line from its fitting at the auxiliary cooler. First support the vehicle while raising it and take the existing plastic cap covering from the fitting's quick connect assembly to a length of two inches. Apply the bent-tip screwdriver to extract one side of the e-clip until it disconnects from its position and then discard the component. Start by extracting the cooler line directly from the quick connect fitting before removing the oil cooler pipes from the Oil Pan clip and transmitting the oil cooler pipes. New e-clips should be used for the quick connect fittings by inserting one end into a slot while rotating until all three ears pass through the slots. Check that the retaining ring can spin effortlessly when installing the cooler line but keep the plastic cap for a separate purpose. A plastic cap should be present at both ends of the cooler line and a new one must be obtained for use if the cap gets damaged. Before completing the installation verify that the retaining ring is held down by the fitting through a process of seating the plastic o-ring cap completely without force. Properly secure the cooler line by tugging it hard to check the fitment while confirming that the cap remains free from any gaps against the fitting. The transmission quick connect fittings should have the cooler line ends inserted until you hear or feel a click. The oil cooler lines should be installed into the Oil Pan clip and secured with a torque pressure of 9 nm (80 inch lbs.). Lower the vehicle and proceed with fitting the oil cooler line to the auxiliary oil cooler fitting followed by connecting the lower oil cooler line to the radiator fitting then reinstall the front grill assembly. Finally, check the transmission fluid.
    Posted by ChevyPartsGiant Specialist
    Q:
    How to replace the Engine Oil Cooler Hose/Pipe on GMC Sierra 1500? Posted by Customer
    A:
    The oil cooler which can be unitized with Radiator or installed separately in front of the Radiator are serviceable cooler lines and hoses. To replace Engine Oil Cooler hose/pipe, first the remove the plastic caps from the quick connect, pull them back from the pipe. Hold one end of the retaining clip and use a small pick type tool or bent screwdriver to pry the other end free from the quick connect fitting, then rotate and pull the clip off and discard the old clip. For a 6.0l engine, detach from the clip hose for the oil cooler that is located on the lower concealing fan; pull back the hoses but pull the pipe fittings straight out of the q/c fitting in the Radiator. Lift the vehicle, and detach the Exhaust Manifold pipe nuts and relocate the pipe. An 8.1l engine, remove the oil cooler hoses from the clip, and pull the pipe fittings straight out from the Radiator quick connect fittings, then raise and support the vehicle. If equipped, take off the engine shield bolts and the shield. For a 6.0l engine, unscrew the Oil Cooler Hose bracket bolt and the Oil Cooler Hose adapter bolts, sliding off the hoses assembly and replacing the gasket, tossing it aside to inspect the fittings and hoses for damage. In the case of an 8.1l engine, the instructions are as follows: use an allen wrench to remove the bolt for the hose bracket; remove the quick connect fittings at the engine and the hose assembly; discard the gasket and inspect for damage. While installing confirm a snap can be heard when the tube ends of the hose assembly are connected to quick-connectors and the full insertion of the tube can be checked by pulling forcefully. For an 8.1l engine, the quick connect fittings at the engine are connected, the hose bracket bolt is installed, and tightened up to 50 nm (37 ft. Lbs). For a 6.0l engine install hose assembly with a new gasket with tightening adapter bolts to 12 nm (106-inch lbs.), bracket bolt to 25 nm (18 ft. Lbs.). If so provided, mount the engine shield and bolts which you tighten to 20 nm (15 ft. Lbs.) in torque. Place the new retaining clip on the quick connect fitting, making sure that it bites into all the slotted areas: leave this to twist all the way until it locks in place allowing the ears to be visible and the clip to be mobile. Mount a new retaining clip into the other fitting; connect the pipe to the Exhaust Manifold and tighten the nuts to 50 nm (37 ft. Lbs.). Lower the vehicle, then for a 6.0l engines, connect the hoses to the hose clip on the Fan Shroud and push it closed. Put on a plastic cap at the end of the oil cooler line which goes to the quick connect fitting. If damaged or lost, get a new cap prior to installation. For 8.1l, attach the hoses to the clip, connect to the Radiator and pull back sharply to ensure the line enter the fitting until you hear or feel a click. Finally tighten the snap of the plastic cap onto the quick connect fitting ensuring that there is no gap between them.
    Posted by ChevyPartsGiant Specialist
    Q:
    What is the first step to replace the Engine Oil Cooler Hose/Pipe for the 2005 Chevrolet Avalanche 1500? Posted by Customer
    A:
    First disconnect the engine oil cooler quick connect fittings.
    Posted by ChevyPartsGiant Specialist
    See expert answers on similar Oil Cooler Hose
    Q:
    What should be done if it is equipped with an engine shield for the 2006 Cadillac Escalade EXT? Posted by Customer
    A:
    Install the engine shield and its bolts, tightening them to 20 Nm (15 ft. lbs.).
    Posted by ChevyPartsGiant Specialist
    See expert answers on similar Oil Cooler Hose
    Q:
    What is the final step for a 6.0L engine after lowering for the 2004 Chevrolet Silverado 1500? Posted by Customer
    A:
    Install the hoses to the hose clip on the fan shroud and snap it shut.
    Posted by ChevyPartsGiant Specialist
    See expert answers on similar Oil Cooler Hose
    Q:
    What is the first step to replace the water pump outlet pipe for the 2001 Chevrolet Suburban 1500? Posted by Customer
    A:
    Remove the left front fender wheelhouse inner panel.
    Posted by ChevyPartsGiant Specialist
    See expert answers on similar Cooling Hose
    Q:
    What should be done after removing the left front fender wheelhouse inner panel for the 2001 GMC Yukon XL 1500? Posted by Customer
    A:
    Take out the water pump.
    Posted by ChevyPartsGiant Specialist
    See expert answers on similar Cooling Hose
    If you have any questions about this product, please don't hesitate to ask us. We will be happy to help you!

OEM GM Inlet Pipe 15809058 Designed for Proper Fit and Performance

Original OEM GM parts deliver superior quality and meet all performance standards needed for optimal automotive operation. The authentic part identified by 15809058 Inlet Pipe is available in the market under the name GM Cooling Hose, Oil Cooler Hose. This genuine product has a full warranty coverage from the manufacturer available at all authorized GM dealers throughout the United States. This part 15809058 Inlet Pipe fits certain Chevrolet Tahoe, Silverado 1500, Silverado 2500 models, as well as GMC Sierra 1500, Yukon, Sierra 2500. Additionally, it is compatible with Cadillac Escalade, Escalade ESV, Escalade EXT models.
The original GM component designated by manufacturer part number 15809058 maintains top performance when functioning as the Hose, Transmission Fluid Auxiliary Cooler Inlet unit. The component 15809058 is constructed from durable material and its dimensions span 18.6 x 18.2 x 5.8 inches while weighing 0.80 Pounds. The Direct Replacement component is ready in New condition to ensure full compatibility with your vehicle system. This component receives the designation of Outlet Pipe; Hose, Transmission Oil Cooler. The part 15809058 has available replacement options 15710131, 15190207, 15052883. GM manufacturer provides a warranty that ensures reliable operation of this product. The Shipping Policy and Return Policy pages outline complete details regarding shipping procedures and return processes.
If you want to save money in the long run on maintenance and repairs, you should choose OEM products because they're of the top level of durability. Are you on the quest of finding GM parts, our site is worth a visit. We stock an endless selection of high-quality GM components including things like ignition coils all the way through to fan shrouds and all at prices that can not be matched. You have nothing to worry about because all our OEM parts are covered with a manufacturer warranty, which guarantees superior quality and value.