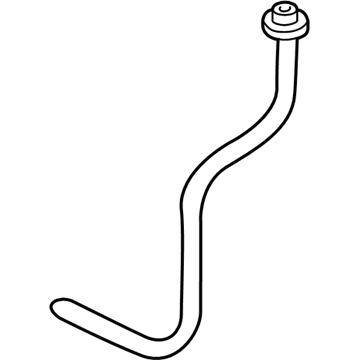
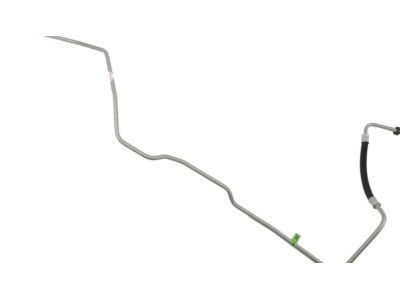
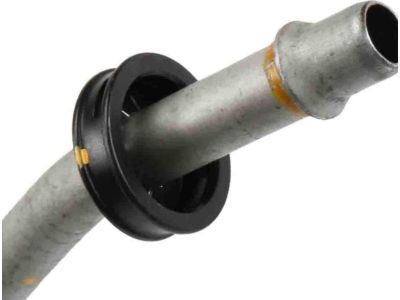
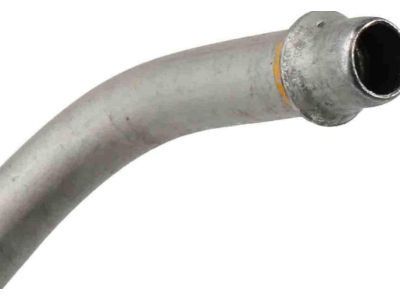
Make sure this part fits

GM 15773661
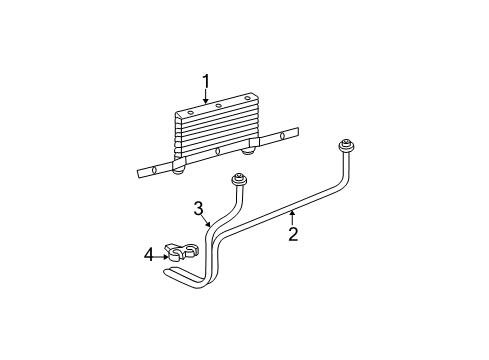
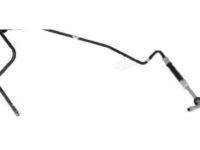
Outlet Pipe, Lower

1999-2007 GM

Customer Questions & Expert Answers (8)
GM 15773661 Outlet Pipe, Lower
  • Part Description
    Pipe, Transmission Fluid Cooler Lower
  • Position
    Lower
  • Replaces
    15190201, 15710123, 15052879
  • Manufacturer
    General Motors
Make sure this part fits
$34.42 MSRP: $56.71
You Save: $22.29 (40%)
Ships in 1-2 Business Days
1
ADD TO CART
  • Related Parts
  • Product Specifications
  • Vehicle Fitment
  • Customer Questions & Expert Answers
  • Product Specifications

    BrandGenuine GM
    Manufacturer Part Number15773661
    Part DescriptionPipe, Transmission Fluid Cooler Lower
    Other NamesPipe, Transmission Oil Cooler
    Item Dimensions47.0 x 16.8 x 4.6 inches
    Item Weight1.10 Pounds
    PositionLower
    ConditionNew
    Fitment TypeDirect Replacement
    Replaces15190201, 15710123, 15052879
    ManufacturerGeneral Motors
    SKU15773661
    WarrantyThis genuine GM part is guaranteed by GM's factory warranty.
    Shipping & ReturnShipping Policy Return Policy
    Warning: California's Proposition 65
  • Vehicle Fitment

    Year Make Model Trim Engine
    2002-2005 Cadillac EscaladeBase8 Cyl 5.3 L GAS, 8 Cyl 6.0 L GAS
    1999-2007 Chevrolet Silverado 1500Base, LS, LT, LTZ, SS, WT, Z71 Off-Road6 Cyl 4.3 L GAS, 8 Cyl 4.8 L GAS, 8 Cyl 5.3 L FLEX, 8 Cyl 5.3 L GAS, 8 Cyl 6.0 L GAS
    2007 Chevrolet Silverado 1500 ClassicLS, LT, SS, WT8 Cyl 4.8 L GAS, 8 Cyl 5.3 L FLEX, 8 Cyl 5.3 L GAS, 8 Cyl 6.0 L GAS
    2005-2006, 2001-2003 Chevrolet Silverado 1500 HDBase, LS, LT8 Cyl 6.0 L GAS
    2007 Chevrolet Silverado 1500 HD ClassicLT8 Cyl 6.0 L GAS
    1999-2004 Chevrolet Silverado 2500Base, LS, LT, WT8 Cyl 5.3 L GAS, 8 Cyl 6.0 L BI-FUEL, 8 Cyl 6.0 L CNG, 8 Cyl 6.0 L GAS
    2001-2007 Chevrolet Silverado 2500 HDBase, LS, LT, LTZ, WT8 Cyl 6.0 L BI-FUEL, 8 Cyl 6.0 L CNG, 8 Cyl 6.0 L GAS
    2007 Chevrolet Silverado 2500 HD ClassicLS, LT, WT8 Cyl 6.0 L GAS
    2001-2006 Chevrolet Silverado 3500Base, LS, LT, WT8 Cyl 6.0 L CNG, 8 Cyl 6.0 L GAS
    2007 Chevrolet Silverado 3500 ClassicLS, LT, WT8 Cyl 6.0 L GAS
    View More
  • Customer Questions & Expert Answers

    Q:
    Is this 15773661 designed for my car? Posted by ChevyPartsGiant Specialist
    A:
    Please Select Your Vehicle model to see if part number 15773661 is suitable before ordering.
    Posted by ChevyPartsGiant Specialist
    Q:
    How to replace the Engine Oil Cooler Hose/Pipe on Cadillac Escalade? Posted by Customer
    A:
    The oil cooler which can be built into the Radiator or placed separately in front of it has serviceable cooler lines and hoses. To replace the Engine Oil Cooler hose/pipe, you should first remove the plastic caps of the quick connect fitting and pull them back, along their pipe. Cradle one leg of the retaining clip and with a small pick type tool (or slightly bent screwdriver) pry the other end off of the quick connect fitting pulling the clip slightly and then rotate and remove the clip completely and discard the old clip. With a 6.0l engine, open the Oil Cooler Hose clip on the lower Fan Shroud, pull the hoses out of the clip, and carefully pull the pipe fittings downwards out of the Radiator quick connect fittings. Lift and support the vehicle, followed by the disassembly of the Exhaust Manifold pipe nuts and reposition them. To remove the oil cooler hoses for an 8.1l engine, disconnect the oil cooler hoses from the clip then pull out the pipe fittings directly from the Radiator quick connect fittings and then lift and support the vehicle. If available, remove the engine shield bolts and remove the shield. For 6.0l engine, you must remove the Oil Cooler Hose bracket bolt and Oil Cooler Hose adapter bolts to remove the hose assembly and gasket, disagrade the gasket and inspecting fittings and hoses for damage. For an 8.1l engine remove the hose bracket bolt, disconnect quick connect fittings at the engine and remove the hose assembly, dump the gasket and examine for damage. In the course of installation ensure that a distinct snap is heard when installing the tube ends of the hose assembly to the quick connectors ensuring that you do a pull on the tube thereby giving it a forceful push. For the 8.1l engine, attach quick connect fittings at the engine, secure hose bracket bolt and tighten it tightly to 50 nm (37 ft. Lbs.). For 6.0l, install a hose assy w/company new gasket, attach the hose adapter bolts at 12 nm (106 inch lbs) limit the hose bracket bolt at 25 nm (18 ft. Lbs.). If fitted, mount the engine shield and bolts, tightening to 20 nm (15 ft. Lbs.). Insert the new retaining clip into the quick connect fitting with your thumb and forefinger so that it will fit into all three slots, and turn it until it locks in place to ensure that the ears can be seen and the clip is able to swing freely. Make sure to have a new retaining clip in hand to install in the other quick connect fitting, and then the pipe to the Exhaust Manifold and tighten nuts to 50 nm (37 ft. Lbs.). Lower the vehicle and for a 6.0l engine, hook up the hoses to hose clip on the Fan Shroud and snap to close with ample plastic cap at the top end of the cooler line connecting to the fitting. For an 8.1l engine, install the hoses-to-clip, but the lines to the Radiator, which must be inserted straight into the quick connect fitting till you hear/feel a click then pull it back sharply to top off the installation. Lastly, snap the fasten plastic cap over the quick connect fitting, making sure that there is no gap between the fitting and the cap.
    Posted by ChevyPartsGiant Specialist
    Q:
    How to replace the Engine Oil Cooler Hose/Pipe on Chevrolet Silverado 1500? Posted by Customer
    A:
    The oil cooler which can be unitized with Radiator or installed separately in front of the Radiator are serviceable cooler lines and hoses. To replace Engine Oil Cooler hose/pipe, first the remove the plastic caps from the quick connect, pull them back from the pipe. Hold one end of the retaining clip and use a small pick type tool or bent screwdriver to pry the other end free from the quick connect fitting, then rotate and pull the clip off and discard the old clip. For a 6.0l engine, detach from the clip hose for the oil cooler that is located on the lower concealing fan; pull back the hoses but pull the pipe fittings straight out of the q/c fitting in the Radiator. Lift the vehicle, and detach the Exhaust Manifold pipe nuts and relocate the pipe. An 8.1l engine, remove the oil cooler hoses from the clip, and pull the pipe fittings straight out from the Radiator quick connect fittings, then raise and support the vehicle. If equipped, take off the engine shield bolts and the shield. For a 6.0l engine, unscrew the Oil Cooler Hose bracket bolt and the Oil Cooler Hose adapter bolts, sliding off the hoses assembly and replacing the gasket, tossing it aside to inspect the fittings and hoses for damage. In the case of an 8.1l engine, the instructions are as follows: use an allen wrench to remove the bolt for the hose bracket; remove the quick connect fittings at the engine and the hose assembly; discard the gasket and inspect for damage. While installing confirm a snap can be heard when the tube ends of the hose assembly are connected to quick-connectors and the full insertion of the tube can be checked by pulling forcefully. For an 8.1l engine, the quick connect fittings at the engine are connected, the hose bracket bolt is installed, and tightened up to 50 nm (37 ft. Lbs). For a 6.0l engine install hose assembly with a new gasket with tightening adapter bolts to 12 nm (106-inch lbs.), bracket bolt to 25 nm (18 ft. Lbs.). If so provided, mount the engine shield and bolts which you tighten to 20 nm (15 ft. Lbs.) in torque. Place the new retaining clip on the quick connect fitting, making sure that it bites into all the slotted areas: leave this to twist all the way until it locks in place allowing the ears to be visible and the clip to be mobile. Mount a new retaining clip into the other fitting; connect the pipe to the Exhaust Manifold and tighten the nuts to 50 nm (37 ft. Lbs.). Lower the vehicle, then for a 6.0l engines, connect the hoses to the hose clip on the Fan Shroud and push it closed. Put on a plastic cap at the end of the oil cooler line which goes to the quick connect fitting. If damaged or lost, get a new cap prior to installation. For 8.1l, attach the hoses to the clip, connect to the Radiator and pull back sharply to ensure the line enter the fitting until you hear or feel a click. Finally tighten the snap of the plastic cap onto the quick connect fitting ensuring that there is no gap between them.
    Posted by ChevyPartsGiant Specialist
    Q:
    How to replace the Engine Oil Cooler Hose/Pipe on Chevrolet Silverado 2500? Posted by Customer
    A:
    The oil cooler which can be unitized with Radiator or installed separately in front of the Radiator are serviceable cooler lines and hoses. To replace Engine Oil Cooler hose/pipe, first the remove the plastic caps from the quick connect, pull them back from the pipe. Hold one end of the retaining clip and use a small pick type tool or bent screwdriver to pry the other end free from the quick connect fitting, then rotate and pull the clip off and discard the old clip. For a 6.0l engine, detach from the clip hose for the oil cooler that is located on the lower concealing fan; pull back the hoses but pull the pipe fittings straight out of the q/c fitting in the Radiator. Lift the vehicle, and detach the Exhaust Manifold pipe nuts and relocate the pipe. An 8.1l engine, remove the oil cooler hoses from the clip, and pull the pipe fittings straight out from the Radiator quick connect fittings, then raise and support the vehicle. If equipped, take off the engine shield bolts and the shield. For a 6.0l engine, unscrew the Oil Cooler Hose bracket bolt and the Oil Cooler Hose adapter bolts, sliding off the hoses assembly and replacing the gasket, tossing it aside to inspect the fittings and hoses for damage. In the case of an 8.1l engine, the instructions are as follows: use an allen wrench to remove the bolt for the hose bracket; remove the quick connect fittings at the engine and the hose assembly; discard the gasket and inspect for damage. While installing confirm a snap can be heard when the tube ends of the hose assembly are connected to quick-connectors and the full insertion of the tube can be checked by pulling forcefully. For an 8.1l engine, the quick connect fittings at the engine are connected, the hose bracket bolt is installed, and tightened up to 50 nm (37 ft. Lbs). For a 6.0l engine install hose assembly with a new gasket with tightening adapter bolts to 12 nm (106-inch lbs.), bracket bolt to 25 nm (18 ft. Lbs.). If so provided, mount the engine shield and bolts which you tighten to 20 nm (15 ft. Lbs.) in torque. Place the new retaining clip on the quick connect fitting, making sure that it bites into all the slotted areas: leave this to twist all the way until it locks in place allowing the ears to be visible and the clip to be mobile. Mount a new retaining clip into the other fitting; connect the pipe to the Exhaust Manifold and tighten the nuts to 50 nm (37 ft. Lbs.). Lower the vehicle, then for a 6.0l engines, connect the hoses to the hose clip on the Fan Shroud and push it closed. Put on a plastic cap at the end of the oil cooler line which goes to the quick connect fitting. If damaged or lost, get a new cap prior to installation. For 8.1l, attach the hoses to the clip, connect to the Radiator and pull back sharply to ensure the line enter the fitting until you hear or feel a click. Finally tighten the snap of the plastic cap onto the quick connect fitting ensuring that there is no gap between them.
    Posted by ChevyPartsGiant Specialist
    Q:
    How to replace the ENGINE OIL COOLER HOSE/PIPE for 4WD on Chevrolet Tahoe? Posted by Customer
    A:
    To replace the engine oil cooler like/pipes for 4wd vehicles, one should first remove the engine oil cooler quick connect fittings. For engines of 5.3l or 6.0l, use the screwdriver to remove the Oil Cooler Hose from the clip on the lower Fan Shroud and unlock the vehicle from the ground by lifting it with help. For 8.1l engines, remove the hoses from the clip and raise and support the vehicle with jack or utility stands at the rear, if equipped, remove the engine protection shield, and front differential carrier shield. Enplace an adjustable jack under the front differential carrier, remove inner axle housing nuts and washers and the differential carrier upper mounting bolt and nut. Pivot the differential carrier forward and down with the jack supporting it, secure it, and remove the lower mounting bolt and nut, and thenze the jack 4-6 inches. For 5.3 and 6.0l, remove the bolt on the Oil Cooler Hose bracket, the drill bolts on the Oil Cooler Hose adapter, and the Oil Cooler Hose assembly with the gasket, discard the gasket, and check the fittings, connectors, and hoses for defects. For 8.1l engines, first remove the Oil Cooler Hose bracket bolt, and then remove the quick connect fittings at the engine and the Oil Cooler Hose assembly, discarding the gasket and inspect for damages in the fittings, connectors, and hose assembly. If it is installed with an 8.1l engine, install the new Oil Cooler Hose assembly together with the gasket, the quick connect fittings at the engine must feel a distinct snap, install the Oil Cooler Hose bracket bolt that should be tightened up to 50 nm (37 ft. Lbs.). To install Oil Cooler Hose assembly for 5.3l or 6.0l engines, install the new gasket and than install the oil filter cooler hose adapter bolts with 12 nm (106 inch lbs.) and oil filter cooler hose bracket bolts with 25 nm (18ft-pounds). Lift the jack to place the differential carrier, install the lower mounting bolt and nut, swing the carrier up and back, install the nut and bolt of the upper mounting and do not tighten it yet. Install the inner axle housing washers and nuts, torquing them to 100 nm (75 ft. Lbs ), and the upper and lower differential carrier bolts to 100 nm (75 ft. Lbs). Take out the adjustable jack, reinstall the front differential carrier shield and engine protection shield if equipped and remove the jack or utility stand from the rear and lower it. For 8.1l engines install a plastic cap on end of oil cooler line connecting to quick connect fitting before install as well as to the oil cooler hoses to the clip. For 5.3l or 6.0l engines, attach the hoses to the hose clip on the Fan Shroud and clip it closed making sure that the oil cooler line has a plastic cap prior to installation and finish up by attaching the oil cooler lines to the Radiator.
    Posted by ChevyPartsGiant Specialist
    Q:
    How to replace the ENGINE OIL COOLER HOSE/PIPE for 4WD on GMC Yukon? Posted by Customer
    A:
    To replace the engine oil cooler like/pipes for 4wd vehicles, one should first remove the engine oil cooler quick connect fittings. For engines of 5.3l or 6.0l, use the screwdriver to remove the Oil Cooler Hose from the clip on the lower Fan Shroud and unlock the vehicle from the ground by lifting it with help. For 8.1l engines, remove the hoses from the clip and raise and support the vehicle with jack or utility stands at the rear, if equipped, remove the engine protection shield, and front differential carrier shield. Enplace an adjustable jack under the front differential carrier, remove inner axle housing nuts and washers and the differential carrier upper mounting bolt and nut. Pivot the differential carrier forward and down with the jack supporting it, secure it, and remove the lower mounting bolt and nut, and thenze the jack 4-6 inches. For 5.3 and 6.0l, remove the bolt on the Oil Cooler Hose bracket, the drill bolts on the Oil Cooler Hose adapter, and the Oil Cooler Hose assembly with the gasket, discard the gasket, and check the fittings, connectors, and hoses for defects. For 8.1l engines, first remove the Oil Cooler Hose bracket bolt, and then remove the quick connect fittings at the engine and the Oil Cooler Hose assembly, discarding the gasket and inspect for damages in the fittings, connectors, and hose assembly. If it is installed with an 8.1l engine, install the new Oil Cooler Hose assembly together with the gasket, the quick connect fittings at the engine must feel a distinct snap, install the Oil Cooler Hose bracket bolt that should be tightened up to 50 nm (37 ft. Lbs.). To install Oil Cooler Hose assembly for 5.3l or 6.0l engines, install the new gasket and than install the oil filter cooler hose adapter bolts with 12 nm (106 inch lbs.) and oil filter cooler hose bracket bolts with 25 nm (18ft-pounds). Lift the jack to place the differential carrier, install the lower mounting bolt and nut, swing the carrier up and back, install the nut and bolt of the upper mounting and do not tighten it yet. Install the inner axle housing washers and nuts, torquing them to 100 nm (75 ft. Lbs ), and the upper and lower differential carrier bolts to 100 nm (75 ft. Lbs). Take out the adjustable jack, reinstall the front differential carrier shield and engine protection shield if equipped and remove the jack or utility stand from the rear and lower it. For 8.1l engines install a plastic cap on end of oil cooler line connecting to quick connect fitting before install as well as to the oil cooler hoses to the clip. For 5.3l or 6.0l engines, attach the hoses to the hose clip on the Fan Shroud and clip it closed making sure that the oil cooler line has a plastic cap prior to installation and finish up by attaching the oil cooler lines to the Radiator.
    Posted by ChevyPartsGiant Specialist
    Q:
    What are the installation torque specifications for a 6.0L engine for the 2004 Chevrolet Silverado 3500? Posted by Customer
    A:
    Install the hose assembly with a new gasket, tighten the adapter bolts to 12 Nm (106 inch lbs.), and the bracket bolt to 25 Nm (18 ft. lbs.).
    Posted by ChevyPartsGiant Specialist
    See expert answers on similar Oil Cooler Hose
    Q:
    What should be done if equipped with an engine shield for the 2004 GMC Sierra 1500? Posted by Customer
    A:
    Install the engine shield and bolts, tightening them to 20 Nm (15 ft. lbs.).
    Posted by ChevyPartsGiant Specialist
    See expert answers on similar Oil Cooler Hose
    If you have any questions about this product, please don't hesitate to ask us. We will be happy to help you!

OEM GM 15773661, Excellent Performance and Perfect Fitment

To ensure reliability, purchase GM part # 15773661 Outlet Pipe, Lower. It is sometimes referred to as GM Cooling Hose, GM Oil Cooler Hose, GM Automatic Transmission Oil Cooler Line. Choosing OEM parts is the optimal decision for guaranteeing superior quality and perfect performance. These components undergo stringent quality checks and are carefully constructed to comply with GM's factory specifications, ensuring a smooth installation process.

ChevyPartsGiant.com is a leading supplier of genuine GM parts such as GM 15773661 Outlet Pipe, Lower. Our website boasts an extensive inventory of OEM GM parts, available at highly competitive prices in the market. Should you require any new genuine GM parts, rest assured we will deliver them swiftly and efficiently to your doorstep. Furthermore, all our parts come with the assurance of a manufacturer's warranty. For detailed Chevy parts information, click here.
Choose ChevyPartsGiant for discounted prices, exceptional service and fast delivery