ChevyParts
My Garage
My Account
Cart
OEM Chevrolet Astro Universal Joint
U-Joint- Select Vehicle by Model
- Select Vehicle by VIN
Select Vehicle by Model
orMake
Model
Year
Select Vehicle by VIN
For the most accurate results, select vehicle by your VIN (Vehicle Identification Number).
2 Universal Joints found


Chevrolet Astro Universal Joints Part Number: 23104840
$36.45 MSRP: $88.98You Save: $52.53 (60%)


Chevrolet Astro Universal Joints Part Number: 89059111
$163.83 MSRP: $273.43You Save: $109.60 (41%)Ships in 1-2 Business Days
Chevrolet Astro Universal Joint
Want to cut long-term maintenance and repair costs? Choose OEM Universal Joint. Those parts deliver top durability you can trust. On our site, you'll find a huge catalog of genuine Chevrolet Astro parts. Prices are unbeatable, so you can keep more in your pocket. Every OEM Chevrolet Astro Universal Joint includes a manufacturer's warranty. You can also get an easy return policy that keeps buying risk free. Fast delivery, get your car on the road quickly. It's simple to search, compare, and order. Stop guessing about quality or fit. Order today and save with parts that last.
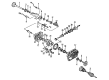
The Universal Joint available in Chevrolet Astro vehicles is very important for connecting the driveshaft to differential and it is required to provide some amount of movement when the suspension is working on the contours of the road. This component allows the driveshaft to rotate, to allow changes in the angle between the transmission as well as differential. Usually the Chevrolet Astro Universal Joint is composed of a cross with needle bearings located in steel cups and fixed by clips. From the various Chevrolet Astro cars, some have used the factory recommended pre-lubricated Universal Joints while others have used the ones that provide grease zerks for greasing purposes. The primary difference is that some types can refuel the grease in Universal Joints in case this will serve to prolong the life of a part. A Universal Joint should be checked routinely, and any worn joints make a loud knocking sound or vibrate, and they should be replaced for good vehicle performance.
Chevrolet Astro Universal Joint Parts and Q&A
- Q: How to replace the universal joint with a nylon injected ring on Chevrolet Astro?A:You need the j 9522-3 u joint bearing separator and j 9522-5 u joint bearing spacer remover to replace the Universal Joint with a nylon injected ring. Only clamp one yoke and position the shaft horizontally to replace the Universal Joint without damaging the slip surface or shaft deformation. Place the shaft on the press with its ends resting flat in position. Apply marks on the propeller shaft to show which side fits at the transfer case end or rear axle and front axle end. Fix the Universal Joint onto the lower yoke so that this smaller part rests securely on the 30 mm (1/8 inch) socket. The u joint bearing separator tool j 9522-3 can separate the plastic retainer ring to let you press the lower bearing cup out from the yoke ear. Push the u joint bearing spacer remover (J 9522-5) between the seal and bearing cup of the cross. Then push the bearing cup out. Turn the propeller shaft to push the other bearing cup out while disassembling the cross from the yoke and taking off all Universal Joint pieces. When you replace the rear axle's front Universal Joint you will follow same cup bearing removal steps inside the Slip Yoke. Search for broken plastic inside retaining ring grooves and damaged parts in bearing cup bores before cleaning away sheared plastic scraps from these areas. Before installation coat each needle bearing in new Universal Joint journals with thin chassis grease and take out the bearing from the opposite journal part. Turn the yoke ear down and insert the cross into the half-bearing cup so that the trunnion moves without restrictions. Place the bearing cup into the yoke until it meets the surface and set the other bearing cup in place making sure trunnion parts match. Halt the pressing process to inspect the joint parts. Insert the bearing retainer into each yoke section until clear space appears at its groove then press it firmly into position using chassis grease when needed. Strike the yoke gently with a dead blow hammer when the retainer fails to engage. Finally, install the propeller shaft.
- Q: What tools are required to service and repair the universal joint with a nylon injected ring on Chevrolet Astro?A:Several tools are essential for servicing and repairing universal joints which incorporate nylon injected rings. These tools include two specific tools are needed: u-joint bearing separator (J 9522-3) and u-joint bearing spacer remover (J 9522-5). U-joint bearing separator (J 9522-3) and u-joint bearing spacer remover (J 9522-5). Propeller shaft removal should start with a vertical placement for support on a press. Indicate on the propeller shaft which section must connect to the transmission or transfer case and which section must connect to rear or front axles. Attach the Universal Joint with its lower yoke rested on a 30 mm (1 1/8 inch) socket support. To separate plastic retaining rings from bearing cups press the u-joint bearing separator (J 9522-3) onto each open horizontal bearing cup then press out the lower bearing cup through the yoke ear. The u-joint bearing spacer remover (J 9522-5) must be inserted between the seal and the bearing cup being removed before continuing to press the cup out of the yoke. Pressing the opposite bearing cup out of the yoke becomes possible through propeller shaft rotation before the Universal Joint parts can be completely disassembled from the yoke. For rear axle front Universal Joint replacements remove bearing cups from Slip Yoke according to standard procedure. Among the tasks are checking retaining ring grooves for plastic accumulation and bearing cup bores for imperfections and burrs followed by a cleaning phase to remove any remaining plastic sheared bearing retainers from the yoke grooves. Begin your installation by removing new bearing cups from Universal Joint journals before greasing needle bearings in each cup with chassis grease. Begin installing one bearing cup into one yoke side but stop halfway before turning the yoke downward to place the cross inside so the trunnions fit smoothly into the bearing cup. Press the bearing cup into the yoke ear until it reaches the yoke's surface then continue by installing the opposite bearing cup partially into the yoke ear while verifying trunnion alignment within both bearing cups. Pressing should stop when the bearing cup starts to bind. At that moment check if the needle bearings are aligned correctly. Press the opposite bearing cup into the yoke ear to enable free unbound trunnion movement in the bearing cups before finishing the yoke press to clear the bearing retainer groove. Press the bearing retainer into its retainer groove then proceed with continuous force until both retainers lock in place while applying a tiny amount of chassis grease for additional help. The retainer should not seat if you hit it with a firm blow from the dead blow hammer while slightly springing the yoke and then install the propeller shaft.


