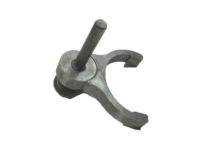
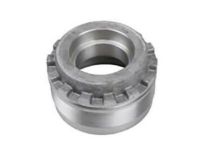
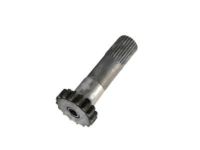
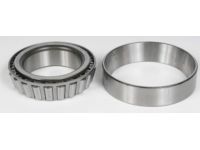
Make sure this part fits

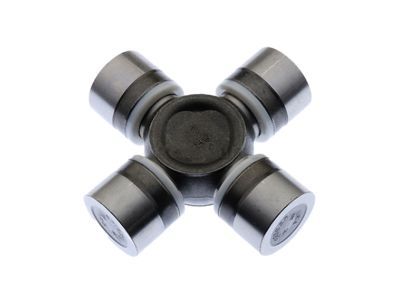
GM 89059111
Universal Joints

1985-2020 GM

Customer Questions & Expert Answers (31)
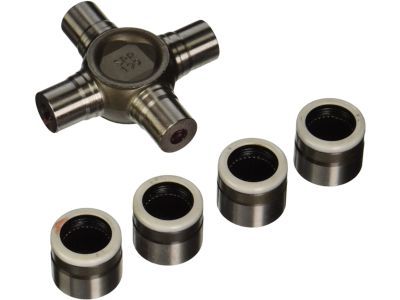
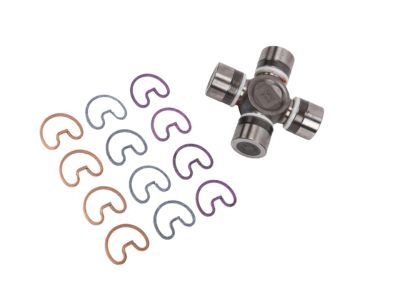
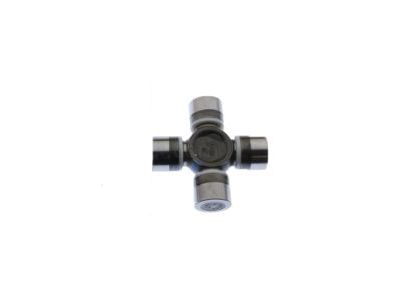
GM 89059111 Universal Joints
  • Part Description
    Joint Kit, Front Axle Propeller Shaft Universal *Outside Snap
  • Position
    Front
  • Replaces
    12472409, 12476231, 12471503, 12522048, 26049843, 88982758, 88964507, 94772179, 12476230
  • Manufacturer
    General Motors
Make sure this part fits
$157.57 MSRP: $270.61
You Save: $113.04 (42%)
Ships in 1-2 Business Days
1
ADD TO CART
  • Related Parts
  • Product Specifications
  • Vehicle Fitment
  • Customer Questions & Expert Answers
  • Product Specifications

    BrandGenuine GM
    Manufacturer Part Number89059111
    Part DescriptionJoint Kit, Front Axle Propeller Shaft Universal *Outside Snap
    Other NamesSlip Yoke; Joint Kit, Propeller Shaft Universal Joint
    Item Dimensions4.1 x 4.1 x 1.6 inches
    Item Weight1.90 Pounds
    PositionFront
    ConditionNew
    Fitment TypeDirect Replacement
    Replaces12472409, 12476231, 12471503, 12522048, 26049843, 88982758, 88964507, 94772179, 12476230
    ManufacturerGeneral Motors
    SKU89059111
    WarrantyThis genuine GM part is guaranteed by GM's factory warranty.
    Shipping & ReturnShipping Policy Return Policy
    Warning: California's Proposition 65
  • Vehicle Fitment

    Year Make Model Trim Engine
    2007-2014 Cadillac EscaladeBase, Hybrid, Hybrid Platinum, Luxury, Platinum, Premium8 Cyl 6.0 L FULL HYBRID EV-FLEX (FHEV), 8 Cyl 6.0 L FULL HYBRID EV-GAS (FHEV), 8 Cyl 6.2 L FLEX, 8 Cyl 6.2 L GAS
    2009-2016 Cadillac Escalade ESVBase, Luxury, Platinum, Premium8 Cyl 6.2 L FLEX, 8 Cyl 6.2 L GAS
    2009-2013 Cadillac Escalade EXTBase, Luxury, Premium8 Cyl 6.2 L FLEX
    1992-2004, 1985-1990 Chevrolet AstroBase, CL, CS, LS, LT4 Cyl 2.5 L GAS, 6 Cyl 4.3 L GAS
    2007-2013 Chevrolet AvalancheBlack Diamond LS, Black Diamond LT, Black Diamond LTZ, LS, LT, LTZ8 Cyl 5.3 L FLEX, 8 Cyl 5.3 L GAS, 8 Cyl 6.0 L GAS
    2004-2005, 1992-1994 Chevrolet BlazerBase, Cheyenne, LS, Silverado, Silverado Sport, Xtreme, ZR26 Cyl 4.3 L GAS, 8 Cyl 5.7 L GAS, 8 Cyl 6.5 L DIESEL
    1992-1996 Chevrolet Corvette40th Anniversary Edition, Base, Collector's Edition, Grand Sport, Indianapolis 500 Pace Car, ZR-18 Cyl 5.7 L GAS
    2003-2014 Chevrolet Express 1500Base, LS, LT6 Cyl 4.3 L GAS, 8 Cyl 5.3 L FLEX, 8 Cyl 5.3 L GAS
    1996-2016 Chevrolet Express 2500Base, LS, LT6 Cyl 4.3 L GAS, 8 Cyl 4.8 L FLEX, 8 Cyl 4.8 L GAS, 8 Cyl 5.0 L GAS, 8 Cyl 5.3 L GAS, 8 Cyl 5.7 L BI-FUEL, 8 Cyl 5.7 L CNG, 8 Cyl 5.7 L GAS, 8 Cyl 6.0 L CNG, 8 Cyl 6.0 L FLEX, 8 Cyl 6.0 L GAS, 8 Cyl 6.5 L DIESEL, 8 Cyl 6.6 L DIESEL
    1996-2016 Chevrolet Express 3500Base, LS, LT8 Cyl 4.8 L FLEX, 8 Cyl 4.8 L GAS, 8 Cyl 5.7 L BI-FUEL, 8 Cyl 5.7 L CNG, 8 Cyl 5.7 L GAS, 8 Cyl 6.0 L CNG, 8 Cyl 6.0 L FLEX, 8 Cyl 6.0 L GAS, 8 Cyl 6.5 L DIESEL, 8 Cyl 6.6 L DIESEL, 8 Cyl 7.4 L GAS, 8 Cyl 8.1 L GAS
    View More
  • Customer Questions & Expert Answers

    Q:
    Is 89059111 compatible with my car? Posted by ChevyPartsGiant Specialist
    A:
    Please Select Your Vehicle model to see if part number 89059111 is suitable before ordering.
    Posted by ChevyPartsGiant Specialist
    Q:
    How to replace the universal joint with a nylon injected ring on Chevrolet Astro? Posted by Customer
    A:
    You need the j 9522-3 u joint bearing separator and j 9522-5 u joint bearing spacer remover to replace the Universal Joint with a nylon injected ring. Only clamp one yoke and position the shaft horizontally to replace the Universal Joint without damaging the slip surface or shaft deformation. Place the shaft on the press with its ends resting flat in position. Apply marks on the propeller shaft to show which side fits at the transfer case end or rear axle and front axle end. Fix the Universal Joint onto the lower yoke so that this smaller part rests securely on the 30 mm (1/8 inch) socket. The u joint bearing separator tool j 9522-3 can separate the plastic retainer ring to let you press the lower bearing cup out from the yoke ear. Push the u joint bearing spacer remover (J 9522-5) between the seal and bearing cup of the cross. Then push the bearing cup out. Turn the propeller shaft to push the other bearing cup out while disassembling the cross from the yoke and taking off all Universal Joint pieces. When you replace the rear axle's front Universal Joint you will follow same cup bearing removal steps inside the Slip Yoke. Search for broken plastic inside retaining ring grooves and damaged parts in bearing cup bores before cleaning away sheared plastic scraps from these areas. Before installation coat each needle bearing in new Universal Joint journals with thin chassis grease and take out the bearing from the opposite journal part. Turn the yoke ear down and insert the cross into the half-bearing cup so that the trunnion moves without restrictions. Place the bearing cup into the yoke until it meets the surface and set the other bearing cup in place making sure trunnion parts match. Halt the pressing process to inspect the joint parts. Insert the bearing retainer into each yoke section until clear space appears at its groove then press it firmly into position using chassis grease when needed. Strike the yoke gently with a dead blow hammer when the retainer fails to engage. Finally, install the propeller shaft.
    Posted by ChevyPartsGiant Specialist
    Q:
    How to replace the universal joint with an external snap ring on Chevrolet Blazer? Posted by Customer
    A:
    Start your universal joint replacement project by getting both the J9522-3 U-Joint Bearing Separator and J9522-5 U-Joint Bearing Spacer Remover tools. Position the propeller shaft horizontally and steer clear of tube contact that can hurt the parts. Note the propeller shaft ends before you take it apart. Use pliers to take apart snap rings and work the cup end with a tap if the joint does not release pressure. Place the U-Joint Bearing Separator (J9522-3) between open horizontal bearing cups then apply it to the lower yoke ear's support surface while using a 30 mm or 27 mm socket head. When the first bearing cup fails to extract push the U-Joint Bearing Spacer Remover (J9522-5) between the seal and the cup. Keep pushing to push out the besing cup. When rotating the propeller shaft you push one bearing cup toward the slip yoke position to determine tube fitting with the yoke. Examine all bearing cup grooves and bores inside the yoke for any signs of damage before processing the parts for reassembly. Place one bearing cup into the yoke opening so its trunnion fit smoothly before pushing it until flush with the ear surface. Press the other bearing cup into position while keeping trunnion alignment right and verifying its movement. Check if the needle bearings face each other properly when unsatisfactory movement occurs during assembly. After seeing the bearing cup retainer groove you must add the bearing retainer blocks and keep pushing until they snap into position. A dead blow hammer works well to fully install the retainer. Apply chassis grease over the snap ring to simplify its placement within the bearing cup groove.
    Posted by ChevyPartsGiant Specialist
    Q:
    How to replace the universal joint with a nylon injected ring using special tools on Cadillac Escalade ESV? Posted by Customer
    A:
    Special tools J-9522-3 and J-9522-5 allow easy replacement of the universal joint with a nylon injected ring. Position the propeller shaft horizontally on the press system before starting the job to prevent damage to the parts. Locate and note the positions of the propeller shaft's ends before using the 30 mm (1 1/8 in) socket to hold the bottom yoke ear. The U Joint Bearing Separator will sever the plastic holding ring while the lower bearing cup press fully from the yoke ear. The U Joint Bearing Spacer Remover goes between seal and bearing cup to push out the bearing cup when it fails to come out entirely. Use the prop shaft rotation to push the opposite bearing cup out leaving the slip yoke stance notated for later reinstallation. Check both retaining ring groves and bearing cup bores on the yoke to find any surface damages before removing them. Remove all sheared plastic from the grooves before installing new bearing cups. You must place the yoke ear down and insert one bearing cup half-way into the part before fitting the cross effectively. Push the bearing cup into the yoke until it reaches the surface and then push half the second bearing cup. Press the final bearing cup sideways when its trunnions fit straight. Check needle bearing alignment because of this action. Press the tools until the bearing retainer slot meets the yoke opening then build the assembly parts and press them until the retainers lock into place. Use a dead blow hammer to partially push the yoke but do not force it. Apply chassis grease to the snap ring when placing it into the bearing cup groove.
    Posted by ChevyPartsGiant Specialist
    Q:
    What tools are needed to service and repair the universal joint with a nylon injected ring on Chevrolet Express 1500? Posted by Customer
    A:
    Service and replace the nylon injected ring of a universal joint using a combination of U Joint Bearing Separator (J9522-3) and U Joint Bearing Spacer Remover (J9522-5). Place the propeller shaft on a press in a flat position while avoiding clamp placement on the tubing to protect it from harm. Draw orientation marks on the shaft ends. Set the universal joint at the lower yoke ear into the 30 mm (1.118 inch) socket first. The U Joint Bearing Separator helps shear the plastic retaining ring on the bearing cup then pushes the lower bearing cup out from the yoke ear. You can push the bearing cup all the way out using the U Joint Bearing Spacer Remover tool (J9522-5) when the plastic bearing cup does not depart readily. Turn the propeller shaft to push out the opposite bearing cup from the yoke housing and take out the cross and all universal joint pieces. Check the grooves of both retaining rings and the bores of each bearing cup for damage before installing new elements. Remove any pieces of sheared plastic that could block the parts from the proper fit. Place one bearing cup into the yoke opening before fitting the cross over the trunnion to let it seat properly. Press equally on the bearing cup to push it against the yoke ear. Repeat this step on the opposite side to align trunnion pins as designed. Check if bearing movement is restricted then examine the needle bearings for improper positioning. Press the yoke butts until the bearing retainer groove leaves space on the surface. Next place both retainers and finish mounting with a dead blow hammer where needed. Use chassis grease as needed to lubricate the snap ring before placing it into the bearing cup groove.
    Posted by ChevyPartsGiant Specialist
    Q:
    How to replace a universal joint on Chevrolet Express 2500? Posted by Customer
    A:
    Secure the propeller shaft horizontally through yoke clamping to prevent damage to the slip joint sealing surface. Gently hitting the yoke will lower stress on the Universal Joint retaining ring. Placing pliers on the ring will let you remove it. Help by setting the propeller shaft level in the press and insert the correct size socket to support the Universal Joint at the opposite side of the j-9522-3 (U-Joint Bearing Separator). Use the j-9522-3 (Separator) and a press unite to extract the universal bearing from the yoke. Apply both j-9522-3 and j-9522-5 tool attachments to the Universal Joint before using the press to extract the bearing when the j-9522-5 does not fully eliminate the bearing. Turn the propeller shaft once while redoing this procedure for the second Universal Joint. When the Slip Yoke exhibits damage both components require simultaneous replacement. You need to take out the Slip Yoke from the propeller shaft and the retaining ring from the attached drive. Place the j-9532-3 separator to pull universal bearings from the yoke through use of the j-9532-5 remover and press tool in combination. Clean both Slip Yoke and propeller shaft yoke after removing the spider part. Set each universal bearing into the yoke opening on propeller shaft then attach the Universal Joint spider till it seats before pressing until level with the yoke surface. Place the retaining ring into the yoke then turn the propeller shaft one more time to install the other bearing. Gently tap the yoke to position the Universal Joint since it needs to move without resistance. Place electrical tape over the remaining two universal bearings while you prepare the installation steps. Set the universal spider at the Slip Yoke location and place in the universal bearings. Push down one spider completely and push all bearings firmly into place until they rest at the same level. Put the retaining ring into the Slip Yoke and loop it while doing the same steps on the second bearing. After fixing the Slip Yoke into the propeller shaft you must place the universal spider into the bearing while keeping it centered then hit the bearing into the yoke and put the retaining ring in place. Turn the propeller shaft while repeating this step for the second bearing unit by gently tapping if needed.
    Posted by ChevyPartsGiant Specialist
    Q:
    What tools are needed to service and repair the universal joint with an external snap ring on Chevrolet Express 3500? Posted by Customer
    A:
    To take care of and repair a universal joint with an external snap ring, use the proper tools: You will also need to use the Universal Joint Bearing Separator (J 9522-3) and the Universal Joint Bearing Spacer Remover (J 9522-5). First, use a press to support the propeller shaft flat, making sure you don't use a vise on the tubing. Put marks on the ends of the propeller shaft for correct reinstallation. Hold the snap ring ends with pliers and, if required, tap the cup slightly to help it come off. Place a 30 mm (1-1/8 inch) hex head socket or a 27 mm (1-1/16 inch) socket under the lower ear of the yoke, and use the Universal Joint Bearing Separator (J 9522-3) on the open horizontal bearing cups to force the lower bearing cup from the yoke ear. If the cup won't come out all the way, put the Universal Joint Bearing Spacer Remover (J 9522-5) between the seal and the cup to keep pressing. Rotate the propeller shaft so the bearing cup at the other end can be pressed out, mark the yoke's direction, and take out the cross and other universal joint parts. Clean and inspect both the retaining ring grooves and bearing cup bores before you put things back together. To assemble, put a bearing cup into one side of the yoke, locate the cross, and press the cup all the way in so it is even with the yoke ear. Do the same steps for the opposite bearing cup, making sure the trunnions are properly aligned. Once the retainer groove appears, put the bearing retainer in and keep pressing until the other retainer is also in place. A dead blow hammer can be used to give the yoke a slight bend for easier retainer installation, plus chassis grease on the snap ring will help it go on smoothly.
    Posted by ChevyPartsGiant Specialist
    Q:
    How to replace the universal joints (External Snap Ring Type) on Chevrolet K3500? Posted by Customer
    A:
    Support the entire propeller shaft on a press table so one end is up and one is down; after that, indicate the spots where you will connect the transmission and rear axle using marks. Pull out the snap ring by gripping its end with pliers; if one is difficult to remove, tap the bearing cup to remove the pressure. Attach the side with the Universal Joint to a socket of 30 mm (1 1/8 inch) size and press out the lower bearing cup using j9522-3. If the cup is stuck inside, raise the cross, slide the j9522-5 between the seal and the stuck cup and keep pressing. Rotate the propeller shaft to push out the opposite bearing cup, take out the cross and all pieces from the yoke and if you are changing the front Universal Joint, remove its bearing cups just like before. Check the grooves around the retaining ring and the bearing cup bores for dirt or corrosion and clean them as required. Before installing, take the bearings out of the new Universal Joint journals and apply grease to them. Partially affix one bearing cup into the yoke, rotate the yoke pin clockwise so the ear points down and slide the lacing cross in position until the trunnion seats in the cup. Set the bearing cup that goes on the yoke flush against it and then start the other side by setting the bearing cup so the trunnions are in line. While pushing in the opposite bearing cup, make sure the trunnions can rotate easily. If the gears are binding, immediately stop and check if they are not aligned. Keep pressing the bearing out until the groove for the retainer becomes apparent and then install the retainer with chassis grease if required to help it go on properly. When the retainer won't technically seat, use a dead blow hammer to tap the yoke with a firm stroke.
    Posted by ChevyPartsGiant Specialist
    Q:
    How to replace the universal joint with a nylon injected ring on Chevrolet Suburban 2500? Posted by Customer
    A:
    You need both a u joint bearing separator (J 9522-3) and a u joint bearing spacer remover (J 9522-5) to replace the Universal Joint with a nylon injected ring. Place the propeller shaft horizontally on a press stand while preventing clamping the tubing in a vise to protect it from harm. Make markings on the propeller shaft ends to set its correct direction. Put the Universal Joint on the bottom yoke ear and set it in a 30-mm socket. Insert the u joint bearing separator (J 9522-3) tool to cut the plastic ring then press the lower bearing cup out of the yoke ear. Press the u joint bearing spacer remover (J 9522-5) between the seal and the bearing cup first before continuing to push out the cup. Note the Slip Yoke angle before taking out the opposite bearing cup from the tube to reassemble later. Look for blemishes inside both bearing cup bores and ring grooves before removing the cross and leftover Universal Joint elements. Remove all damaged plastic pieces from the groove system before placing new bearing cups. First insert a bearing cup into one half of the yoke and place the cross until the trunnion fits without resistance. Push the bearing cup into the yoke ear until it reaches the surface then repeat on the other side while aligning the trunnions properly. Look at the needle bearings if they resist proper installation. Push until the bearing retainer groove releases from the yoke surface and install both retainers finally using a dead blow hammer if needed for full engagement. Apply chassis grease on the snap ring for better fitting inside the bearing cup space.
    Posted by ChevyPartsGiant Specialist
    Q:
    How to replace the universal joint on Cadillac Escalade? Posted by Customer
    A:
    To safely replace the Universal Joint position one yoke underneath a clamp to prevent harming the Slip Yoke seal while keeping the propeller shaft flat. Hit the yoke gently with a hammer to release force on the retaining ring and use pliers to remove it. Support the propeller shaft on the press with the supplied gearbox tool. Place a suitable socket under the other Universal Joint opposite the separator (J-9522-3). Our j-9522-3 tool set enables you to extract universal bearings from their yokes by using the press. Set the j-9522-5 - u-joint bearing spacer remover on the Universal Joint first and then use both j-9522-3 - separator and j-9522-5 - remover with the press to extract the bearing when the complete removal is not possible. Turn the propeller shaft and apply the method for both universal joints. When the Slip Yoke shows damage you must install an entire new Universal Joint unit. To proceed disassemble the propeller shaft by taking off the Slip Yoke and its retaining ring first. Press the j-9522-3 - separator with j-9522-5 - remover to take universal bearings from the yoke while the press uses these tools to remove them. Subsequently extract the spider from the Slip Yoke altogether and completely wash both yokes. Install the universal bearings by placing them on both sides of the yoke on the propeller shaft. Then, put the Universal Joint spider into the space until it meets the yoke and press it. Place the retaining ring inside the yoke then turn the propeller shaft while performing this process for both universal bearings. When the Universal Joint does not move freely hit the yoke gently with a hammer to seat the bearings. Secure the remaining two universal bearings with electrical tape until they need to be installed. Insert the universal spider into the Slip Yoke before putting universal bearings into either side of the Slip Yoke. Press one bearing spider fully into the universal bearing until it is even with the rest of the components. Fit the retaining ring into the Slip Yoke and spin the yoke. Do the same for the other bearing space. Install the Slip Yoke into the propeller shaft and fit the universal spider into its bearing space. Then press the bearing into the yoke before adding the retaining ring to the propeller shaft yoke. Turn the propeller shaft several times and do the same steps on the other bearing side to test the Universal Joint movement. If it gets stuck, gently hit both yokes with a hammer to push the bearings into position.
    Posted by ChevyPartsGiant Specialist
    Q:
    How to replace the universal joint with an external snap ring on Chevrolet Tahoe? Posted by Customer
    A:
    Depress the propeller shaft level on a hydraulic press table with both transmissions and rear axle connections undamaged. Identify the places where the propeller shaft connects with transmission and rear axle. Use pliers to unlock snap rings but apply gentle hits to the end of the assembly if needed. Place j 9522-3 in the horizontal bearing cups and push the lower bearing cup out of the yoke ear using a 27 mm (1-1/16 in) socket when pressing the yoke ear which rests on a 30 mm (1-1/8 in) hex head socket. When the bearing cup remains stuck press j 9522-5 between the seal and cup until it leaves the assembly. Turn the propeller shaft to force out the opposite bearing cup so you can note its position for reassembly. Discard the cross piece and all the remaining Universal Joint components from the yoke while you extract the bearing cups from the Slip Yoke when replacing its Universal Joint unit. Check if the retaining ring grooves and bearing cup bores need cleansing or fix physical damage before beginning the process. Fit one bearing cup onto each side of the yoke by placing the yoke ear downward. Put the crosspiece into the bearing cup until the trunnion attaches properly and fit the bearing cup into the yoke until it touches both surfaces. Press the yoke ear bearing cup partially into place while making sure the trunnions enter both bearing cups directly. Test the trunnion movement when pressed between opposite cups. Reach inside to look at needle bearing condition if press tightness reduces trunnion movement. Press further until the bearing cup retainer slot shows then insert the retaining parts into both grooves before pressing them until all parts lock together. A light impact from a dead blow hammer may assist retaining the bearing retainer while chassis grease applied to the snap ring helps it seat correctly.
    Posted by ChevyPartsGiant Specialist
    Q:
    What tools are required to service and repair the universal joint with an external snap ring on GMC Safari? Posted by Customer
    A:
    The proper tools to maintain an external snap ring Universal Joint are a u-joint bearing separator part number j 9522-3 and u-joint bearing spacer remover part number j 9522-5. Place the propeller shaft on a press then set it horizontally for service. Indicate on the propeller shaft which ends need to connect to the transmission or transfer case and to the rear or front axle. Use pliers to grip the snap ring ends and remove it; when a ring does not come out freely hit gently on the bearing cup's end to release pressure. Apply the 30 mm (1 1/8 inch) socket at the lower yoke ear to hold the support position and press the lower bearing cup out of the yoke ear using the u-joint bearing separator tool j 9522-3. To get the remaining bearing cup out fully, lift the cross and position the u-joint bearing spacer remover (J 9522-5) between the seal and cup before proceeding with the presses. Press the opposite end of the shaft to push out the second bearing cup while removing the cross section and associated Universal Joint parts from the yoke. When replacing front universal joints at the rear axle you must extract the bearings from the Slip Yoke in the same way. Check for impurities in the bearing cup bores and groove area of the retaining ring before cleaning the grooves properly. Begin installation by inserting half of one bearing cup into the new journal before placing it in the yoke space. Lower the yoke ear and place the cross piece before pushing the bearing cup into the yoke until it reaches flush with the surface. Fit the opposite bearing cup into the second yoke ear while keeping trunnions straight. Push the yoke ear carefully to fit the bearing without trunnion hindrance while making the bearing retainer groove visible. Press the bearing retainer onto its proper location before using a dead blow hammer to loosen the yoke bearings slightly when needed. Finally, install the propeller shaft.
    Posted by ChevyPartsGiant Specialist
    Q:
    How to replace the universal joint with an external snap ring on GMC Savana 2500? Posted by Customer
    A:
    To replace the universal joint with an external snap ring, begin by gathering the necessary tools: The required tools include U-Joint Bearing Separator (J9522-3) and U-Joint Bearing Spacer Remover (J9522-5). Keep the propeller shaft in horizontal position during maintenance while also avoiding any tubing clamps that can harm the system. Make clear marks on the propeller shaft ends so it can be correctly reassembled. You should pull the snap rings apart using pliers before occasionally using a tool to tap the cup's end and reduce pressure. To remove the lower bearing cup from the yoke ear first stabilize the yoke ear using either a 30 mm (1-1/8 inch) hex head socket or a 27 mm (1-1/16 inch) socket then use the U-joint Bearing Separator (J9522-3) to push the bearing cup out of its position. Use the U-Joint Bearing Spacer Remover (J9522-5) to separate further a bearing cup that doesn't completely leave its position by placing it between the seal and the cup. Rotating the propeller shaft enables bearing cup extraction while marking the slip yoke orientation relative to the tube. Examine the bearing cup bores and retaining ring grooves after removing the cross and universal joint parts while checking for cleanliness as well as imperfections. To assemble the yoke slide one bearing cup into its side where the trunnion fits easily before pressing the cup until it matches the yoke's ear. Install the second bearing cup on the yoke after ensuring trunnions point directly straight and then press it into the yoke until it shows free movement. Examine the needle bearings for misalignment whenever binding occurs. To finalize the bearing retainer assembly press until both retainers snap into position after the retainer groove becomes visible. A firm strike from a dead blow hammer and chassis grease application on the snap ring may help seat the retainer when difficulty arises during installation.
    Posted by ChevyPartsGiant Specialist
    Q:
    How to replace a universal joint on GMC Yukon? Posted by Customer
    A:
    When replacing the Universal Joint always keep the propeller shaft in horizontal position through clamping a single yoke to avoid harming the Slip Yoke sealing surface. Strike the yoke gently with a hammer to release pressure on its Universal Joint retaining ring before using pliers to take out the ring. Help position the propeller shaft over the press correctly and secure the Universal Joint bearing separator with its specific size socket in the opposite spot as item j-9522-3. To take the universal bearing out of the yoke apply j-9522-3 - separator and the press at once. Place the j-9522-5 u-joint bearing spacer remover on the Universal Joint and combine it with both j-9522-3 separator and j-9522-5 remover to take off the bearing through the press. Turn the propeller shaft once more and apply this same joint removal procedure to the remaining Universal Joint. Replace both items at once since the damaged Slip Yoke affects the Universal Joint. Take out the Slip Yoke from the propeller shaft while also removing the retaining ring from the Slip Yoke. Use the j-9522-3 and j-9522-5 separators with a press to remove the universal bearing from the yoke and then take the spider from the Slip Yoke for complete cleaning of the parts. Place the universal bearings in opposite sides of the yoke on the propeller shaft and thread the Universal Joint spider until it seats. Press it evenly with the yoke. Place the retaining ring into the yoke and turn the propeller shaft before doing the same steps for the other bearing. When the Universal Joint sticks it needs the yoke to receive a delicate tap. Add the rest of the universal bearings to their places and secure them with electrical tape before placing the propeller shaft. Place the spider unit in the yoke and install universal bearings before pressing one unit fully down until the yoke appears level. Put the retaining ring into the Slip Yoke then rotate it to install it in the opposite bearing. After placing the propeller shaft yoke into its slot press the Universal Joint bearing into the yoke and install its retaining ring inside the shaft. Turn the propeller shaft and repeat this process for both bearings as you keep tapping the joint to check its movement.
    Posted by ChevyPartsGiant Specialist
    Q:
    How to service and repair the universal joint using the J 9522-3 and J 9522-5 tools on GMC Savana 3500? Posted by Customer
    A:
    Make use of both J 9522-3 Universal Joint Bearing Separator and J 9522-5 Universal Joint Bearing Spacer Remover to repair the universal joint. Set the propeller shaft down horizontally in a press while making sure not to put the tubing in a tightening instrument that could harm it. Place dots on the shaft ends to show their correct alignment. Put the universal joint over the 30 mm (1 1/8 inch) socket with the lower yoke ear and press the bearing cup out from the yoke ear by using the J 9522-3 shear tool. Use the J 9522-5 tool when the bearing cup resists coming off by placing it between the seal and cup to push the bearing cup out. Rotate the propeller shaft until the bearing cup of the opposite side come out while noting the slip yoke alignment and removing the cross assembly and universal joint parts. Search for damage on the retaining ring grooves and bearing cup bores before you clean out any sheared plastic that blocks proper reassembly. Put a bearing cup into one yoke side then place the cross so trunnion operates well before pushing bearing cup to match yoke ear. Push the bearing cup into the unused yoke half while making sure trunnions rest properly. Press down while aligning the bearing retainer groove to the yoke before installing both bearing retainers until their snaps lock in place. When needed apply a dead blow hammer to push the retainer in position. Adding chassis grease to the snap ring will help with the insertion process.
    Posted by ChevyPartsGiant Specialist
    Q:
    How to replace a universal joint on GMC Savana 1500? Posted by Customer
    A:
    Before starting replacement work take the propeller shaft tubing out of any vise to prevent damage. Instead clamp one yoke and keep the shaft in a horizontal position. Tapping the yoke frees pressure from the Universal Joint retaining ring so you can remove it with pliers. Use the press to balance the propeller shaft while fitting the proper socket to separate the bearing from the opposite j-9522-3 (U-Joint Bearing Separator). Install the j-9522-3 to take out the universal bearing from the yoke as needed; place the j-9522-5 on top of the Universal Joint when the first tool fails to fully remove the bearing. Turn the propeller shaft again to separate the opposite Universal Joint through this same process. When the Slip Yoke shows damage experts will replace it at the same time as the new Universal Joint. First remove the propeller shaft Slip Yoke with its retaining ring. After that separate the universal bearing from the yoke with the j-9522-3 and j-9522-5 tools to finally extract the spider from the Slip Yoke. Thoroughly wash both pieces of the Slip Yoke and propeller shaft yoke. Place universal bearings into the propeller shaft yoke before installing the Universal Joint spider until it seats properly while pressing until it reaches yoke level. Set in the retaining ring for the second universal bearing and continue the same process for the remaining assembly part. Tap the yoke gently to fix any movement problems in the Universal Joint. Set up the rest of the universal bearings using electrical tape and add them to the vehicle during installation. Place the universal spider piece into the Slip Yoke then add universal bearings before pressing one spider to a complete seat. Push both bearing into the Slip Yoke until they rest evenly then install the retaining ring. Take the same steps for the opposite bearing. Place the Slip Yoke in the propeller shaft then put the universal spider onto the bearing axis. Press the bearing into the yoke fully and fit the retaining ring properly. Move the shaft while repeating both procedures to test if the Universal Joint operates without resistance and tap only when needed.
    Posted by ChevyPartsGiant Specialist
    Q:
    How to replace the universal joint with an external snap ring on GMC Yukon? Posted by Customer
    A:
    To replace the Universal Joint with an external snap ring, first, you should lay the propeller shaft on the press table horizontally so as not to damage the tubing by clamping it in a vice. Tag the propeller shaft to show the transmission and rear axle connections. Disassemble using pliers the snap rings and, if needed, tap the cup end lightly to relieve pressure. Start the support of the lower ear of the yoke onto 30 mm (1-1/8 in) hex head socket or onto 27 mm (1-1/16 in) socket and then to place j 9522-3 onto the open horizontal bearing cups in order to press the lower bearing cup out of the yoke ear. If the bearing cup fails to come out all the way, raise the cross and place j 9522-5 in between the seal and bearing cup to keep pressing it out. Rotate the propeller shaft to drive out the opposite bearing cup and note the orientation of Slip Yoke to tube that one therefore needs for reassembling. Remove the cross & other universal junt event as well and in the case of changing the front Universal Joint, take off bearing cups found on the Slip Yoke as well. Check retaining ring groove and bearing cup bore for cleanliness and imperfections and cleaning where necessary. For assembly, take bearings cups off from the Universal Joint and have one of the bearings cups half assembled into the one end of the yoke while the yoke ear is pointing down. Place the cross on the ends of the trunnion such that the trunnion fits freely in the bearing cup and push the bearing cup into the yoke until its flush with the yoke. Mount one of the opposite bearing cups partially inside a yoke ear making sure that the trunnions are pointing straight into the bearing cups. Press the contrary bearing cup as you check for the free movement of trunnions; if there is binding, check the needle bearings for misalignment. Press further applying pressure, up until you see the bearing cup retainer groove, then install the bearing retainer into the groove and press everything until both retainers snap into place. If fitting the retainer becomes difficult than a firm hammer blow from the kind of dead hammer (which is intended for such blow on snap ring) can help, and a little of the chassis grease can help paint the grease on the snap ring to smooth the entry.
    Posted by ChevyPartsGiant Specialist
    Q:
    How should the needle bearings be prepared for installation for the 2001 Chevrolet Astro? Posted by Customer
    A:
    Coat the needle bearings with grease.
    Posted by ChevyPartsGiant Specialist
    See expert answers on similar Universal Joint
    Q:
    What tool is used to shear the plastic retaining ring on the bearing cup for the 2004 Chevrolet Blazer? Posted by Customer
    A:
    Use the U Joint Bearing Separator (J9522-3).
    Posted by ChevyPartsGiant Specialist
    See expert answers on similar Universal Joint
    Q:
    What should you do if the universal bearing cannot be completely removed for the 2009 Chevrolet Silverado 1500? Posted by Customer
    A:
    Position the J-9522-5 (U-Joint Bearing Spacer Remover) on the universal joint and use both tools with the press to extract the bearing.
    Posted by ChevyPartsGiant Specialist
    See expert answers on similar Universal Joint
    Q:
    What should be done before disassembling the snap rings for the 2005 Chevrolet Express 2500? Posted by Customer
    A:
    Mark the propeller shaft ends for proper reassembly.
    Posted by ChevyPartsGiant Specialist
    See expert answers on similar Universal Joint
    Q:
    What is the process to press the lower bearing cup out of the yoke ear for the 2007 Chevrolet Express 2500? Posted by Customer
    A:
    Use the U-Joint Bearing Separator (J 9522-3) to press the lower bearing cup out.
    Posted by ChevyPartsGiant Specialist
    See expert answers on similar Universal Joint
    Q:
    What is the first step in removing the bearing cup for the 2003 Chevrolet Express 3500? Posted by Customer
    A:
    Use the U Joint Bearing Separator (J9522-3) to shear the plastic retaining ring on the bearing cup and press the lower bearing cup out of the yoke ear.
    Posted by ChevyPartsGiant Specialist
    See expert answers on similar Universal Joint
    Q:
    What is the next step after removing one bearing cup for the 2007 Chevrolet Express 3500? Posted by Customer
    A:
    Rotate the propeller shaft to press the opposite bearing cup out, then mark the orientation of the slip yoke to the tube for reassembly.
    Posted by ChevyPartsGiant Specialist
    See expert answers on similar Universal Joint
    Q:
    What is the final step in the installation process for the 2000 GMC Safari? Posted by Customer
    A:
    Install the bearing retainer, ensuring it seats properly, and if necessary, use a dead blow hammer to adjust the yoke slightly, then reinstall the propeller shaft.
    Posted by ChevyPartsGiant Specialist
    See expert answers on similar Universal Joint
    Q:
    What is the procedure for installing the bearing cups for the 2001 GMC Safari? Posted by Customer
    A:
    Install one bearing cup partway into one side of the yoke, turn the yoke ear towards the bottom, and install the cross so that the trunnion seats freely into the bearing cup.
    Posted by ChevyPartsGiant Specialist
    See expert answers on similar Universal Joint
    Q:
    What is the final step after completing the assembly of the propeller shaft for the 2000 GMC Savana 3500? Posted by Customer
    A:
    Reinstall the propeller shaft and remove the safety stands before lowering the vehicle.
    Posted by ChevyPartsGiant Specialist
    See expert answers on similar Universal Joint
    Q:
    What is the next step after pressing out the lower bearing cup for the 2003 GMC Safari? Posted by Customer
    A:
    Rotate the propeller shaft to press out the opposite bearing cup, remove the cross, and take out the remaining universal joint parts.
    Posted by ChevyPartsGiant Specialist
    See expert answers on similar Universal Joint
    Q:
    How do you ensure the bearing retainer groove clears the inside of the yoke for the 2002 GMC Safari? Posted by Customer
    A:
    Continue pressing until the bearing retainer groove clears the inside of the yoke.
    Posted by ChevyPartsGiant Specialist
    See expert answers on similar Universal Joint
    Q:
    How do you press the lower bearing cup out of the yoke ear for the 2008 GMC Sierra 1500? Posted by Customer
    A:
    Apply the J 9522-3 (U Joint Bearing Separator) on the open horizontal bearing cups.
    Posted by ChevyPartsGiant Specialist
    See expert answers on similar Universal Joint
    Q:
    What should be done after pressing the bearing cup flush with the yoke ear for the 2007 GMC Sierra 1500? Posted by Customer
    A:
    Repeat for the opposite side, ensuring the trunnions align correctly.
    Posted by ChevyPartsGiant Specialist
    See expert answers on similar Universal Joint
    If you have any questions about this product, please don't hesitate to ask us. We will be happy to help you!

OEM GM 89059111, Excellent Performance and Perfect Fitment

To ensure reliability, purchase GM part # 89059111 Universal Joints. It is sometimes referred to as GM Universal Joint. Choosing OEM parts is the optimal decision for guaranteeing superior quality and perfect performance. These components undergo stringent quality checks and are carefully constructed to comply with GM's factory specifications, ensuring a smooth installation process.

ChevyPartsGiant.com is a leading supplier of genuine GM parts such as GM 89059111 Universal Joints. Our website boasts an extensive inventory of OEM GM parts, available at highly competitive prices in the market. Should you require any new genuine GM parts, rest assured we will deliver them swiftly and efficiently to your doorstep. Furthermore, all our parts come with the assurance of a manufacturer's warranty. For detailed Chevy parts information, click here.
Choose ChevyPartsGiant for discounted prices, exceptional service and fast delivery