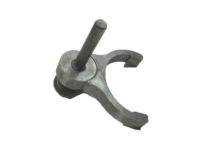
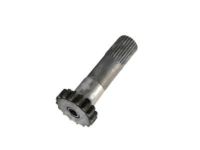
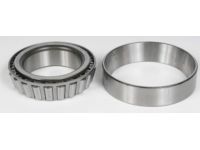
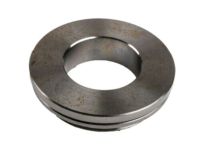
Make sure this part fits

GM 23104840
Universal Joints

1984-2020 GM

Customer Questions & Expert Answers (61)
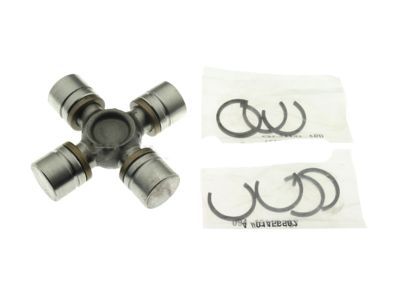
GM 23104840 Universal Joints
  • Part Description
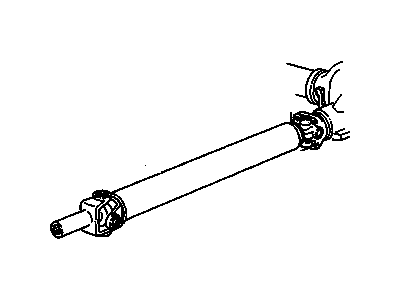
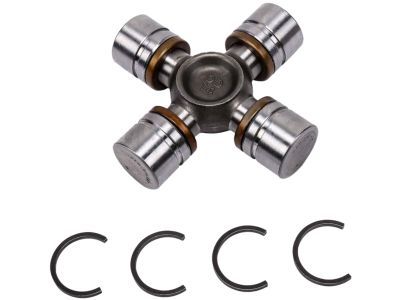
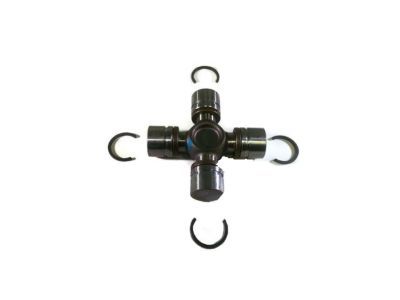
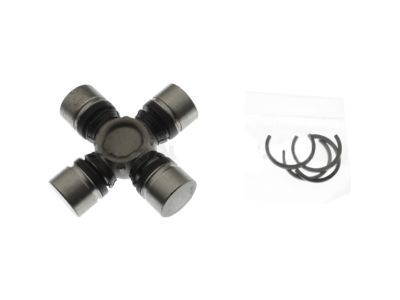
    Joint Kit, Propeller Shaft Universal Joint; U Joint
  • Position
    Front
  • Replaces
    12471502, 12479126, 26042371
  • Manufacturer
    General Motors
Make sure this part fits
$50.80 MSRP: $87.24
You Save: $36.44 (42%)
1
ADD TO CART
  • Related Parts
  • Product Specifications
  • Vehicle Fitment
  • Customer Questions & Expert Answers
  • Product Specifications

    BrandGenuine GM
    Manufacturer Part Number23104840
    Part DescriptionJoint Kit, Propeller Shaft Universal Joint; U Joint
    Item Dimensions5.9 x 5.4 x 2.9 inches
    Item Weight1.80 Pounds
    PositionFront
    ConditionNew
    Fitment TypeDirect Replacement
    Replaces12471502, 12479126, 26042371
    ManufacturerGeneral Motors
    SKU23104840
    WarrantyThis genuine GM part is guaranteed by GM's factory warranty.
    Shipping & ReturnShipping Policy Return Policy
    Warning: California's Proposition 65
  • Vehicle Fitment

    Year Make Model Trim Engine
    2006-2007 Buick RainierCXL6 Cyl 4.2 L GAS, 8 Cyl 5.3 L GAS
    1991-1996 Buick RoadmasterBase, Collector's Edition, Estate Wagon, Estate Wagon Collector's Edition, Limited, Limited Collector's Edition8 Cyl 5.0 L GAS, 8 Cyl 5.7 L GAS
    1992 Cadillac BroughamBase, d'Elegance8 Cyl 5.0 L GAS, 8 Cyl 5.7 L GAS
    2002-2020, 1999-2000 Cadillac EscaladeBase, Hybrid, Hybrid Platinum, Luxury, Platinum, Premium, Premium Luxury8 Cyl 5.3 L GAS, 8 Cyl 5.7 L GAS, 8 Cyl 6.0 L FULL HYBRID EV-FLEX (FHEV), 8 Cyl 6.0 L FULL HYBRID EV-GAS (FHEV), 8 Cyl 6.0 L GAS, 8 Cyl 6.2 L FLEX, 8 Cyl 6.2 L GAS
    2015-2020, 2003-2008 Cadillac Escalade ESVBase, Luxury, Platinum, Premium, Premium Luxury8 Cyl 6.0 L GAS, 8 Cyl 6.2 L FLEX, 8 Cyl 6.2 L GAS
    2002-2012 Cadillac Escalade EXTBase, Luxury, Premium8 Cyl 6.0 L GAS, 8 Cyl 6.2 L FLEX, 8 Cyl 6.2 L GAS
    1993-1996 Cadillac FleetwoodBase, Brougham8 Cyl 5.7 L GAS
    1992-2005 Chevrolet AstroBase, CL, CS, LS, LT6 Cyl 4.3 L GAS
    2007-2012 Chevrolet AvalancheLS, LT, LTZ8 Cyl 5.3 L FLEX, 8 Cyl 5.3 L GAS, 8 Cyl 6.0 L GAS
    2002-2006 Chevrolet Avalanche 1500Base, LS, LT, North Face, WBH, Z718 Cyl 5.3 L FLEX, 8 Cyl 5.3 L GAS
    View More
  • Customer Questions & Expert Answers

    Q:
    Can you help me check if this 23104840 is the right part for my car? Posted by ChevyPartsGiant Specialist
    A:
    Please Select Your Vehicle model to see if part number 23104840 is suitable before ordering.
    Posted by ChevyPartsGiant Specialist
    Q:
    How to Properly Service a Universal Joint with a Nylon Injected Ring on Buick Rainier? Posted by Customer
    A:
    Start replacing the universal joint with a nylon injected ring using two essential tools: U Joint Bearing Separator (J 9522-3) and U Joint Bearing Spacer Remover (J 9522-5). Rest the propeller shaft parallel to ground without clamping tubing directly because it can hurt the parts. Note the exact locations where you installed the propeller shaft. Fit the universal joint onto a 1 1/8 inch socket with the yoke lower ear and push the U Joint Bearing Separator (J 9522-3) to pop the retaining ring and push the lower bearing cup out of the yoke ear. You can use the U Joint Bearing Spacer Remover (J 9522-5) to completely remove the bearing cup from the seal space when the seal space does not detach fully. Move the shaft to remove the bearing cup from the opposite end of the slip yoke while documenting its correct installation position. Check the cross and joint parts for any remaining components. Also search for damage on the path of the retaining ring and bearing opening. You need to clean every recovered plastic fragment from both bearing cup bores before installing replacement parts. Place one bearing cup in the yoke and fit the cross over it before pressing the cup firmly against the yoke ear. Use this method to place the bearing cups correctly on the other trunnion. Keep pushing down the bearing cup until the retainer groove empties before placing the bearing retainer into position and pressing both retainers to secure them. A dead blow hammer will help when needing to press the retainer into place along with chassis grease to make snap ring installation easier.
    Posted by ChevyPartsGiant Specialist
    Q:
    How to replace the universal joint with a nylon injected ring on Buick Rainier? Posted by Customer
    A:
    You need two equipment to change the Universal Joint: u joint bearing separator part j9522-3 and u joint bearing spacer remover j9522-5. Place the propeller shaft horizontally on a press device but never lock the tubing in a vise since it could harm the parts. Mark on the propeller shaft to show its two ends: transmission side and rear axle location. Set the Universal Joint onto the socket with one bearing cup resting on the socket edge that measures 30 mm (1 1/8 inch). Practically use the u joint bearing separator j9522-3 to cut the plastic bearing cup retaining ring and drive out the lower bearing cup from the yoke ear. Since the bearing cup will not emerge fully from the seal, place the u joint bearing spacer remover between the seal and cup first before continuing to push the cup out. As you rotate the shaft you push one bearing cup out and mark how the Slip Yoke fits to the tube for reinstalling. Check the bearing cup bores and retaining ring grooves of the cross for damage after its removal. Inspect both the entering and exiting bearing cups carefully for any imperfections. Sweep sheared plastic from the grooves since it blocks the new bearing cups from sitting properly. Place a bearing cup into one end of the yoke and turn down the yoke ear then put together the cross so the trunnion moves easily. Push the bearing cup into one yoke side until it reaches the surface then perform the same action for the other cup while adjusting trunnion position when necessary. Press until the bearing retainer groove touches the yoke then put the retainer in place before completing the press operation. Use a dead blow hammer to barely push the yoke back before placing retainers when they resist seating. Chassis grease will help the snap rings slide into position.
    Posted by ChevyPartsGiant Specialist
    Q:
    How to replace the universal joint with an external snap ring on Cadillac Escalade? Posted by Customer
    A:
    To replace the universal joint with an external snap ring, begin by gathering the necessary tools: You need U-Joint Bearing Separator (J9522-3) and U-Joint Bearing Spacer Remover (J9522-5). Set the propeller shaft horizontally on the press with caution to avoid damaging the tubing directly. Make notes on the ends of the propeller shaft to help reinstall it correctly. The dismantling of snap rings requires plier manipulation followed by possible cup end tapping to release pressure. Position the U-Joint Bearing Separator (J9522-3) over the open horizontal bearing cups of a supported lower yoke ear which you should attach either a 30 mm (1-1/8 inch) hex head socket or 27 mm (1-1/16 inch) socket. To completely remove the bearing cup use the J9522-5 U-Joint Bearing Spacer Remover between the bearing cup and seal while continuing to press it out. Follow this by marking the slip yoke's position to the tube and proceeding with cross and universal joint components removal. The assembly process needs to start only after checking that bearing cup bores and retaining ring grooves are clean of imperfections. Assemble the parts by inserting a bearing cup into one yoke side and pressing the cross into place until the bearing cup reaches full contact. After aligning the trunnions properly you should press the opposite bearing cup into the yoke to perform free movement checks. Check the needle bearings whenever you detect binding. Press the bearing retainer until both retainers snap into position once you see the retainer groove. Apply a dead blow hammer to slightly flex the yoke while you apply chassis grease to the snap ring to help the retainer seat properly.
    Posted by ChevyPartsGiant Specialist
    Q:
    How to replace the universal joint with an external snap ring on Cadillac Escalade ESV? Posted by Customer
    A:
    You need both U-Joint Bearing Separator (J 9522-3) and U-Joint Bearing Spacer Remover (J 9522-5) tools to start replacing the universal joint with an external snap ring. Place the propeller shaft using light support in a flat position to shield the tubing from harm. Make marks at both ends of the propeller shaft to assemble it correctly. To release snap rings apply pliers to their ends and if needed use a light tap with a tool to reduce pressure. Press the lower part of the yoke onto either a 30 mm (1-1/8 in) hex head socket or a 27 mm (1-1/16 in) socket and use the U-Joint Bearing Separator (J 9522-3) to push the bottom bearing cup out of the yoke ear. Put the U-Joint Bearing Spacer Remover (J 9522-5) between the seal and bearing cup when the cup cannot be taken out fully. When rotating the shaft, pushing out one bearing cup tells you the exact placement of the slip yoke to the tube reference. Check the seal groove and bearing cup holes in the cross and joint parts before removing them. You should put a bearing cup into one side of the yoke first then place the cross and push the bearing cup until it reaches the yoke ear. Position the new bearing cup opposite the other side of the trunnions and push to fit it firmly. Check for smooth movement before proceeding. A locked needle bearing needs inspection to find the problem. Push the bearing retainer into position when its groove shows in the bearing cup. Keep pressing until both holders lock into place. Hit the yoke lightly with a dead blow hammer when setting the retainers and apply chassis grease to help them expand easier.
    Posted by ChevyPartsGiant Specialist
    Q:
    How to replace the universal joint with an external snap ring on Cadillac Escalade EXT? Posted by Customer
    A:
    To install the external snap ring in place of the universal joint, you need to first collect: You should have the U-Joint Bearing Separator J 9522-3 and the U-Joint Bearing Spacer Remover (J 9522-5). Hold the propeller shaft level with supports below the tubing to make sure you don't damage it. First, make sure you mark the ends of the propeller shaft, followed by disassembling the snap rings by pinching them with pliers. Should the ring be hard to remove, tapping the cup gently will make it easier. Put the 30 mm (1-1/8 in) hex head socket or 27 mm (1-1/16 in) socket under the lower ear of the yoke, then push the lower bearing cup out with the U-Joint Bearing Separator (J 9522-3). You can also use the U-Joint Bearing Spacer Remover (J 9522-5) if required to help get the bearing cup out. Rotate the propeller shaft so the other bearing cup is pushed out, and mark the slip yoke so it goes back together properly. Take out the cross and all the remaining parts, and look over the retaining ring grooves as well as the bearing cup bores to make sure they are clean and free of damage. Put a bearing cup into one ear of the yoke, then put the cross in and make sure it moves freely. Make sure the bearing cup is fully against the yoke ear, and repeat on the other side, making sure everything is lined up. Once you notice the groove for the retainer, put in the bearing retainer and press firmly until both retainers lock. Sometimes, it helps to use a dead blow hammer to make the yoke easier to spring, and always use chassis grease on the snap ring for correct fitting in the groove.
    Posted by ChevyPartsGiant Specialist
    Q:
    How to replace the universal joint with a nylon injected ring on Cadillac Escalade EXT? Posted by Customer
    A:
    To put in the nylon injected ring, hold the propeller shaft flat on a press and mark each end. Put the 30 mm (1 1/8 in) socket onto the lower ear of the yoke, then use the U Joint Bearing Separator (J 9522-3) on the open horizontal bearing cups to cut the plastic ring and press the bearing cup out. If the bearing cup won't fully come out, use the U Joint Bearing Spacer Remover (J 9522-5) between the seal and the bearing cup to push it more. Twist the propeller shaft so the opposite bearing cup comes loose and then take out the cross as well as the other universal joint parts. Look for any dirt or flaws in the retaining grooves and bearing cup bores, and clean them at the same time if needed. To assemble, put a bearing cup into the yoke, turn the yoke ear down, and fit the cross with the trunnion seats free. Make sure both bearing cups are pushed all the way into the yoke ear and check that the trunnions line up correctly. Should binding happen, carefully look at the needle bearings for signs of misalignment. Press repeatedly until the bearing retainer groove is through the yoke, then place the retainer in position, and using a dead blow hammer if you need, press and snap the other retainer into place. It's possible to lubricate the snap ring with chassis grease before putting it into the bearing cup groove for better installation.
    Posted by ChevyPartsGiant Specialist
    Q:
    How to replace the universal joint and slip yoke using tools J9522-3 and J9522-5 on Chevrolet Camaro? Posted by Customer
    A:
    You need tools j9522-3 and j9522-5 to get the Universal Joint and Slip Yoke out. Secure the propeller shaft on level ground using any method except placing the tubing inside a vise which may harm the components. Apply j9522-3 over the exposed horizontal bearing cap then press it out to break the nylon injected ring seals during extraction. Push the j9522-5 tool between the seal and bearing cap when the front side of the cap does not come loose fully. Spin the propeller shaft once more and repeat the procedure on the opposite end bearing cap. When changing front universal joints always remove the two propeller shaft Slip Yoke bearing caps through identical procedures. Once the spider is taken out clean both the yoke and joint cup hole keeping the dust seals safe. Set the propeller shaft with the spent u-joint spider bearing retainer rings and use the bearing caps to suspend the shaft horizontally. Start the bearing cap in half and turn it down for bottom position before using j9522-3 to set trunnion in place. Rotate the opposite bearing cap with the same method to make sure both trunnion pieces are in a straight position. Apply pressure to the bearing caps as you move the spider to verify its easy operation before examining the needle roller bearing for any hindrances. Stop to press when the first bearing retainer groove pops loose and push the retainer ring into position by hitting on the yoke surface if required. Apply this step to both Universal Joint sections.
    Posted by ChevyPartsGiant Specialist
    Q:
    What tools are required to service and repair the universal joint, and what are the steps involved in the process on Chevrolet S10? Posted by Customer
    A:
    To service nylon injected and external snap ring universal joints requires using U Joint Bearing Separator (J 9522-3) plus U Joint Bearing Spacer Remover (J 9522-5). Set the propeller shaft into the press table with minimum contact that might harm the tubing. Tag the shaft surface at the transmission and rear axle positions. Secure the lower yoke end on a 1 1/8 inch socket stand while using the U Joint Bearing Separator (J 9522-3) to push the bottom bearing cup from the yoke cavity. When the bearing cup proves difficult to remove use the U Joint Bearing Spacer Remover (J 9522-5) by inserting it into the yoke ear. Follow the propeller shaft rotation to take off the opposite bearing cup from the slip yoke then write down its orientation for reassembly. Check for any damage or foreign materials in the bores and grooves of both retaining rings and bearing cups after extracting them. After making sure the trunnion seat fits properly you can push the bearing cup at one end of the yoke all the way until it stops. Fit the second bearing cup in the yoke and match its trunnion positions. Use the press to move the bearing retainer until its groove shows then fit both retainers into place. A basic hammer tool should be used briefly on the yoke if it does not fit properly while grease on the retainer snap ring makes insertion simpler.
    Posted by ChevyPartsGiant Specialist
    Q:
    How to replace the universal joint with a nylon injected ring on Chevrolet SSR? Posted by Customer
    A:
    You can replace the Universal Joint with a nylon injected ring using tools j 9522-3 u joint bearing separator and j 9522-5 u joint bearing spacer remover. Start by placing the propeller shaft horizontally on a press while making sure the tubing remains free from vise clamps to prevent damages. Label both ends of the propeller shaft to remember their original positions. Mount the yoke's lower ear into a 30 mm (1 1/8 inch) socket for Universal Joint installation. Continue pressing the bearing cup out of the yoke ear by using j 9522-3 separator tool until the bearing clip becomes fully removed. Then fit in j 9522-5 spacer remover tool to extract the bearing cup further when the clip has not been fully separated from the cup. Reposition the propeller shaft to take out the opposite bearing cup while recording Slip Yoke positioning for future reinstallation. Check the retaining ring grooves and bearing cup bores for damage before cleaning the sheared plastic from the grooves. Start assembly by putting a bearing cup into one yoke end before positioning the cross to achieve free pinion seating followed by bearing cup pressing until the ear reaches the yoke surface. Repetition of this process follows with the opposite bearing cup before performing final alignment checks on trunnions. Press the bearing retainer groove until it leaves the yoke edge before installing both retainers while continuing with pressing until the retainers snap securely. A dead blow hammer may help you position the retainer but you should apply chassis grease to the snap ring before attempting insertion into the bearing cup groove.
    Posted by ChevyPartsGiant Specialist
    Q:
    What tools are required to replace the universal joint and slip yoke on Chevrolet Camaro? Posted by Customer
    A:
    Two specific tools are needed to remove the Universal Joint and Slip Yoke: j 9522-3 (U-Joint Bearing Separator) and j 9522-5 (U-Joint Bearing Spacer Remover). Position the propeller shaft horizontally onto the base plate of a press and steer clear of holding the tubing in a vise for well-being. Use j 9522-3 shears to cut away its nylon ring before taking off the yoke ear lower bearing cap. Seal the bearing cap with the j 9522-5 after lifting the j 9522-3 and pressing out the cap. Repeat this procedure at the opposite side with the propeller shaft. When you replace the front Universal Joint you should take out both dust seals from the Slip Yoke on the propeller shaft. Wipe the yoke and Universal Joint cup opening thoroughly while keeping the dust seals safe from harm. Separate the u-joint trunnion bearing retainer rings before taking out the propeller shaft again for continued work. Put half the bearing cap into the yoke then turn the yoke to push the trunnion down with j 9522-3. Turn one bearing cap in the yoke while checking if both trunnions move without twisting. Then handle the opposite bearing cap in the same way. Test if the needle bearing moves smoothly before installing the u-joint bearing retainer ring through repetitive strikes on the yoke when needed. You need to apply the same steps to set up the other half of the Universal Joint assembly.
    Posted by ChevyPartsGiant Specialist
    Q:
    What tools are needed to service and repair the universal joint with an external snap ring on Chevrolet Trailblazer? Posted by Customer
    A:
    Repairing a Universal Joint with an external snap ring requires use of these tools: the proper tools for this task include u-joint bearing separator (J 9522-3) together with u-joint bearing spacer remover (J 9522-5). U-joint bearing separator (J 9522-3) and u-joint bearing spacer remover (J 9522-5). Set the propeller shaft horizontally on a press for support while maintaining the tubing out of vise contact to protect it from damage. Make identifying marks on the propeller shaft to show its connection points with the transmission and rear axle assembly. Use pliers to pinch snap ring ends for disassembly and tap the cup end lightly to reduce pressure when needed. Free the supporting surface of the Universal Joint by using a 30 mm (1-1/8 inch) hex head socket or a 27 mm (1-1/16 inch) socket before using the u-joint bearing separator (J 9522-3) for bearing cup removal from the yoke ear. To press out the bearing cup which will not dislodge completely a u-joint bearing spacer remover (J 9522-5) needs to be placed between the bearing cup and the seal. The rotating propeller shaft exerting pressure on the opposing bearing cup requires you to note the Slip Yoke position for reinstallation. Examine both the bearing cup bores and retaining ring grooves for cleanliness while looking for any imperfections. Remove the cross and discarded Universal Joint parts from the assembly. Position a bearing cup on one yoke side followed by the cross assembly then apply pressure until the cup rests flush with the ear. Move through this process again on the different side of the yoke while checking that all trunnions remain correctly oriented. Run the press tool until you can see the retainer groove before you position the bearing retainer. Keep pressing until both retainers securely lock into place. The dead blow hammer can lightly press the yoke when needed to help with retainer placement while chassis grease applied on the bearing cup edges will assist with correct seating.
    Posted by ChevyPartsGiant Specialist
    Q:
    How to replace a universal joint on GMC Envoy? Posted by Customer
    A:
    First support the propeller shaft horizontally by securing one yoke with a clamp while protecting the Slip Yoke sealing surface during this process. Use a gentle tap on the yoke followed by plier removal of the Universal Joint retaining ring. After securing the propeller shaft at proper level position on the press select the right socket format to maintain the Universal Joint area beyond the j 9522-3 (U-Joint Bearing Separator). Use the j 9522-3 (U-Joint Bearing Separator) with the press to remove the universal bearing from the yoke. Place the j 9522-5 (U-Joint Bearing Spacer Remover) onto the Universal Joint before using both tools alongside the press to fully remove it. Repetition of the procedure for separating the Universal Joint requires turning the propeller shaft before continuing with the second Universal Joint. A damaged Slip Yoke requires replacement together with a new Universal Joint. Then extract both items - Slip Yoke from the propeller shaft and retaining ring from the Slip Yoke. A combination of tools j 9522-3 (U-Joint Bearing Separator) and j 9522-5 (U-Joint Bearing Spacer Remover) with a press enables technicians to extract the universal bearing from the yoke while removing the spider from the Slip Yoke before thoroughly cleaning both components. Install universal bearings into the propeller shaft's yoke then position the Universal Joint spider until it reaches full seat depth before pressing it to the yoke's plane. First install the yoke retaining ring then turn the propeller shaft while you repeat these steps for its opposing universal bearing. Test the Universal Joint for free movement before installation. Slight tapping of the yoke helps position the bearing correctly against the retaining ring. Please install two more universal bearings before securing everything with electrical tape during propeller shaft assembly. When installing universal spiders in slip yokes personnel must first fully seat one spider before pressing the bearings into the yoke until it maintains a level position. After installing the retaining ring into the Slip Yoke users must rotate it before repeating the installation sequence for the other bearing. Consolidate by positioning the Slip Yoke inside the propeller shaft then center the universal spider within the bearing. Press the bearing into the yoke then install the retaining ring inside the propeller shaft yoke. Use a rotating motion on the propeller shaft to repeat the universal bearing installation while verifying free movement of the Universal Joint through careful yoke tapping if required.
    Posted by ChevyPartsGiant Specialist
    Q:
    What tools are needed to service and repair the universal joint with a nylon injected ring on GMC Jimmy? Posted by Customer
    A:
    Service repair of universal joints with nylon injected rings requires these tools: Two main tools exist to handle this task: Universal Joint Bearing Separator (J 9522-3) and Universal Joint Bearing Spacer Remover (J 9522-5). Universal Joint Bearing Separator (J 9522-3) and Universal Joint Bearing Spacer Remover (J 9522-5). First support the propeller shaft horizontally on a press system without clamping the tubing inside a vise to preserve its condition. Last the propeller shaft ends with proper mark guidance. Keep the lower yoke ear of the universal joint fitting inside a 30 mm (1 1/8 inch) socket. The Universal Joint Bearing Separator (J 9522-3) enables a user to shear the plastic retaining ring on the bearing cup so they can press the lower bearing cup out of the yoke ear. Use the Universal Joint Bearing Spacer Remover (J 9522-5) between the seal and bearing cup if the cup is stuck before it can be fully pressed out. Use the propeller shaft rotation to push the bearing cup located on the opposite side out before removing the cross and all universal joint components. Evaluate retaining ring grooves along with bearing cup bores for damage while clearing away any plastic shearing that could prevent assembly. Begin assembly by mounting a bearing cup onto one yoke side followed by cross position adjustment so trunnions free fit. Apply force to each bearing cup until it sits seamlessly against the yoke ear before proceeding with the opposite side while maintaining correct trunnion position. Perform further inspection on needle bearings when you encounter binding resistance. Press until the bearing retainer groove emerges from the yoke before installing the bearing retainer while you snap both retainers into position with a dead blow hammer to support the seating process. Chassis grease can be used optionally for the snap ring to help it settle correctly within the bearing cup groove.
    Posted by ChevyPartsGiant Specialist
    Q:
    What tools are required to service and repair the universal joint, and what are the steps involved in the process on GMC Sonoma? Posted by Customer
    A:
    To service nylon injected and external snap ring universal joints requires using U Joint Bearing Separator (J 9522-3) plus U Joint Bearing Spacer Remover (J 9522-5). Set the propeller shaft into the press table with minimum contact that might harm the tubing. Tag the shaft surface at the transmission and rear axle positions. Secure the lower yoke end on a 1 1/8 inch socket stand while using the U Joint Bearing Separator (J 9522-3) to push the bottom bearing cup from the yoke cavity. When the bearing cup proves difficult to remove use the U Joint Bearing Spacer Remover (J 9522-5) by inserting it into the yoke ear. Follow the propeller shaft rotation to take off the opposite bearing cup from the slip yoke then write down its orientation for reassembly. Check for any damage or foreign materials in the bores and grooves of both retaining rings and bearing cups after extracting them. After making sure the trunnion seat fits properly you can push the bearing cup at one end of the yoke all the way until it stops. Fit the second bearing cup in the yoke and match its trunnion positions. Use the press to move the bearing retainer until its groove shows then fit both retainers into place. A basic hammer tool should be used briefly on the yoke if it does not fit properly while grease on the retainer snap ring makes insertion simpler.
    Posted by ChevyPartsGiant Specialist
    Q:
    How do you clean the components after removing the spider for the 2008 Cadillac Escalade? Posted by Customer
    A:
    Clean both the slip yoke and propeller shaft yoke thoroughly.
    Posted by ChevyPartsGiant Specialist
    See expert answers on similar Universal Joint
    Q:
    What is the next step after removing the first bearing cup for the 2000 Chevrolet Astro? Posted by Customer
    A:
    Rotate the propeller shaft to press the opposite bearing cup out and disassemble the cross from the yoke.
    Posted by ChevyPartsGiant Specialist
    See expert answers on similar Universal Joint
    Q:
    What is the next step after removing the first bearing cup for the 2005 Chevrolet Astro? Posted by Customer
    A:
    Rotate the propeller shaft to press the opposite bearing cup out of the yoke, disassemble the cross from the yoke, and remove the remaining universal joint parts.
    Posted by ChevyPartsGiant Specialist
    See expert answers on similar Universal Joint
    Q:
    What should you inspect during the process for the 2001 Chevrolet Astro? Posted by Customer
    A:
    Inspect the retaining ring grooves and bearing cup bores for dirt, corrosion, or imperfections, and clean the grooves as necessary.
    Posted by ChevyPartsGiant Specialist
    See expert answers on similar Universal Joint
    Q:
    What should be done if the bearing cup does not fully remove for the 2006 Chevrolet Avalanche 2500? Posted by Customer
    A:
    Insert the U Joint Bearing Spacer Remover (J 9522-5) between the seal and the bearing cup to continue pressing it out.
    Posted by ChevyPartsGiant Specialist
    See expert answers on similar Universal Joint
    Q:
    What can be used to assist in seating the retainer if necessary for the 2003 Chevrolet Avalanche 1500? Posted by Customer
    A:
    A dead blow hammer can be used to assist in seating the retainer.
    Posted by ChevyPartsGiant Specialist
    See expert answers on similar Universal Joint
    Q:
    What should be inspected after removing the cross and universal joint parts for the 2004 Chevrolet Blazer? Posted by Customer
    A:
    Inspect the retaining ring grooves and bearing cup bores for imperfections.
    Posted by ChevyPartsGiant Specialist
    See expert answers on similar Universal Joint
    Q:
    What is the first step in the assembly process for the 2004 Chevrolet Blazer? Posted by Customer
    A:
    Insert a bearing cup into one side of the yoke, ensuring the trunnion seats freely, then press it flush with the yoke ear.
    Posted by ChevyPartsGiant Specialist
    See expert answers on similar Universal Joint
    Q:
    How should the propeller shaft be supported during the process for the 2004 Chevrolet Express 1500? Posted by Customer
    A:
    The propeller shaft should be supported horizontally on a press, avoiding clamping the tubing in a vise to prevent damage.
    Posted by ChevyPartsGiant Specialist
    See expert answers on similar Universal Joint
    Q:
    What should be done if the slip yoke is damaged for the 2010 Chevrolet Express 2500? Posted by Customer
    A:
    Replace it along with the universal joint.
    Posted by ChevyPartsGiant Specialist
    See expert answers on similar Universal Joint
    Q:
    What steps should be taken to remove the opposite bearing cup for the 2005 Chevrolet Express 2500? Posted by Customer
    A:
    Rotate the propeller shaft to press the opposite bearing cup out, mark the slip yoke orientation, and remove the cross and remaining parts.
    Posted by ChevyPartsGiant Specialist
    See expert answers on similar Universal Joint
    Q:
    How do you disassemble the snap rings for the 2007 Chevrolet Express 2500? Posted by Customer
    A:
    Pinch them with pliers, and if necessary, tap the end of the cup lightly to relieve pressure.
    Posted by ChevyPartsGiant Specialist
    See expert answers on similar Universal Joint
    Q:
    What should be done if binding occurs during assembly for the 2003 Chevrolet Express 3500? Posted by Customer
    A:
    Inspect the needle bearings for misalignment.
    Posted by ChevyPartsGiant Specialist
    See expert answers on similar Universal Joint
    Q:
    What should be done before removing the snap rings for the 2000 Chevrolet K3500? Posted by Customer
    A:
    Support the propeller shaft horizontally on a press and mark it to indicate which end connects to the transmission and which to the rear axle.
    Posted by ChevyPartsGiant Specialist
    See expert answers on similar Universal Joint
    Q:
    What should be done to the snap ring for easier installation for the 2007 Chevrolet Express 3500? Posted by Customer
    A:
    Lubricate the snap ring with chassis grease.
    Posted by ChevyPartsGiant Specialist
    See expert answers on similar Universal Joint
    Q:
    What is the installation process for the universal bearings for the 2009 Chevrolet Silverado 1500? Posted by Customer
    A:
    Position the universal bearings in the yoke on the propeller shaft, install the universal joint spider until seated, and press it until even with the yoke.
    Posted by ChevyPartsGiant Specialist
    See expert answers on similar Universal Joint
    Q:
    What should be marked on the propeller shaft for the 2004 Chevrolet Silverado 2500? Posted by Customer
    A:
    Mark the propeller shaft to identify the transmission end and rear axle end.
    Posted by ChevyPartsGiant Specialist
    See expert answers on similar Universal Joint
    Q:
    What should be done if the bearing cup does not fully remove for the 2007 Chevrolet Silverado 1500 Classic? Posted by Customer
    A:
    Lift the cross and insert J 9522-5 between the seal and the bearing cup to continue pressing it out.
    Posted by ChevyPartsGiant Specialist
    See expert answers on similar Universal Joint
    Q:
    What should be done after the bearing retainer groove clears the yoke for the 2002 Chevrolet Suburban 2500? Posted by Customer
    A:
    Install the bearing retainer and snap both retainers into place, using a dead blow hammer if necessary to assist with seating.
    Posted by ChevyPartsGiant Specialist
    See expert answers on similar Universal Joint
    Q:
    What should be done to ensure proper orientation during reassembly for the 2005 Chevrolet SSR? Posted by Customer
    A:
    Mark the ends of the propeller shaft.
    Posted by ChevyPartsGiant Specialist
    See expert answers on similar Universal Joint
    Q:
    How do you secure the bearing retainer for the 2009 Chevrolet Tahoe? Posted by Customer
    A:
    Assemble the bearing retainer in the groove and press until both retainers snap into place.
    Posted by ChevyPartsGiant Specialist
    See expert answers on similar Universal Joint
    Q:
    What should you do if the bearing cup does not fully remove for the 2001 Chevrolet Suburban 1500? Posted by Customer
    A:
    Lift the cross and insert the J 9522-5 between the seal and the bearing cup to continue pressing it out.
    Posted by ChevyPartsGiant Specialist
    See expert answers on similar Universal Joint
    Q:
    What should be inspected after removing the cross and remaining universal joint parts for the 2000 Chevrolet Tahoe? Posted by Customer
    A:
    Inspect the retaining ring grooves and bearing cup bores for cleanliness and imperfections.
    Posted by ChevyPartsGiant Specialist
    See expert answers on similar Universal Joint
    Q:
    What tools are needed to service and repair the universal joint with a nylon injected ring for the 2004 Chevrolet Trailblazer? Posted by Customer
    A:
    U Joint Bearing Separator (J 9522-3) and U Joint Bearing Spacer Remover (J 9522-5).
    Posted by ChevyPartsGiant Specialist
    See expert answers on similar Universal Joint
    Q:
    What should be done if the bearing cup does not come out completely for the 2004 Chevrolet Silverado 3500? Posted by Customer
    A:
    Lift the cross and insert the U Joint Bearing Spacer Remover (J 9522-5) between the seal and the bearing cup, then continue pressing.
    Posted by ChevyPartsGiant Specialist
    See expert answers on similar Universal Joint
    Q:
    How do you begin removing the universal joint for the 2007 Chevrolet Silverado 3500 Classic? Posted by Customer
    A:
    Position the universal joint with the lower ear of the yoke on a 30 mm (1 1/8 inch) socket and use the U Joint Bearing Separator (J 9522-3) to shear the plastic retaining ring on the bearing cup.
    Posted by ChevyPartsGiant Specialist
    See expert answers on similar Universal Joint
    Q:
    What tool is used to shear the plastic retaining ring for the 2000 GMC C3500? Posted by Customer
    A:
    Use the J9522-3 to shear the plastic retaining ring on the bearing cup.
    Posted by ChevyPartsGiant Specialist
    See expert answers on similar Universal Joint
    Q:
    What is the next step after supporting the lower ear of the yoke for the 2002 Chevrolet Tahoe? Posted by Customer
    A:
    Use the U-Joint Bearing Separator (J 9522-3) to press the lower bearing cup out of the yoke ear.
    Posted by ChevyPartsGiant Specialist
    See expert answers on similar Universal Joint
    Q:
    What should be done if binding occurs during assembly for the 2003 GMC Savana 2500? Posted by Customer
    A:
    Inspect the needle bearings for misalignment.
    Posted by ChevyPartsGiant Specialist
    See expert answers on similar Universal Joint
    Q:
    How should the propeller shaft be supported during the process for the 2000 GMC C2500? Posted by Customer
    A:
    The propeller shaft should be supported horizontally on a press table, avoiding clamping the tubing in a vise to prevent damage.
    Posted by ChevyPartsGiant Specialist
    See expert answers on similar Universal Joint
    Q:
    What is the next step after inserting the cross into the bearing cup for the 2010 GMC Yukon? Posted by Customer
    A:
    Press the bearing cup into the yoke until flush.
    Posted by ChevyPartsGiant Specialist
    See expert answers on similar Universal Joint
    Q:
    What can be used to assist in seating the retainers for the 2000 GMC Jimmy? Posted by Customer
    A:
    Chassis grease can be used if necessary to assist seating.
    Posted by ChevyPartsGiant Specialist
    See expert answers on similar Universal Joint
    Q:
    What should be done after pressing the bearing cup until flush with the yoke ear for the 2005 Chevrolet Trailblazer? Posted by Customer
    A:
    Repeat for the opposite side, ensuring trunnions align correctly.
    Posted by ChevyPartsGiant Specialist
    See expert answers on similar Universal Joint
    Q:
    What should you do with the remaining universal bearings during installation for the 2009 GMC Savana 1500? Posted by Customer
    A:
    Secure them with electrical tape until installation in the vehicle.
    Posted by ChevyPartsGiant Specialist
    See expert answers on similar Universal Joint
    Q:
    What tools are needed to replace the universal joint with an external snap ring for the 2000 GMC Safari? Posted by Customer
    A:
    U Joint Bearing Separator (J 9522-3) and U Joint Bearing Spacer Remover (J 9522-5).
    Posted by ChevyPartsGiant Specialist
    See expert answers on similar Universal Joint
    Q:
    What tools are needed to replace the universal joint for the 2002 GMC Safari? Posted by Customer
    A:
    U Joint Bearing Separator (J 9522-3) and U Joint Bearing Spacer Remover (J 9522-5).
    Posted by ChevyPartsGiant Specialist
    See expert answers on similar Universal Joint
    Q:
    What is the process for pressing the lower bearing cup out of the yoke ear for the 2001 GMC Jimmy? Posted by Customer
    A:
    Place the Universal Joint Bearing Separator (J 9522-3) on the open horizontal bearing cups to press the lower bearing cup out of the yoke ear.
    Posted by ChevyPartsGiant Specialist
    See expert answers on similar Universal Joint
    Q:
    What should be done after pressing out the first bearing cup for the 2007 GMC Sierra 1500 Classic? Posted by Customer
    A:
    Rotate the propeller shaft to press the opposite bearing cup out, marking the orientation of the slip yoke to the tube.
    Posted by ChevyPartsGiant Specialist
    See expert answers on similar Universal Joint
    Q:
    How do you begin the assembly of the new universal joint for the 2007 GMC Sierra 3500 Classic? Posted by Customer
    A:
    Insert a bearing cup into one side of the yoke, ensuring the trunnion seats freely, then press it flush with the yoke ear.
    Posted by ChevyPartsGiant Specialist
    See expert answers on similar Universal Joint
    Q:
    What tools are required to service and repair the universal joint with an external snap ring for the 2004 GMC Yukon XL 2500? Posted by Customer
    A:
    U-Joint Bearing Separator (J. 9522-3) and U-Joint Bearing Spacer Remover (J 9522-5).
    Posted by ChevyPartsGiant Specialist
    See expert answers on similar Universal Joint
    Q:
    What tools are needed to replace the universal joint with an external snap ring for the 2005 GMC Sierra 3500? Posted by Customer
    A:
    U-Joint Bearing Separator (J 9522-3) and U-Joint Bearing Spacer Remover (J 9522-5).
    Posted by ChevyPartsGiant Specialist
    See expert answers on similar Universal Joint
    Q:
    How do you relieve pressure from the universal joint retaining ring for the 2010 GMC Yukon? Posted by Customer
    A:
    Lightly tap the yoke with a hammer.
    Posted by ChevyPartsGiant Specialist
    See expert answers on similar Universal Joint
    Q:
    How should the universal joint be positioned for the 2001 GMC Safari? Posted by Customer
    A:
    Position the universal joint with the lower ear of the yoke supported on a 30 mm (1/1/8 inch) socket.
    Posted by ChevyPartsGiant Specialist
    See expert answers on similar Universal Joint
    Q:
    What is the first step in removing the bearing cup for the 2001 GMC Yukon XL 1500? Posted by Customer
    A:
    Use the Universal Joint Bearing Separator (J 9522-3) to shear the plastic retaining ring on the bearing cup and press the lower bearing cup out of the yoke ear.
    Posted by ChevyPartsGiant Specialist
    See expert answers on similar Universal Joint
    Q:
    How do you ensure proper installation of the opposite bearing cup for the 2004 GMC Safari? Posted by Customer
    A:
    Press the opposite bearing cup into the yoke ear, checking for free movement of the trunnions, and press until the bearing retainer groove is visible.
    Posted by ChevyPartsGiant Specialist
    See expert answers on similar Universal Joint
    Q:
    How do you support the universal joint for removal for the 2003 GMC Safari? Posted by Customer
    A:
    Support it with the lower ear of the yoke on a 30 mm (1 1/8 inch) socket.
    Posted by ChevyPartsGiant Specialist
    See expert answers on similar Universal Joint
    If you have any questions about this product, please don't hesitate to ask us. We will be happy to help you!

OEM GM 23104840, Excellent Performance and Perfect Fitment

To ensure reliability, purchase GM part # 23104840 Universal Joints. It is sometimes referred to as GM Universal Joint. Choosing OEM parts is the optimal decision for guaranteeing superior quality and perfect performance. These components undergo stringent quality checks and are carefully constructed to comply with GM's factory specifications, ensuring a smooth installation process.

ChevyPartsGiant.com is a leading supplier of genuine GM parts such as GM 23104840 Universal Joints. Our website boasts an extensive inventory of OEM GM parts, available at highly competitive prices in the market. Should you require any new genuine GM parts, rest assured we will deliver them swiftly and efficiently to your doorstep. Furthermore, all our parts come with the assurance of a manufacturer's warranty. For detailed Chevy parts information, click here.
Choose ChevyPartsGiant for discounted prices, exceptional service and fast delivery