ChevyParts
My Garage
My Account
Cart
OEM Chevrolet Express 1500 Fuel Rail
Engine Fuel Rail- Select Vehicle by Model
- Select Vehicle by VIN
Select Vehicle by Model
orMake
Model
Year
Select Vehicle by VIN
For the most accurate results, select vehicle by your VIN (Vehicle Identification Number).
4 Fuel Rails found


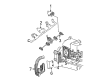
Chevrolet Express 1500 Fuel Rail Part Number: 17113695
$104.95 MSRP: $327.45You Save: $222.50 (68%)Ships in 1-2 Business Days


Chevrolet Express 1500 Fuel Rail Part Number: 12602113
$114.68 MSRP: $232.93You Save: $118.25 (51%)Ships in 1-2 Business Days
Chevrolet Express 1500 Fuel Rail Part Number: 89018110
$188.56 MSRP: $341.28You Save: $152.72 (45%)Ships in 1-2 Business DaysChevrolet Express 1500 Fuel Rail Part Number: 12621668
$198.77 MSRP: $359.76You Save: $160.99 (45%)Ships in 1-2 Business Days
Chevrolet Express 1500 Fuel Rail
Want to cut long-term maintenance and repair costs? Choose OEM Fuel Rail. Those parts deliver top durability you can trust. On our site, you'll find a huge catalog of genuine Chevrolet Express 1500 parts. Prices are unbeatable, so you can keep more in your pocket. Every OEM Chevrolet Express 1500 Fuel Rail includes a manufacturer's warranty. You can also get an easy return policy that keeps buying risk free. Fast delivery, get your car on the road quickly. It's simple to search, compare, and order. Stop guessing about quality or fit. Order today and save with parts that last.
Chevrolet Express 1500 Fuel Rail Parts and Q&A
- Q: How to replace the fuel rail assembly on Chevrolet Express 1500?A:The Fuel Rail assembly replacement requires a first stage to remove the engine cover together with the air cleaner resonator outlet duct. A service part identification number with eight digits exists on the Fuel Rail assembly for maintenance purposes. Use gm x-30a or equivalent engine cleaner to clean the Fuel Rail assembly according to the product guidelines without submerging it in liquid cleaning solutions. First disconnect the accelerator control cable and cruise control cable from their fixings on the cable bracket as well as Throttle Body when available followed by crimping off the cruise control cable engine-end fitting from throttle lever. The servicing technician should remove the upper engine wire harness retainer nut followed by disconnecting the evaporative emission (EVAP) purge valve harness connector before positioning the upper engine wire harness to the side. The fuel system needs decompression while you mark every connector to its specific injector for maintaining the proper firing sequence after assembly. Use pliers only on multec 2 fuel injector connectors as their neckline may become damaged instead. To disconnect a fuel injector connector you should raise the connector position assurance (CPA), depress the tab and then let go of the cpa. Remove the Fuel Rail assembly while supporting it and take caution to protect the electrical connector terminals and spray tips from potential damage. Apply caps to the fittings and insert plugging accessories to stop contamination. Proceed with these installation and removal steps: disconnect the fuel feed and return tubes (1, 2) from the Fuel Rail, remove the fuel pressure regulator vacuum hose, loosen the right Fuel Rail crossover tube screw and untighten the Fuel Rail bolts to separate the whole rail assembly. The bottoms o-ring seals on the injectors need discarding. Lubricate new fuel injector lower o-ring seals using clean engine oil and use them to install each injector one by one. Remove the retaining clip attaching screw along with the crossover pipe retainer from the right-hand Fuel Rail. Afterwards disconnect the crossover pipe rail and its o-ring . The crossover pipe requires clean engine oil lubrication of a new o-ring before installation onto the crossover pipe where it leads into the right Fuel Rail. To avoid thread stripping, initially start the attaching screw with hand power before installing the crossover pipe retainer and screw on the Fuel Rail. Apply gm p/n 12345382 with code 10953489 threadlock to the Fuel Rail bolts and install the bolts by tightening to 10 n.m (89 lb in) and tighten the screw to 3.8 n.m (34 lb in). Zero air leakage by establishing connections of fuel pressure regulator vacuum hose then fuel lines (1 and 2) and fuel injectors with original connectors while regularly rotating each injector to prevent strain on its wiring. Route the upper engine wire harness while joining the evap purge solenoid connector followed by installation of the retainer nut which needs to be tightened to 5.5 n.m (49 lb in torque). If equipped with Throttle Body and cable bracket the accelerator control cable joins with the cruise control cable then the engine-end fitting attaches to the throttle lever. The last step involves installing the air cleaner resonator outlet duct followed by the engine cover while performing a leak check through a two-second engine ignition turn-on followed by a ten-second engine off period then a second engine ignition turn-on to inspect fuel leaks.

Related Chevrolet Express 1500 Parts
 Chevrolet Express 1500 Air Hose
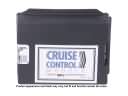 Chevrolet Express 1500 Cruise Control Module
 Chevrolet Express 1500 Fuel Injector
 Chevrolet Express 1500 Fuel Pressure Regulator
 Chevrolet Express 1500 Fuel Pressure Sensor
 Chevrolet Express 1500 Fuel Pump Gasket
 Chevrolet Express 1500 Fuel Pump Seal
 Chevrolet Express 1500 Fuel Tank
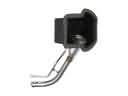 Chevrolet Express 1500 Fuel Tank Filler Neck
 Chevrolet Express 1500 Idle Control Valve
 Chevrolet Express 1500 Throttle Cable
 Chevrolet Express 1500 Vapor Pressure Sensor