Make sure this part fits

GM 17113695
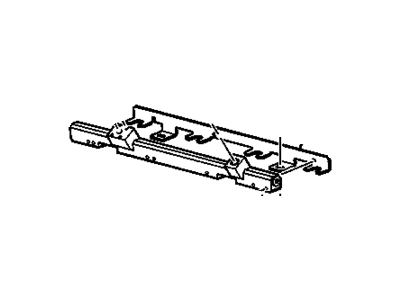
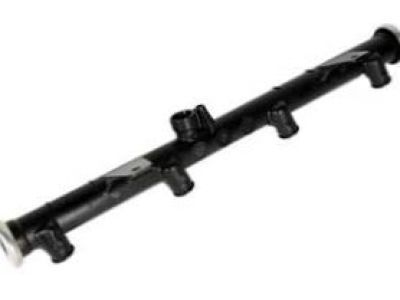
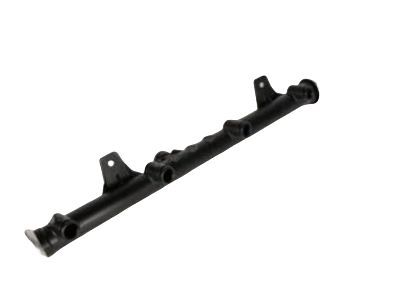
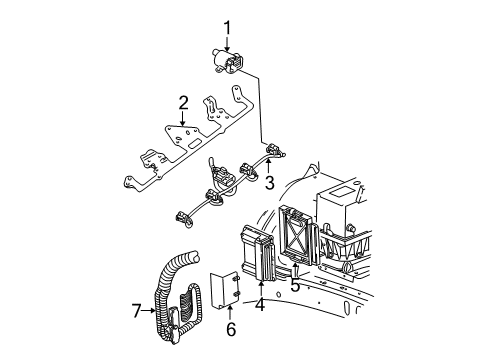
Fuel Rail

2001-2007 GM

Customer Questions & Expert Answers (20)
GM 17113695 Fuel Rail
  • Part Description
    Rail, Fuel Injection
  • Position
    Passenger Side
  • Replaces
    89017376
  • Manufacturer
    General Motors
Make sure this part fits
$167.50 MSRP: $300.41
You Save: $132.91 (45%)
Ships in 1-2 Business Days
1
ADD TO CART
  • Related Parts
  • Product Specifications
  • Vehicle Fitment
  • Customer Questions & Expert Answers
  • Product Specifications

    BrandGenuine GM
    Manufacturer Part Number17113695
    Part DescriptionRail, Fuel Injection
    Item Dimensions20.8 x 14.4 x 9.5 inches
    Item Weight5.80 Pounds
    PositionPassenger Side
    ConditionNew
    Fitment TypeDirect Replacement
    Replaces89017376
    ManufacturerGeneral Motors
    SKU17113695
    WarrantyThis genuine GM part is guaranteed by GM's factory warranty.
    Shipping & ReturnShipping Policy Return Policy
    Warning: California's Proposition 65
  • Vehicle Fitment

    Year Make Model Trim Engine
    2004 Buick RainierCXL, CXL Plus8 Cyl 5.3 L GAS
    2002-2006 Cadillac EscaladeBase8 Cyl 5.3 L GAS, 8 Cyl 6.0 L GAS
    2003-2006 Cadillac Escalade ESVBase8 Cyl 6.0 L GAS
    2002-2006 Cadillac Escalade EXTBase8 Cyl 6.0 L GAS
    2002-2006 Chevrolet Avalanche 1500Base, LS, LT, North Face, On Road Edition, WBH, Z66, Z718 Cyl 5.3 L FLEX, 8 Cyl 5.3 L GAS
    2003-2007 Chevrolet Express 1500Base, LS, LT8 Cyl 5.3 L FLEX, 8 Cyl 5.3 L GAS
    2003-2007 Chevrolet Express 2500Base, LS, LT8 Cyl 4.8 L GAS, 8 Cyl 5.3 L GAS, 8 Cyl 6.0 L CNG, 8 Cyl 6.0 L GAS
    2003-2007 Chevrolet Express 3500Base, LS, LT8 Cyl 4.8 L GAS, 8 Cyl 6.0 L CNG, 8 Cyl 6.0 L GAS
    2003-2004 Chevrolet SSRBase8 Cyl 5.3 L GAS
    2001-2006 Chevrolet Silverado 1500Base, Hybrid, LS, LT, SS, WT, Z71 Off-Road8 Cyl 4.8 L GAS, 8 Cyl 5.3 L FLEX, 8 Cyl 5.3 L FULL HYBRID EV-GAS (FHEV), 8 Cyl 5.3 L GAS, 8 Cyl 6.0 L GAS
    View More
  • Customer Questions & Expert Answers

    Q:
    Is this 17113695 designed for my car? Posted by ChevyPartsGiant Specialist
    A:
    Please Select Your Vehicle model to see if part number 17113695 is suitable before ordering.
    Posted by ChevyPartsGiant Specialist
    Q:
    How to replace the fuel rail assembly on Cadillac Escalade ESV? Posted by Customer
    A:
    The replacement of Fuel Rail assembly begins with a step of relieving fuel system pressure before removing the wire harness bracket nut. Disconnect the evaporative emission (EVAP) purge solenoid electrical connector as well as the generator electrical connector and manifold absolute pressure (MAP) sensor and Knock Sensor. Pull out the Knock Sensor harness connector from its position on the Intake Manifold and break the connector position assurance lock free. Disconnect the main coil and fuel injector electrical connectors from their location and note them before disassembly so they can be reinstalled properly. Also remove the harness clips from the Fuel Rail. The operation on the fuel injector electrical connectors starts by lifting the cpa retainer then pushing the tab to disconnect the connector. Detach both the positive crankcase ventilation hose and remove the fuel pipe which feeds the Fuel Rail. The successful removal of the Fuel Rail requires you to first loosen the crossover tube-to-right Fuel Rail bolt followed by removing all Fuel Rail bolts while being careful to protect the injector electrical connector terminals and spray tips. Keep the rail installation area contamination-free by using caps to seal fittings and by placing plugs in empty holes. The technicians should clean the Fuel Rail with a spray engine cleaner followed by removing and discarding the lower o-ring seal from each fuel injector. Clean engine oil should be used to lubricate new fuel injector lower o-ring seals before installing each seal onto an injector. Apply a 5 mm threadlock gm p/n 12345382 (Canadian PN 10953489) band on the Fuel Rail bolts before installing and torquing them to 10 n.m (89 lb in). Fitting the fuel feed pipe to the Fuel Rail while installing the pcv hose and connecting the fuel injector electrical connectors should follow correct reinstallation procedures. Install the main coil then fuel injectors to the engine wire harness. Fasten harness clips to the Fuel Rail followed by cpa retainers while the MAP Sensor and Knock Sensor need to be connected with their harness connector to the Intake Manifold. After connecting the evap purge solenoid electrical connector with the generator electrical connector you must install the wire harness bracket nut which requires a torque of 5 n.m (44 lb in). First tighten the fuel fill cap before you reconnect the negative Battery Cable and perform the leak inspection by keeping the ignition on with engine off for 2 sec then letting it rest for 10 seconds before turning it on again to check for fuel leaks.
    Posted by ChevyPartsGiant Specialist
    Q:
    How to replace the fuel rail assembly on 4.8L, 5.3L, and 6.0L engines on Chevrolet Avalanche 1500? Posted by Customer
    A:
    Before starting Fuel Rail assembly replacement on engines with 4.8l, 5.3l and 6.0l the fuel system pressure must be released. Start by removing the wire harness bracket nut and then detach both the evaporative emission (EVAP) purge solenoid electrical connector and generator electrical connector. The replacement process begins by cutting the stormwater from the maniflood absolute pressure sensor and Knock Sensor alongside disconnecting the Knock Sensor harness connector on the Intake Manifold and connector position assurance lock. The primary engine operation connects must be separated along with fuel injector wires on both sides. Additionally, all Fuel Rail harness clips need removal. Place the engine wire harness aside first while marking fuel injector connectors for reinstallation. Then use the cpa retainer to disconnect each fuel injector electrical connector by pulling up the retainer then pushing the tab to separate the connector. The maintenance process begins by extracting the pcv hose and detaching both fuel supply and return tubing from the Fuel Rail and afterward removing the vacuum hose of the fuel pressure regulator. Separate the Fuel Rail bolts before gently removing the Fuel Rail to prevent terminal and tip harm on injector electrical connectors. Use caps to seal off fittings and seal the holes while protecting against contaminants. A spray-based engine cleaner is acceptable for brushing the Fuel Rail yet submersion should be avoided. To examine the fuel injectors remove their lower o-ring seals from each injector and then discard them. New fuel injector lower o-ring seals require engine oil lubrication before their installation onto each injector. Apply gm p/n 12345382 threadlock to Fuel Rail bolts at their threads before installing the bolts which should be tightened to 10 n.m (89 lb in) torque. The fuel pressure regulator vacuum hose and fuel feed and return pipes and pcv hose require reattachment during this step. Secure the fuel injector electrical connectors properly while checking the correct sequence and place the engine wire harness in its position. Reconnect the main coil then the fuel injectors before installing the harness clips to the Fuel Rail while holding cpa retainers. After reattaching the MAP Sensor connect the Knock Sensor and next install the Knock Sensor harness connector onto the Intake Manifold while also connecting the evap purge solenoid electrical connector with the generator electrical connector. The last installation task includes installing the wire harness bracket nut while tightening it to 5 n.m (44 lb in), followed by fuel fill cap tightening and negative Battery Cable reconnection and a leak inspection through a sequence of turning on the ignition with engine off for 2 seconds, then turning off for 10 seconds before another ignition on check for fuel leaks.
    Posted by ChevyPartsGiant Specialist
    Q:
    How to replace the fuel rail assembly on Chevrolet Express 3500? Posted by Customer
    A:
    The procedure to replace the Fuel Rail assembly starts with removing both the engine cover and the air cleaner resonator outlet duct. Use gm x-30a engine spray along with its packaging guidelines to clean the Fuel Rail assembly without submerging it in any cleaning solution. You can find an eight-digit code that serves for both servicing and parts replacement on the Fuel Rail assembly. Take off the accelerator control cable and cruise control cable from the cable bracket before you remove the upper engine wire harness retainer nut and Throttle Body. The evap purge valve harness connector should be disconnected before setting the upper engine wire harness to the side. Remove fuel pressure from the system before marking all electrical connectors with the correct injector correspondence details for appropriate firing sequence after reinstallation. Disconnection of multec 2 fuel injector connectors should be handled without pliers because they can cause damage to the connectors. The fuel injector connector disconnection requires pulling up the connector position assurance (CPA) on the injector connector followed by pushing the tab on the injector connector in and finally releasing the cpa. After disconnecting the injector connectors perform the same procedure for all the connectors followed by safely removing the fuel feed and return pipes from the Fuel Rail. The first step requires users to cut the fuel pressure regulator vacuum line followed by a loosening of the crossover tube to right Fuel Rail retainer screw before removing the Fuel Rail bolts to eventually remove the Fuel Rail. Extract the lower o-ring seals which belong to the injectors. Smoother installation of new fuel injector lower o-ring seals takes place when applying clean engine oil before putting them onto each injector. The process begins by removing the retaining clip attaching screw together with the crossover pipe retainer from the right-hand Fuel Rail. Afterwards separate the crossover pipe rail and o-ring. Insert the right Fuel Rail crossover pipe after placement of the lubricated o-ring with clean engine oil. Begin your work on the attaching screw for the retaining clip manually to stop thread destruction before you mount the crossover pipe retainer and attach its screw to install the Fuel Rail. Start by wrapping threads of the Fuel Rail bolts with a 5 mm band of gm p/n 12345382 threadlock. Then apply bolts and secure them at 10 n.m torque. Use 3.8 n.m torque to secure the screw while reconnecting the fuel pressure regulator vacuum line and fuel feed and return pipes to the Fuel Rail. Attach the fuel injector electrical connectors to their specific injectors while observing the correct firing sequence and ensuring wire harness flexibility. Next install the upper engine wire harness followed by connecting the evap purge solenoid connector along with its retainer nut that should be tightened to 5.5 n.m. Afterward restore the accelerator control cable along with cruise control cable installation of air cleaner resonator outlet duct and engine cover. The last step requires igniting the engine while keeping it off for 2 seconds and then shutting it off for 10 seconds followed by an ignition check to detect fuel leaks.
    Posted by ChevyPartsGiant Specialist
    Q:
    How to replace the fuel rail assembly on Chevrolet Silverado 3500? Posted by Customer
    A:
    Before replacing the Fuel Rail assembly it is vital to reduce pressure in the fuel system. Start by first removing the bracket nut securing the wire harness and then unplug the evaporative emission (EVAP) purge solenoid electrical connector combined with the generator electrical connector and the manifold absolute pressure (MAP) sensor and Knock Sensor. The first step is to detach the Intake Manifold's Knock Sensor harness connector followed by removing the electronic throttle control (ETC) electrical connector through releasing its gray retainer and pressing down the black clip before unconnecting the connector. The procedure starts by removing the connector position assurance (CPA) retainer from the right-side engine area followed by disconnecting the main coil and fuel injectors from their mounting positions along the right engine side. Afterward the Fuel Rail harness clips need to be removed from the coil. First detach the Fuel Injector and main coil connectors from the left engine side where the cpa retainer existed before removing all harness clips from the Fuel Rail. After placing the engine wire harness to the side you should mark the Fuel Injector electrical connectors so their order is correct for reassembly. Perform the following steps for each Fuel Injector electrical connector by pushing up the cpa retainer 1 click then pushing the tab into place and removing the electrical connector. The positive crankcase ventilation (PCV) hose must be detached while removing the fuel feed pipe that connects to the Fuel Rail. Extract the Fuel Rail by removing its bolts with caution because this process may damage injector electrical connector terminals and prevent contamination through the fittings so protect them with caps. Activate a spray type engine cleaner on the Fuel Rail for cleaning only but never saturate the rail with liquid cleaning solvent. Each injector needs its Fuel Injector lower o-ring seal to be removed before discarding. Before installing the fuel injectors users must apply engine oil to new lower o-ring seals and position them at each injector. Apply a 5 mm threadlock band of gm p/n 12345382 (Canadian P/N 10953489) to the Fuel Rail bolts before tightening them to 10 n.m using a 89 lb in torque value. Final steps include linking the fuel feed pipe to the Fuel Rail as well as mounting the pcv hose followed by connecting the Fuel Injector electrical connectors. Secure correct reassembly through appropriate placement of connectors onto their designated injectors while settling the cpa retainer into 1 click per element. The engine wire harness must be positioned and the main coil and fuel injectors connected on the left side before attaching harness clips to both the Fuel Rail and the cpa retainer. The right side main coil and fuel injectors need attachment while also installing the cpa retainer and the harness clips to the Fuel Rail . First complete etc electrical connector connection by using the gray retainer followed by hookup of the MAP Sensor and Knock Sensor before mounting the Knock Sensor harness connector on the Intake Manifold and installing evap purge solenoid electrical connector and generator electrical connector. To finish the installation you should install the wire harness bracket nut while tightening it to 5 n.m (44 lb in) and complete the installation with tightening the fuel fill cap and negative Battery Cable connection before checking for leaks through a three-step ignition test.
    Posted by ChevyPartsGiant Specialist
    Q:
    How to service the fuel rail assembly on Chevrolet Suburban 2500? Posted by Customer
    A:
    The first step for servicing the Fuel Rail assembly involves lowering fuel system pressure while cleaning the assembly with gm x-30a engine cleaner along with other equivalent products without allowing it to sit in liquid cleaning solvent. The service procedure begins with removing the engine sight shield bracket nuts followed by unmounting the bracket and then disconnecting the generator harness connector and evaporative emission canister purge valve harness connector and throttle position sensor harness connector along with the electronic throttle control harness connector. After removing the bracket studs from the upper engine wire harness it should be positioned aside so that each connector can be identified with its matching injector based on firing sequence. Locate the white portion on each injector connector then grip and carefully lift the top section of connectors only until exceeding the white area. Next, press the lower tab to unlock the connector. The process starts by disconnecting both the fuel feed pipe and return pipe from the Fuel Rail as a first step followed by disconnection of the line that supplies vacuum to the fuel pressure regulator. First remove the Fuel Rail attaching bolts then take off the assembly before extracting one injector lower o-ring seat from each injector and discarding its seal. Clean engine oil must be used to lubricate new lower injector o-ring seals before placing them onto each injector spray tip. Install the Fuel Rail assembly to the Intake Manifold by applying gm p/n 12345382 (Canadian P/N 10953489) threadlock on the 5 mm (0.020 in) band of bolts with a torque of 12 n.m (106 lb in). Reinstall the fuel pressure regulator vacuum line together with the fuel feed and return pipes while verifying correct injector electrical placement for maintaining the engine firing sequence. Attach the upper engine wire harness bracket using its retainer studs and fasten up the nut to 10 n.m (89 lb in). The repair process requires reattachment of the generator harness connector along with the evap canister purge valve harness connector and throttle position sensor harness connector and electronic throttle control harness connector. Secure the engine sight shield mounting bracket bolts to 10 n.m (89 lb in) while tightening the nuts and fasten the fuel filler cap and connect the negative Battery Cable. A fuel leak inspection process begins with a two-second ignition on, followed by ten seconds of ignition off before repeating the procedure for visual inspection of fuel leakage. Mount the engine sight shield and fasten its bolts with a torque of 10 n.m (89 lb in).
    Posted by ChevyPartsGiant Specialist
    Q:
    How to replace the fuel rail assembly on Chevrolet Suburban 1500? Posted by Customer
    A:
    Before starting the Fuel Rail assembly replacement process, you must take out the engine sight shield. Wash the Fuel Rail assembly by spraying gm x-30a or its equivalent engine cleaner but maintain it out of liquid solvents. Remove the accelerator control and cruise control cables from the cable bracket as well as the cruise control cable engine-end fitting from the throttle lever when these components exist. The technician should remove the upper engine wire harness retainer nut before disconnecting the evap purge solenoid electrical connector and placing the upper engine wire harness in a safe location. The process starts with depressurizing the fuel system while marking electrical connectors to their specific hose locations for proper sequential engine firing sequence. It is necessary to avoid using pliers while disconnecting multec (R) 2 fuel injector connectors to prevent damage. You must first raise the connector position assurance then push the tab on the injector connector before releasing the assurance and removing the fuel injector connector. Clear the Fuel Rail assembly from its place while safeguarding injector electrical connector terminals and spray tips by providing support to the Fuel Rail during this procedure. Cover the fittings while also plugging the holes in order to avoid contamination. The procedure begins with disconnecting fuel feed and return pipes from the Fuel Rail alongside the disconnecting of the fuel pressure regulator vacuum line and the loose retaining clip attaching screw from the right-hand Fuel Rail. The technician must remove bolts from the Fuel Rail before removing the rail assembly along with throwing away the fuel injector lower o-ring seals. Clean engine oil must be applied for lubrication to new fuel injector lower o-ring seals before they are installed onto each fuel injector. The retaining clip attaching screw should be removed first followed by the removal of crossover pipe retainer from the right-hand Fuel Rail and then the crossover pipe rail and o-ring. After installing a new o-ring on the crossover pipe to which you applied clean engine oil you should put the crossover pipe into the right-hand Fuel Rail. Use your hand to begin the retaining clip attaching screw before attaching the crossover pipe retainer and screw in a loose position. A 5 mm (0.020 in) band of gm p/n 12345382 threadlock should be applied to the Fuel Rail bolt threads before their installation to 10 n.m (89 lb in) torque and a screw torqued at 3.8 n.m (34 lb in). The fuel pressure regulator vacuum line needs reattachment with the fuel feed and return pipes and fuel injector electrical connectors following inspection to make sure each connector matches the proper injector and needs rotation until wire harness avoidance. Insert the upper engine wire harness before you attach the evap purge solenoid connector and the retainer nut which should be tightened to 5.5 n.m (49 lb in). After reattaching the accelerator control and cruise control cables you should use ignition to examine for leaks by following the specified turn-on and turn-off procedure. Place the engine sight shield last as the finishing step.
    Posted by ChevyPartsGiant Specialist
    Q:
    How to replace the Fuel Injection Fuel Rail Assembly on GMC Savana 3500? Posted by Customer
    A:
    Begin the replacement process of the fuel injection Fuel Rail assembly by taking out engine cover and air cleaner resonator outlet duct. A serviceable component requires the eight-digit id number located on the Fuel Rail assembly for all related service operations. Use gm x-30a or an equivalent spray type engine cleaner to clean the Fuel Rail assembly under package instructions with soaking in liquid cleaning solvents excluded. Remove the accelerator control cable together with cruise control cable from the cable bracket while also disconnecting it from the Throttle Body when present. You must disconnect the evaporative emission (EVAP) purge valve harness connector by removing the upper engine wire harness retainer nut then moving the upper engine wire harness to a different position. Users should drain the fuel system pressure using ch 48027 while marking injector connector points to their designated firing sequence positions to maintain proper system operation. The user should not use pliers when disconnecting the multec 2 fuel injector connectors because this can cause damage. To disconnect the fuel injector connector users must separate the connector position assurance from the top while pushing the tab forward and then release the assurance to fully disconnect. The customer should repeat this removal process on all fuel injector connectors before carefully removing the Fuel Rail assembly to protect injector terminals and spray tips with supports placed under the rail. Seal the fittings before plugging the holes to stop contamination and disconnect the fuel feed and return pipes (1, 2) and the fuel pressure regulator vacuum line. Unscrew the crossover tube to right Fuel Rail retainer screw before you remove the Fuel Rail bolts and finally you can remove the Fuel Rail. The technicians discard lower o-ring seals for fuel injectors during this process. You should prepare new fuel injector lower o-ring seals by applying clean engine oil and place them one by one onto each injector. Start by removing the retaining clip attaching screw as well as crossover pipe retainer from the right-hand Fuel Rail and subsequent removal of crossover pipe rail with its o-ring . The crossover pipe must receive clean engine oil to lubricate a new o-ring before installation on the crossover pipe and subsequent installation into the right Fuel Rail. Use a hand to start the retaining clip attaching screw before installing the crossover pipe retainer and screw along with the right-hand Fuel Rail. Use a 5 mm (0.020 in) band of gm p/n 12345382 (Canadian P/N 10953489) threadlock on the Fuel Rail bolts' threads before bolting and tightening to 10 n.m (89 lb in) and the screw to 3.8 n.m (34 lb in). Connect the fuel pressure regulator vacuum line with the fuel feed and return pipes (1, 2) and attach the fuel injector electrical connectors to their specific injectors while rotating the injectors to prevent wire harness stretching. Attach the evap purge solenoid connector followed by installing the retainer nut to the upper engine wire harness while torquing it to 5.5 n.m (49 lb in). Installation of the engine cover includes hooking up the accelerator control cable with cruise control cable to the cable bracket and Throttle Body while also connecting the cruise control cable engine-end fitting to the throttle lever stud if available. Completing the sequence with the air cleaner resonator outlet duct installation. Check for fuel leaks by enabling the ignition while the engine remains off for two seconds then disabling it for 10 seconds before enabling it again with an engine-off state to conduct the inspection.
    Posted by ChevyPartsGiant Specialist
    Q:
    How to replace the fuel rail assembly on GMC Yukon XL 1500? Posted by Customer
    A:
    The replacement process for Fuel Rail assembly requires engine sight shield removal followed by application of gm x - 30a spray engine cleaner to the assembly components but no liquid immersion. After disconnecting the accelerator control cable and cruise control cable from their respective positions on the cable bracket and Throttle Body, disconnect and remove the upper engine wire harness retainer nut which allows the removal of the evap purge valve harness connector. After positioning aside the upper engine wire harness users must start relieving fuel system pressure. It is essential to match the connectors with their specific injector positions so the engine can activate injectors in the right firing sequence upon assembly completion. Pull each injector connector top section by no more than the white marking to reveal the release tab at the lower side. The technician must disconnect fuel feed pipes and return pipes from the Fuel Rail as well as remove the fuel pressure regulator vacuum line. The crossover tube securing screw to the right Fuel Rail needs loosening for removal of the Fuel Rail mounting bolts followed by extraction of the assembly. The technicians must remove the injector lower o-ring seals which go on each fuel injector. Apply smooth engine oil to new lower o-ring seals then place them at the injector spray tip end before installing the injectors. The crossover tube requires removal along with its o-ring from the right Fuel Rail retainer. Install a new o-ring before lubricating it. Put the crossover tube into the right Fuel Rail before loosely installing the retainer. The Fuel Rail assembly must be mounted to the Intake Manifold with gm p/n 12345382 thread lock applied to Fuel Rail bolt threads before tightening them to 10 n.m (89 lb in) while right crossover pipe retainer screw reaches 3.8 n.m (34 lb in). Attach all fuel pressure regulator vacuum line components, fuel feed and return pipes to the Fuel Rail and injectors with correct firing order sequence while avoiding wire harness stretch. Place the upper engine wire harness then connect the evap purge solenoid and install the retainer nut by tightening it to 5.5 n.m (49 lb in). Reconnect the accelerator control cable and cruise control cable to their positions at the cable bracket and Throttle Body while installing the engine sight shield mounting bracket with its bolts. After tightening the fuel filler cap you should finish by connecting the negative Battery Cable. Switch on the ignition for 2 seconds then disable it for 10 seconds before another 2-second ignition switch on to test for fuel leaks before fitting the engine sight shield.
    Posted by ChevyPartsGiant Specialist
    Q:
    How to replace the fuel rail assembly on GMC Yukon XL 2500? Posted by Customer
    A:
    The replacement of Fuel Rail assembly begins with a step of relieving fuel system pressure before removing the wire harness bracket nut. Disconnect the evaporative emission (EVAP) purge solenoid electrical connector as well as the generator electrical connector and manifold absolute pressure (MAP) sensor and Knock Sensor. Pull out the Knock Sensor harness connector from its position on the Intake Manifold and break the connector position assurance lock free. Disconnect the main coil and fuel injector electrical connectors from their location and note them before disassembly so they can be reinstalled properly. Also remove the harness clips from the Fuel Rail. The operation on the fuel injector electrical connectors starts by lifting the cpa retainer then pushing the tab to disconnect the connector. Detach both the positive crankcase ventilation hose and remove the fuel pipe which feeds the Fuel Rail. The successful removal of the Fuel Rail requires you to first loosen the crossover tube-to-right Fuel Rail bolt followed by removing all Fuel Rail bolts while being careful to protect the injector electrical connector terminals and spray tips. Keep the rail installation area contamination-free by using caps to seal fittings and by placing plugs in empty holes. The technicians should clean the Fuel Rail with a spray engine cleaner followed by removing and discarding the lower o-ring seal from each fuel injector. Clean engine oil should be used to lubricate new fuel injector lower o-ring seals before installing each seal onto an injector. Apply a 5 mm threadlock gm p/n 12345382 (Canadian PN 10953489) band on the Fuel Rail bolts before installing and torquing them to 10 n.m (89 lb in). Fitting the fuel feed pipe to the Fuel Rail while installing the pcv hose and connecting the fuel injector electrical connectors should follow correct reinstallation procedures. Install the main coil then fuel injectors to the engine wire harness. Fasten harness clips to the Fuel Rail followed by cpa retainers while the MAP Sensor and Knock Sensor need to be connected with their harness connector to the Intake Manifold. After connecting the evap purge solenoid electrical connector with the generator electrical connector you must install the wire harness bracket nut which requires a torque of 5 n.m (44 lb in). First tighten the fuel fill cap before you reconnect the negative Battery Cable and perform the leak inspection by keeping the ignition on with engine off for 2 sec then letting it rest for 10 seconds before turning it on again to check for fuel leaks.
    Posted by ChevyPartsGiant Specialist
    Q:
    How to replace the fuel rail assembly on GMC Sierra 3500? Posted by Customer
    A:
    Start by removing the fuel system pressure and engaging with the engine sight shield before you initiate Fuel Rail assembly replacement. Disconnect the electric connections of the generator and evap canister purge valve and electronic throttle control (ETC). Move the engine harness driver-side on the engine bay after detaching its bolts and studs. Each fuel injector connector needs to be identified for correct firing sequences before pulling the connector top section only beyond the white segment until the tab release occurs. Before removing the fuel feed line from the Fuel Rail take steps to support the rail which prevents damaging the injector electrical connector terminals and spray tips. Seal all fittings by placing caps and insert stoppers into holes to prevent pollutants from entering. First you must remove the Fuel Rail studs before cleaning the Fuel Rail with gm x-30a spray engine cleaner and finally separating the Fuel Rail from its position. Seal the fuel injector lower o-ring seals with clean engine oil before placing them at the tip spray end of the injector. Secure the Fuel Rail along with its Fuel Rail studs by tightening them to 12 n.m (106 lb in). Install the fuel feed line alongside the fuel injector electrical connectors while making sure each wire harness maintains proper placement on its designated injector and requiring mild rotation to prevent wire harness tension. Reposition the engine harness while installing its bolt and studs and tightening them to 10 n.m (89 lb in) before connecting the etc electrical connector and the evap canister purge valve electrical connector and the generator electrical connector . The sight shield installation must follow the fuel fill cap installation while connecting the negative Battery Cable. The inspection for fuel leaks needs a two-second ignition on period with the engine in off position after which the ignition should be set to off for ten seconds before restarting ignition off to check for any fuel leaks.
    Posted by ChevyPartsGiant Specialist
    Q:
    What should be done with the upper engine wire harness before removing the fuel rail for the 2004 Chevrolet Express 1500? Posted by Customer
    A:
    Remove the upper engine wire harness retainer nut, disconnect the EVAP purge valve harness connector, and reposition the upper engine wire harness aside.
    Posted by ChevyPartsGiant Specialist
    See expert answers on similar Fuel Rail
    Q:
    How should the fuel rail be removed for the 2007 Chevrolet Silverado 3500 Classic? Posted by Customer
    A:
    Carefully remove the fuel rail to avoid damaging the injector electrical connector terminals and spray tips, and cap the fittings to prevent contamination.
    Posted by ChevyPartsGiant Specialist
    See expert answers on similar Fuel Rail
    Q:
    What should be done with the upper engine wire harness for the 2004 Chevrolet SSR? Posted by Customer
    A:
    Position the upper engine wire harness, connect the EVAP purge solenoid connector, and install the retainer nut to the upper engine wire harness, tightening it to 5.5 N.m (49 lb in).
    Posted by ChevyPartsGiant Specialist
    See expert answers on similar Fuel Rail
    Q:
    What is the first step to replace the fuel rail assembly for the 2004 Chevrolet Silverado 2500? Posted by Customer
    A:
    Relieve the fuel system pressure and remove the wire harness bracket nut.
    Posted by ChevyPartsGiant Specialist
    See expert answers on similar Fuel Rail
    Q:
    What needs to be removed from the fuel rail for the 2005 GMC Sierra 3500? Posted by Customer
    A:
    Remove the positive crankcase ventilation (PCV) hose and disconnect the fuel feed pipe.
    Posted by ChevyPartsGiant Specialist
    See expert answers on similar Fuel Rail
    Q:
    What should be applied to the threads of the fuel rail bolts for the 2007 GMC Sierra 3500 Classic? Posted by Customer
    A:
    A 5 mm (0.2 in) band of threadlock GM P/N 12345382 (Canadian P/N 10953489).
    Posted by ChevyPartsGiant Specialist
    See expert answers on similar Fuel Rail
    Q:
    Where can the identification number for servicing or part replacement be found for the 2006 GMC Savana 3500? Posted by Customer
    A:
    An eight-digit identification number is located on the fuel rail assembly.
    Posted by ChevyPartsGiant Specialist
    See expert answers on similar Fuel Rail
    Q:
    How should the new fuel injector lower O-ring seals be prepared for the 2004 GMC Sierra 1500? Posted by Customer
    A:
    Lubricate them with clean engine oil before installing.
    Posted by ChevyPartsGiant Specialist
    See expert answers on similar Fuel Rail
    Q:
    What should be done after disconnecting the fuel injector connectors for the 2003 GMC Savana 3500? Posted by Customer
    A:
    Disconnect the fuel feed and return pipes from the fuel rail and disconnect the fuel pressure regulator vacuum line.
    Posted by ChevyPartsGiant Specialist
    See expert answers on similar Fuel Rail
    If you have any questions about this product, please don't hesitate to ask us. We will be happy to help you!

OEM GM 17113695, Excellent Performance and Perfect Fitment

To ensure reliability, purchase GM part # 17113695 Fuel Rail. It is sometimes referred to as GM Fuel Rail. Choosing OEM parts is the optimal decision for guaranteeing superior quality and perfect performance. These components undergo stringent quality checks and are carefully constructed to comply with GM's factory specifications, ensuring a smooth installation process.

ChevyPartsGiant.com is a leading supplier of genuine GM parts such as GM 17113695 Fuel Rail. Our website boasts an extensive inventory of OEM GM parts, available at highly competitive prices in the market. Should you require any new genuine GM parts, rest assured we will deliver them swiftly and efficiently to your doorstep. Furthermore, all our parts come with the assurance of a manufacturer's warranty. For detailed Chevy parts information, click here.
Choose ChevyPartsGiant for discounted prices, exceptional service and fast delivery