ChevyParts
My Garage
My Account
Cart
OEM Chevrolet Lumina Transmission Pan
Trans Pan- Select Vehicle by Model
- Select Vehicle by VIN
Select Vehicle by Model
orMake
Model
Year
Select Vehicle by VIN
For the most accurate results, select vehicle by your VIN (Vehicle Identification Number).
2 Transmission Pans found


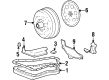
Chevrolet Lumina Oil Pan Part Number: 24207558
$20.66 MSRP: $55.25You Save: $34.59 (63%)Ships in 1-2 Business Days
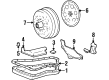
Chevrolet Lumina Oil Pan Part Number: 24206181
$109.30 MSRP: $186.08You Save: $76.78 (42%)Ships in 1-2 Business Days
Chevrolet Lumina Transmission Pan
Want to cut long-term maintenance and repair costs? Choose OEM Transmission Pan. Those parts deliver top durability you can trust. On our site, you'll find a huge catalog of genuine Chevrolet Lumina parts. Prices are unbeatable, so you can keep more in your pocket. Every OEM Chevrolet Lumina Transmission Pan includes a manufacturer's warranty. You can also get an easy return policy that keeps buying risk free. Fast delivery, get your car on the road quickly. It's simple to search, compare, and order. Stop guessing about quality or fit. Order today and save with parts that last.
Chevrolet Lumina Transmission Pan Parts Questions & Experts Answers
- Q: How to service and repair the transmission pan on Chevrolet Lumina?A:Service and repair procedures start by properly raising and supporting the vehicle during which you should place a drain pan under the transaxle bottom Oil Pan. Begin by safely removing the Oil Pan bolts from both front and side aspects before loosening the rear Oil Pan bolts about four turns with caution towards avoiding damage to the Oil Pan and case mating surfaces to stop oil leaks. Tap the Oil Pan gently with a rubber mallet while leaving a screwdriver to work as a pry tool. This action permits the liquid to exit before you take out the remaining Oil Pan bolts and Oil Pan together with the gasket. An examination of the Oil Pan combined with filter screen must happen to identify any foreign materials such as metal particles, clutch facing material, rubber particles, and engine coolant so their source of contamination can be found and fixed. The Oil Pan flange must be checked for distortion before replacing the Oil Pan unless congratulations can be made to regain its original shape. You should replace the bolt and washer assembly when the washer shows an inverted orientation. The clean process requires dry and oil-free Oil Pan and case flanges which must be solvent-cleaned alongside the removal of all old gasket particles from surfaces. Set the Oil Pan Gasket correctly before mounting the Oil Pan while tightening the Oil Pan bolts to 14 nm (10 ft. Lbs.). Fill the transaxle with proper quantities of dexron(R) iii fluid after lowering the car and engage the park position from the gear selector while letting the engine idle slowly. Transaxle damage will result if you exceed the recommended fluid capacity level since this can lead to foaming and fluid loss along with shift complaints. Check the fluid level before conducting a final inspection for correct work completion as well as monitoring any possible fluid leakage.

Related Chevrolet Lumina Parts
 Chevrolet Lumina Automatic Transmission Filter
 Chevrolet Lumina Automatic Transmission Shift Levers
 Chevrolet Lumina Automatic Transmission Shifter
 Chevrolet Lumina Clutch Disc
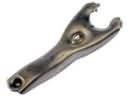 Chevrolet Lumina Clutch Fork
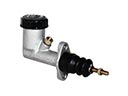 Chevrolet Lumina Clutch Master Cylinder
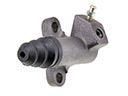 Chevrolet Lumina Clutch Slave Cylinder
 Chevrolet Lumina Flywheel
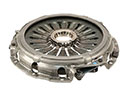 Chevrolet Lumina Pressure Plate
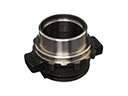 Chevrolet Lumina Release Bearing
 Chevrolet Lumina Transmission Assembly