ChevyParts
My Garage
My Account
Cart
OEM Chevrolet Metro Dimmer Switch
Light Dimmer Switch- Select Vehicle by Model
- Select Vehicle by VIN
Select Vehicle by Model
orMake
Model
Year
Select Vehicle by VIN
For the most accurate results, select vehicle by your VIN (Vehicle Identification Number).
2 Dimmer Switches found


Chevrolet Metro Combination Switch Part Number: 30018893
Chevrolet Metro Combination Switch Part Number: 30019103
Chevrolet Metro Dimmer Switch
Want to cut long-term maintenance and repair costs? Choose OEM Dimmer Switch. Those parts deliver top durability you can trust. On our site, you'll find a huge catalog of genuine Chevrolet Metro parts. Prices are unbeatable, so you can keep more in your pocket. Every OEM Chevrolet Metro Dimmer Switch includes a manufacturer's warranty. You can also get an easy return policy that keeps buying risk free. Fast delivery, get your car on the road quickly. It's simple to search, compare, and order. Stop guessing about quality or fit. Order today and save with parts that last.
Chevrolet Metro Dimmer Switch Parts and Q&A
- Q: How to service and repair the dimmer switch on Chevrolet Metro?A:To service and repair the dimmer switch; first, turn off the SIR system, and then remove the knee bolster. Remove the dimmer control from the electrical connector, after that with the help of a pick disconnect the clip by pushing it up from the bottom of the IP lamp dimmer control. Then again, disconnect the dimmer control from the left garnish trim panel. For install connect the dimmer control electrical connector and install the IP lamp dimmer control to the left garnish trim panel ensuring clip fully engages. Finally, reinstall the knee bolster and power the SIR system.
- Q: How to replace the dimmer switch on Chevrolet Metro?A:Before starting the dimmer switch replacement the SIR system needs to be disabled along with the knee bolster removal. Start by disconnecting the electrical connector from the dimmer control then use a pick as a tool to pop up the clip before extracting the IP lamp dimmer control from its bottom position. You need to pull out the dimmer control component which exists in the left garnish trim panel. After connecting the electrical connector of the dimmer control insert the IP lamp dimmer control back into the left garnish trim panel while making sure the clip properly connects. You should install the knee bolster followed by activation of the SIR system.


Related Chevrolet Metro Parts
 Chevrolet Metro ABS Relay
 Chevrolet Metro Automatic Transmission Shift Position Sensor Switch
 Chevrolet Metro Back Up Light Switch
 Chevrolet Metro Brake Light Switch
 Chevrolet Metro Door Lock Switch
 Chevrolet Metro Fuel Pump Relay
 Chevrolet Metro Headlight Switch
 Chevrolet Metro Neutral Safety Switch
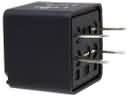 Chevrolet Metro Relay
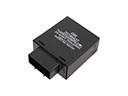 Chevrolet Metro Turn Signal Flasher
 Chevrolet Metro Turn Signal Switch
 Chevrolet Metro Wiper Switch