ChevyParts
My Garage
My Account
Cart
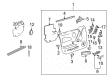
OEM Chevrolet Suburban 1500 Window Motor
Window Lift Motor- Select Vehicle by Model
- Select Vehicle by VIN
Select Vehicle by Model
orMake
Model
Year
Select Vehicle by VIN
For the most accurate results, select vehicle by your VIN (Vehicle Identification Number).
7 Window Motors found


Chevrolet Suburban 1500 Window Motor, Front Driver Side Part Number: 19179943
$50.15 MSRP: $97.34You Save: $47.19 (49%)Ships in 1-2 Business Days
Chevrolet Suburban 1500 Window Motor, Front Passenger Side Part Number: 19179942
$50.15 MSRP: $97.34You Save: $47.19 (49%)Ships in 1-2 Business Days


Chevrolet Suburban 1500 Motor Part Number: 23142260
$231.38 MSRP: $339.83You Save: $108.45 (32%)Ships in 1-2 Business DaysChevrolet Suburban 1500 Transmission Part Number: 25889602
$125.43 MSRP: $181.04You Save: $55.61 (31%)Ships in 1 Business Day

Chevrolet Suburban 1500 Window Motor Part Number: 89044536

Chevrolet Suburban 1500 Window Motor
Want to cut long-term maintenance and repair costs? Choose OEM Window Motor. Those parts deliver top durability you can trust. On our site, you'll find a huge catalog of genuine Chevrolet Suburban 1500 parts. Prices are unbeatable, so you can keep more in your pocket. Every OEM Chevrolet Suburban 1500 Window Motor includes a manufacturer's warranty. You can also get an easy return policy that keeps buying risk free. Fast delivery, get your car on the road quickly. It's simple to search, compare, and order. Stop guessing about quality or fit. Order today and save with parts that last.
Chevrolet Suburban 1500 Window Motor Parts and Q&A
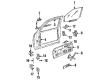
- Q: How to replace the front door window motor on Chevrolet Suburban 1500?A:The first step to replace the front door Window Motor includes lifting the window; when the motor stays inactive you must take off the window for better access to the motor retaining screws. Begin by taking out the door trim panel together with the water deflector and the door speaker before attaching support to the window. Disconnect the wiring harness of the Window Motor then remove the 3 retaining bolts from its front side but maintain the cable gear inside the housing to avoid spool detachment. The installation requires the motor to be detached from the cable housing by gently wiggling it. Record its original position before you extract the motor from the door regulator assembly. The installation process begins by gently putting the new motor into the cable housing followed by the installation of 3 bolts onto the Window Motor shaft which needs to be tightened with 5 n.m torque setting (44 lb in). Reinstall the window and after that connect the wiring harness to the Window Motor. Proceed to install the wire connector to the switch before testing the window function and detach the wiring harness afterward. Finish the process by placing back the speaker as well as the water deflector and door trim panel.
- Q: How to replace the rear door window motor on Chevrolet Suburban 1500?A:The first step to replace the rear door Window Motor requires users to raise the window but requires window removal when the motor becomes nonoperable to access retention screws. The window support procedure begins by taking out the door trim panel along with the water deflector together with the door speaker. Disconnect the wiring harness at the Window Motor after which remove the 3 bolts (115 001 01) connected to the motor from its front side but keep the cable gear inside the housing to prevent cable spool failure. Separate the Window Motor from the cable housing by wiggling it while paying attention to its orientation before removing it from the Window Regulator assembly. Installation requires a new motor to be gently fitted into the cable housing before tightening the three bolts (115 001 01) to 5 n.m (44 lb in). To reintegrate the window you should first install it and then connect the wiring harness to the Window Motor. The first step is to remove the window support while connecting the wire connector to the switch to examine the window operation. Assessment complete, disconnect the wiring harness. Conclude by putting back the speaker and water deflector system followed by the door trim panel.


Related Chevrolet Suburban 1500 Parts
 Chevrolet Suburban 1500 Door Armrest
 Chevrolet Suburban 1500 Door Handle
 Chevrolet Suburban 1500 Door Latch Assembly
 Chevrolet Suburban 1500 Door Lock
 Chevrolet Suburban 1500 Door Seal
 Chevrolet Suburban 1500 Lift Support
 Chevrolet Suburban 1500 Liftgate Hinge
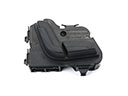 Chevrolet Suburban 1500 Seat Switch
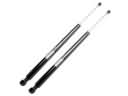 Chevrolet Suburban 1500 Tailgate Lift Support
 Chevrolet Suburban 1500 Tailgate Lock
 Chevrolet Suburban 1500 Trunk Latch
 Chevrolet Suburban 1500 Trunk Lock Cylinder