ChevyParts
My Garage
My Account
Cart
OEM Chevrolet Venture Piston
Engine Pistons- Select Vehicle by Model
- Select Vehicle by VIN
Select Vehicle by Model
orMake
Model
Year
Select Vehicle by VIN
For the most accurate results, select vehicle by your VIN (Vehicle Identification Number).
3 Pistons found

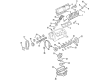
Chevrolet Venture Piston Part Number: 12578023
$50.34 MSRP: $101.06You Save: $50.72 (51%)
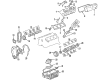
Chevrolet Venture Piston Part Number: 12578021
$50.34 MSRP: $101.06You Save: $50.72 (51%)Chevrolet Venture Piston Part Number: 12564669
$50.34 MSRP: $101.06You Save: $50.72 (51%)
Chevrolet Venture Piston
Want to cut long-term maintenance and repair costs? Choose OEM Piston. Those parts deliver top durability you can trust. On our site, you'll find a huge catalog of genuine Chevrolet Venture parts. Prices are unbeatable, so you can keep more in your pocket. Every OEM Chevrolet Venture Piston includes a manufacturer's warranty. You can also get an easy return policy that keeps buying risk free. Fast delivery, get your car on the road quickly. It's simple to search, compare, and order. Stop guessing about quality or fit. Order today and save with parts that last.
The Piston is an essential automobile component in the Chevrolet Venture fleet that determines the automobile's efficiency of the venture internal combustion engine. This Piston transforms combustion power into kinetic energy; it compels force from expanding gases to the crankshaft resulting into improved efficiency of the Chevrolet Venture. Made from some of the toughest aluminum alloys, Piston comes with a feature of low weight and high strength that comes from the gas-tight piston rings. Some of the Piston variants used have been trunk pistons to enhance the lubricated part and the racing piston for extreme performance Piston has been used and the versatility is seen wherein the Piston is used. The versatility of the Piston in the various models of Chevrolet Venture ranging from the Base, LS, and the LT models goes to prove that this part plays a very crucial role in the efficiency and reliability of the vehicle. The Chevrolet Venture is a minivan manufactured by the Chevrolet division of General Motors as a rebadged variant of the Pontiac Montana from 1997 to 2005; One of the defining strengths which made this car great is the agreeably smooth ride and the ability to customize it to an eight-passenger, front-wheel drive vehicle. The Piston is a distinctive element in the automotive market since the design of the part regulates the durability and efficiency of the engine. Thus, Piston as an essential part of the Chevrolet Venture cars' innovative history gives people a pleasure and confidence in driving safe and efficient car.
Chevrolet Venture Piston Parts Questions & Experts Answers
- Q: How to service and repair the piston and rod bearing on Chevrolet Venture?A:You should start connecting rod servicing by unmounting cylinder heads while hoisting the vehicle into position. The first step involves removing the Oil Pan and Oil Pump and crankshaft oil deflector. Drive the crankshaft to bottom dead center (BDC) after you mark down the piston with cylinder information and connecting rod number for correct reassembly. The service requires using the cylinder bore ridge reamer (J 24270) to flatten out any significant ridges which may be found at the piston travel's upper point before continuing the work. Place a cloth over the piston and rotate the crankshaft to its lowest position. Remove the ridge from the cylinder ring at this time. Use the crankshaft to rotate it toward the highest point of the stroke before removing the cloth to clean metal debris from both the cylinder and piston. A suitable tool should be used to remove connecting rod nuts and cap and connecting rod and piston assembly afterwards. Inspection must occur for the piston as well as connecting rod bearings and connecting rod cap and crankshaft connecting rod journal while the cylinder bore requires honing followed by hot water detergent cleaning before the cylinder bores dry through swabbing with new engine oil. Before installing the piston and connecting rod assembly begin by applying oil to the cylinder wall and Piston Rings and position the crankshaft at bottom dead center. Then use the connecting rod bolt guide set (J 5239) and Piston Ring compressor (J 8037) before installation and verify that the piston arrow points toward the engine front. Place the connecting rod bearing caps into position after removing protective threads and tighten the nuts to 20 nm (115 ft. Lbs.) while using the torque angle meter (J 36660-A) to reach an additional 75-degree range. Check for binding conditions while also measuring connecting rod side clearance after reattaching the crankshaft oil deflector and Oil Pump and Oil Pan which should lead to lowering the vehicle and Cylinder Head installation.

Related Chevrolet Venture Parts
 Chevrolet Venture Coolant Filter
 Chevrolet Venture Crankshaft
 Chevrolet Venture Cylinder Head
 Chevrolet Venture Dipstick Tube
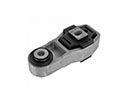 Chevrolet Venture Engine Mount Torque Strut
 Chevrolet Venture Motor And Transmission Mount
 Chevrolet Venture Oil Pan
 Chevrolet Venture Piston Ring
 Chevrolet Venture Timing Chain
 Chevrolet Venture Timing Cover
 Chevrolet Venture Valve Cover Gasket
 Chevrolet Venture Valve Cover Grommet